
INITIAL CONFIGURATION
⇒ To start using ControlBox CBone you must insert the company data required in this section, the purpose of this is to use the information to personalize the entire system, you can also upload the company's logo and write the terms and conditions that will appear in the commercial invoice, email notification, courier waybill and label.
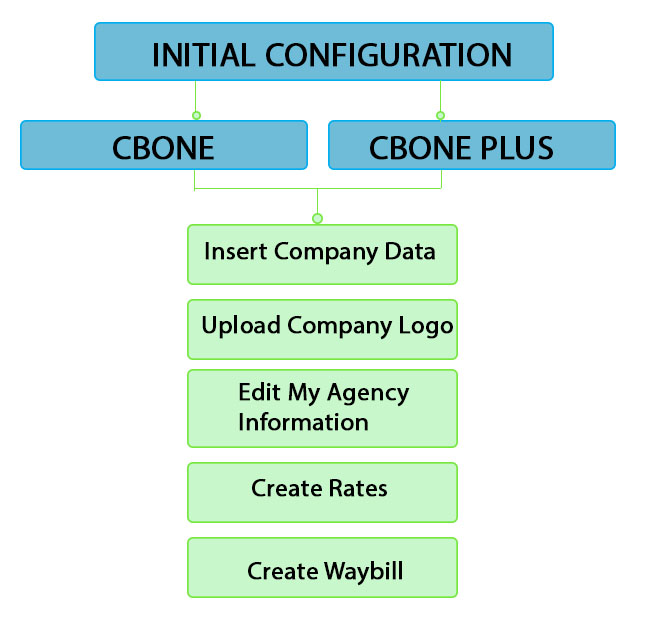
1. Insert Company Data
1.1 The first step is to insert the company's data, for this you must follow the instructions as shown bellow:
1.2 On this screen you must fill every blank field according to your company data. Don't leave blank spaces.
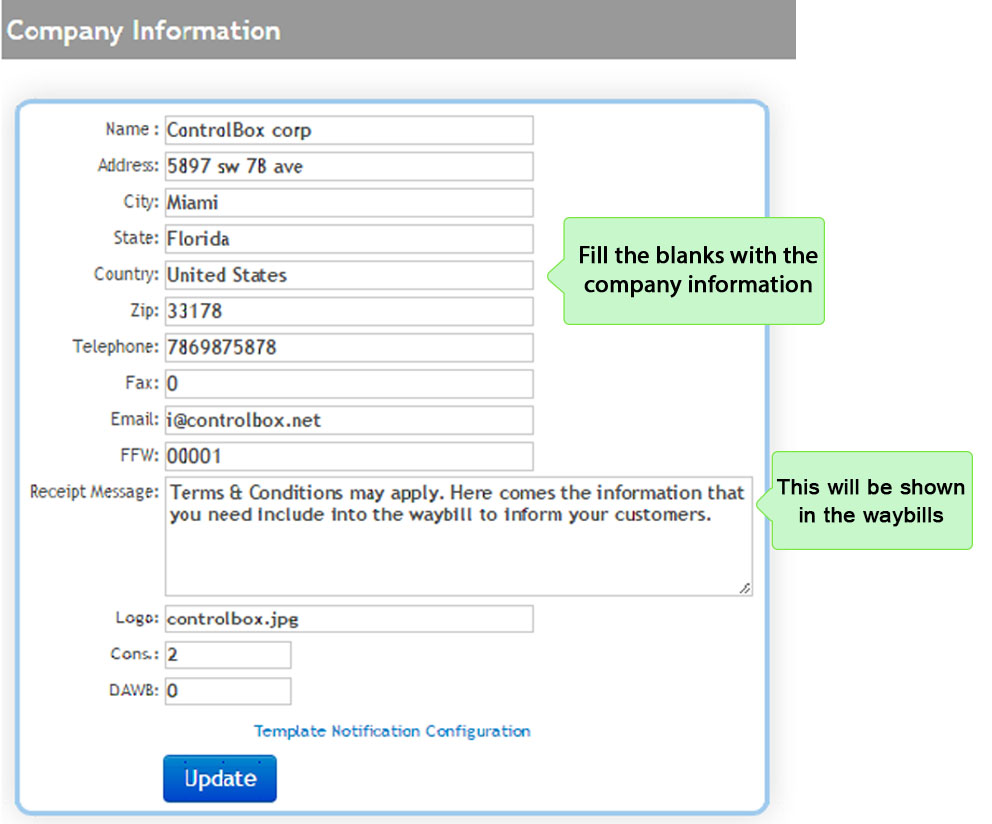
→The Company Name is printed out in reports and waybills.
→The Freight Forwarding Code (FFW) is the internal company code assigned by the system.
→In the Receipts message you must write the terms and conditions, it will be printed out in the waybills and the WHR (Warehouse Receipts).
→The Cons starts or assigns the number of bound, it also shows the number of current consolidated
→The DAWB allows to assign the start number of the guide (waybill) HAWB
1. 3 Finally click on Update and you will be able to update the company's information.
2. Upload the company's logo
⇒ ControlBox allows your company's logo to be seen in some websites where your customers have access to, as shown in the following screens:
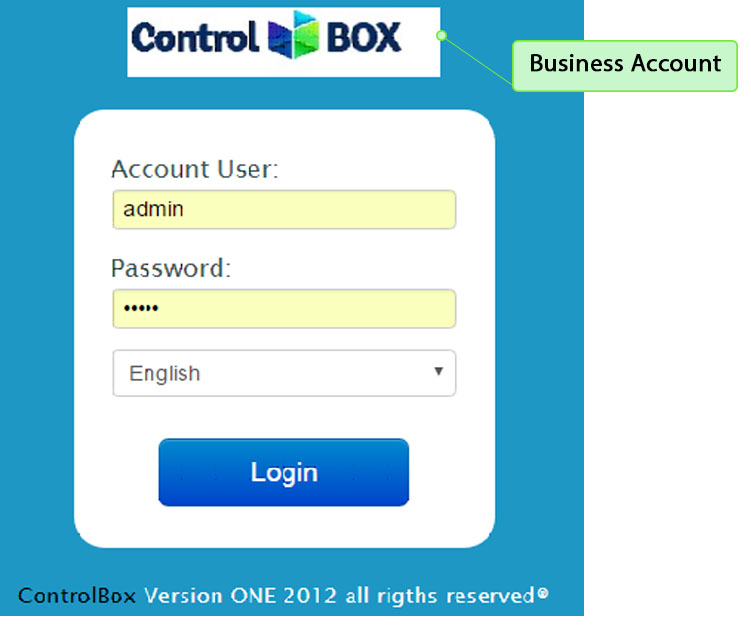
![]() BUSINESS ACCOUNT ACCESS ONLINE:
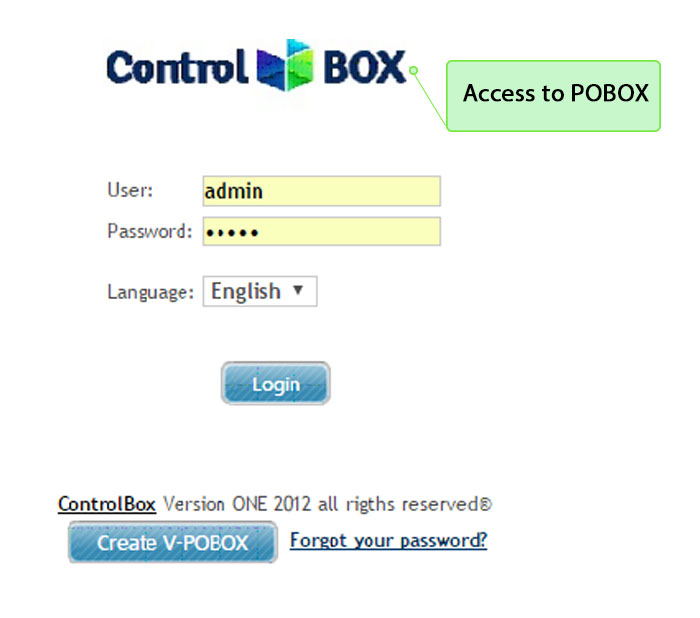
BUSINESS ACCOUNT ACCESS ONLINE: ![]() CUSTOMER ACCESS TO POBOX ONLINE:
CUSTOMER ACCESS TO POBOX ONLINE:
(This is available in the full version) (This is available in the full version)
![]() ACCESS TO TRACKING:
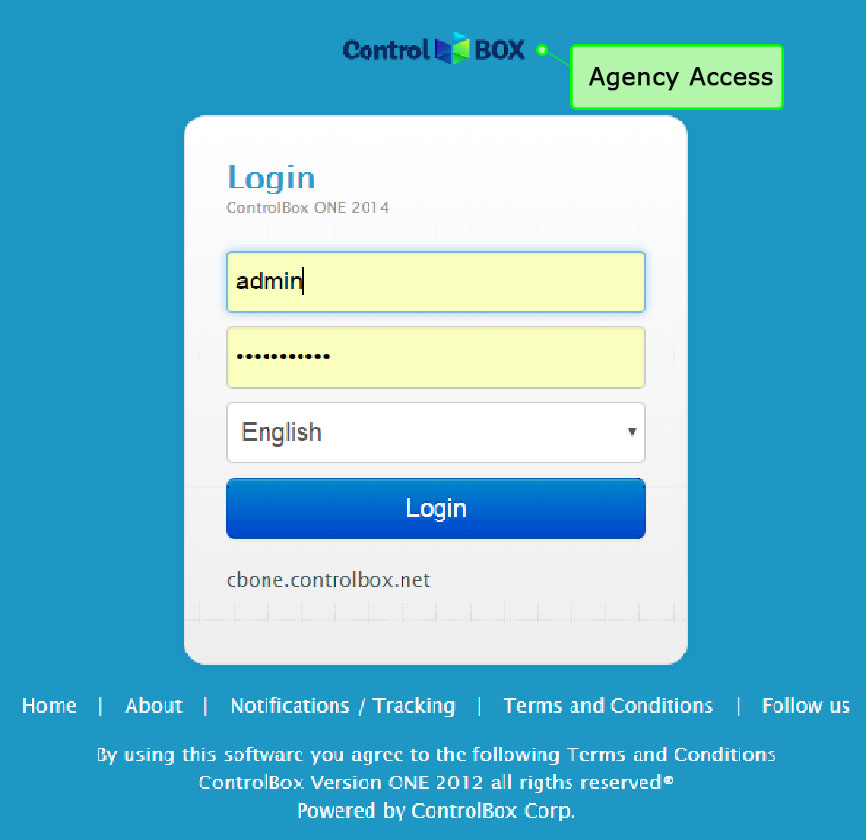
ACCESS TO TRACKING: ![]() ONLINE ACCESS FOR AGENCIES:
ONLINE ACCESS FOR AGENCIES:
![]()
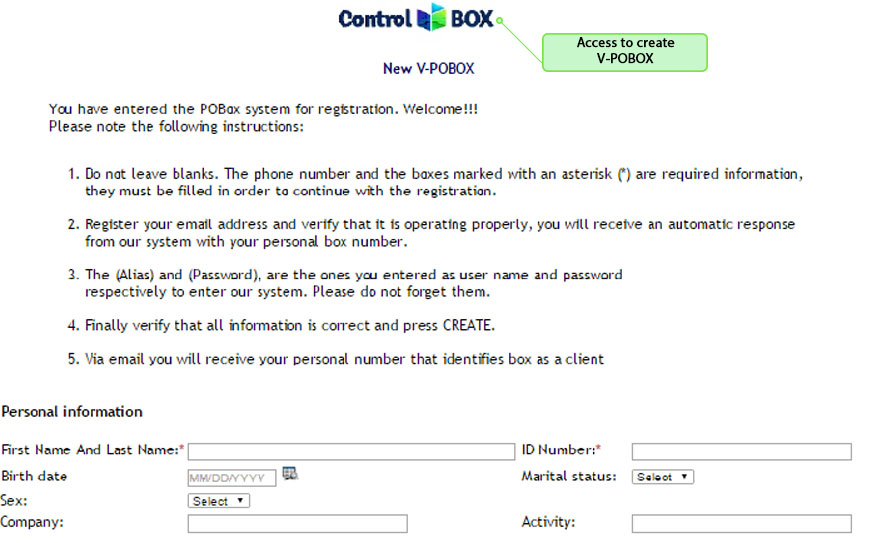
![]() ACCESS TO CREATE V-POBOX:
ACCESS TO CREATE V-POBOX:
(This is available in the full version)
⇒ In addition, the courier waybill can also have the logo, but you need to configure this option as it is explained in the waybill section of this manual.
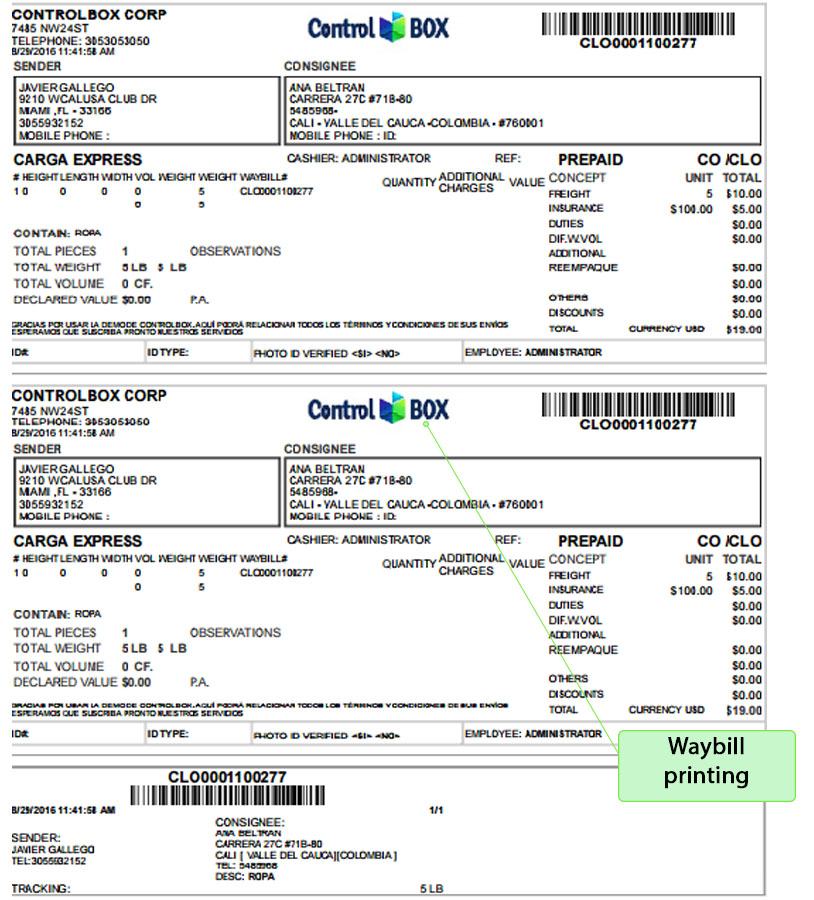
![]() WAYBILL PRINTING:
WAYBILL PRINTING:
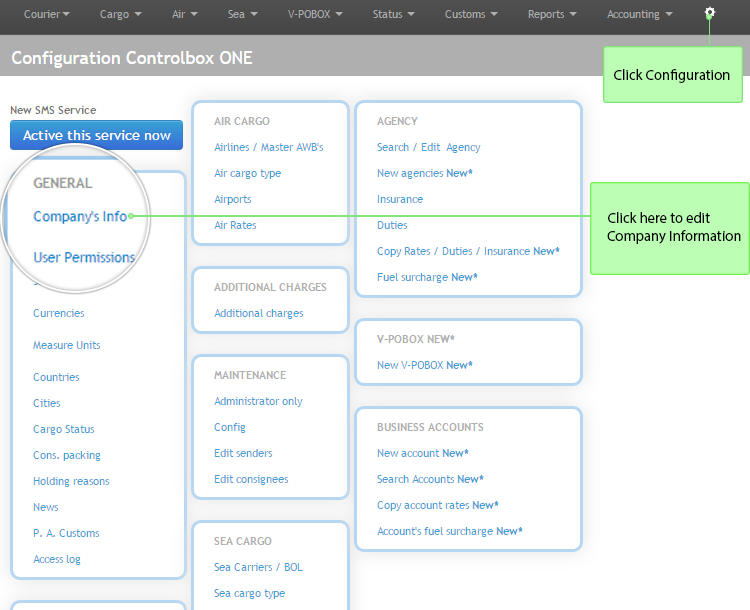
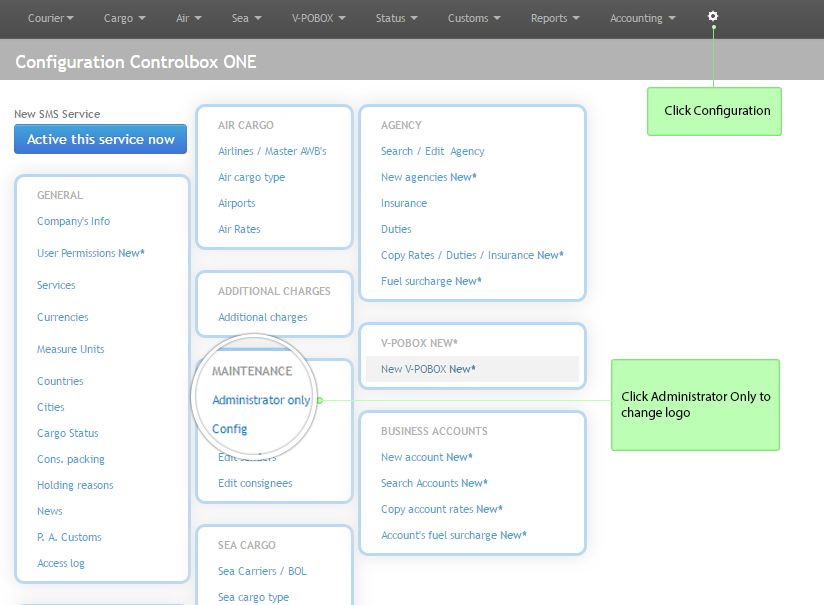
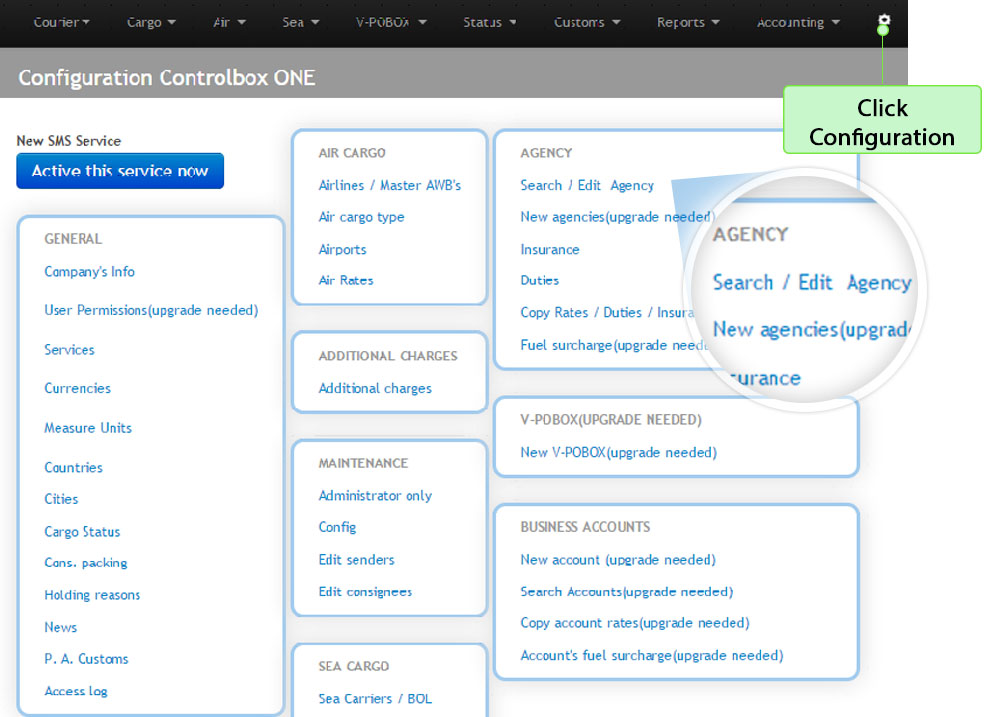
2.1 To upload the company's logo you must click on Configuration, then choose the option Administrator only that you can find in the Maintenance module as shown bellow:
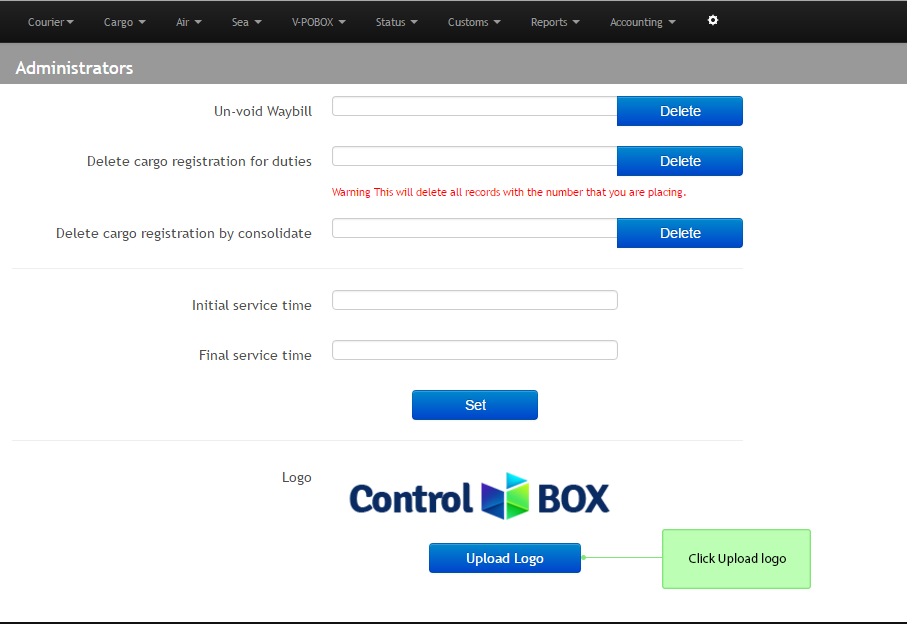
2.2 As next step, scroll down to the bottom of the page and click on Upload Logo, then choose a file from your computer and click on Upload.
3. Edit My Agency Information
⇒ To start using the system you should create the Agency where you will have the main control of the transactions and movements, being this one the Main Agency.
You could also create other agencies that will receive freight to the main Agency, as it is explained in the Agency section of this manual (This is available only in the full version)
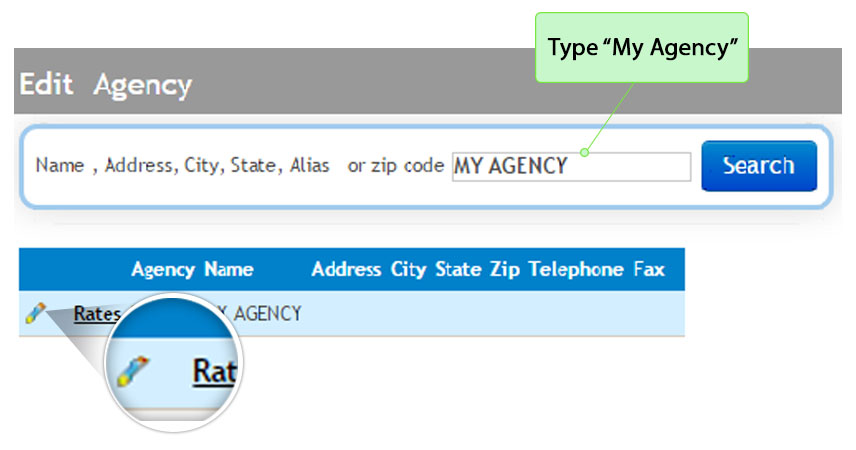
3.1 By following the next steps you will easily create the agency. First, click on Configuration, then click on Search/ Edit Agency as shown:
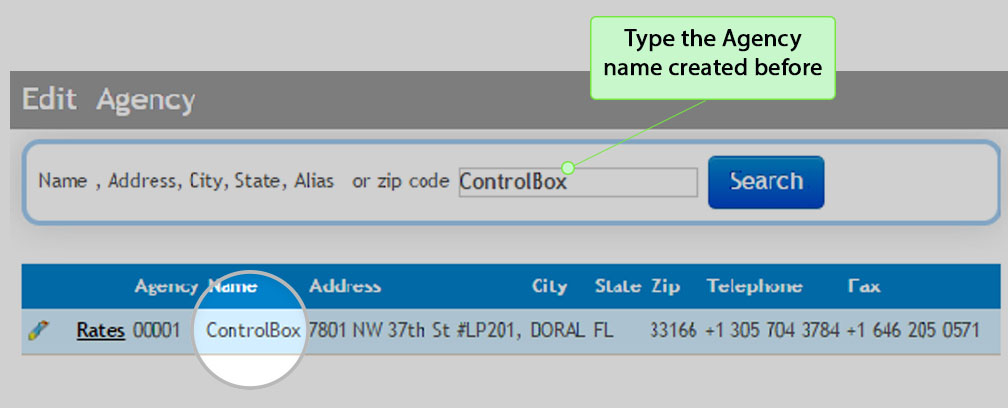
3.2 Here type "My Agency" in the blank field and then click on Search, by doing this the system will show the agency previously configured by it, then click on the pencil icon to edit the Agency information:
3.3 Now, in the following screen you must insert all the agency information required by the system, some of the required fields are explained below. After filling the information click on Update:
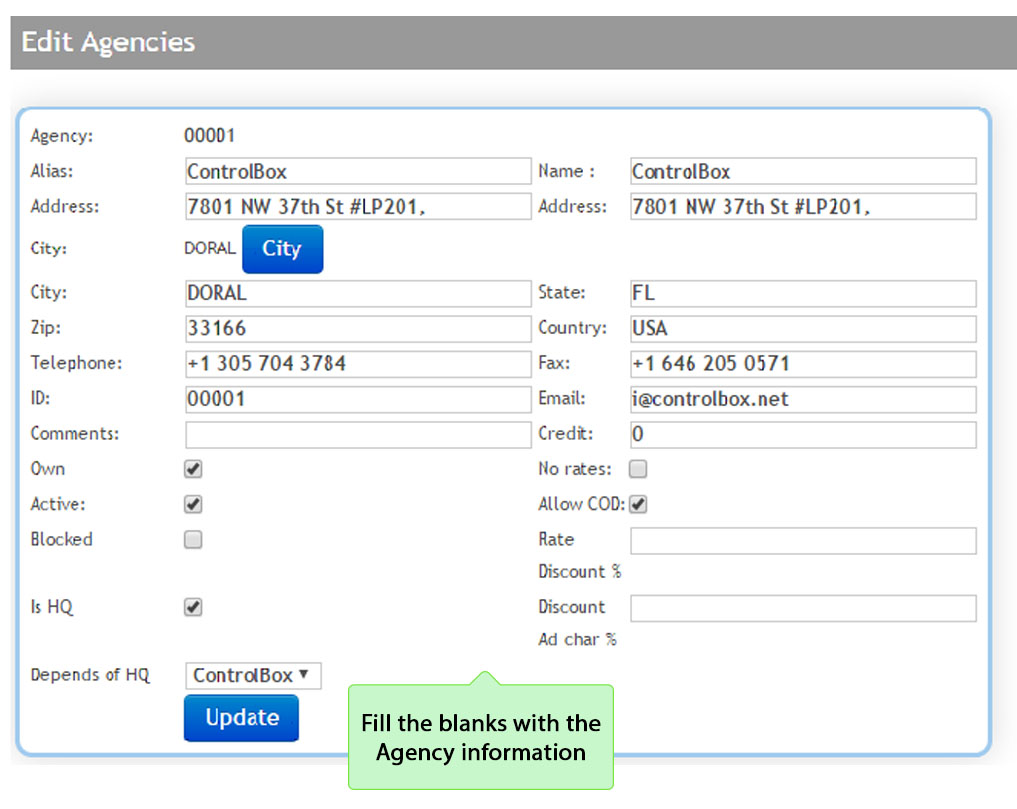
Edit the information as necessary:
→Own: If selected, the commissions won't be split between agency and company, everything is for the company.
→Active: If the agency is functioning and can receive cargo.
→Blocked: If selected, they cannot access the system.
→HQ: If selected, the agency is a headquarters that can be in charge of various agencies.
→Depends of HQ: Here you must select the headquarters that the agency belongs to, in case the HQ is the agency make sure to select the same agency.
→Credit: Amount that is allowed to be held as credit, the number 0 means an indefinite amount.
→No rates: Courier allows you to create waybills with values equal total.
→Allow COD: (COD= Cash OnDelivery) If selected, allows the agency to create waybills that won't be collected at source, instead they will be collected at destination.
→Discount %: Assigns an overall discount rate applied on each applied fee, this discount only applies on the commission appointed in agency fees.
→Discount Ad char%: Assign an overall discount rate applied on each applied fee, this discount only applies on additional charges.
3.4 After updating the information, if you type the agency name previously created, the system will show it up below the searching bar and that is going to be the Agency of your company.
4. How to create Rates
⇒ Before creating rates you must insert the services charged to the customers by the agency.
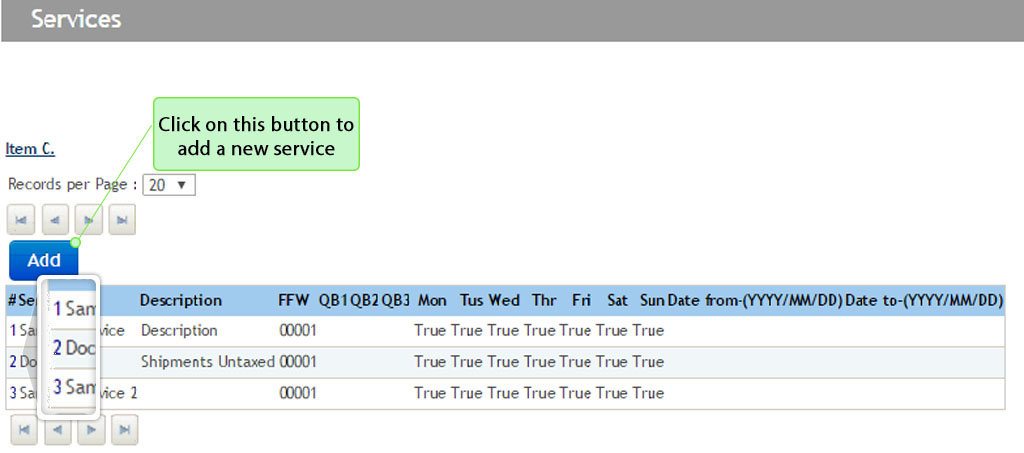
4.1 To create services, click on Configuration and select the Service option located in the General module, as follows: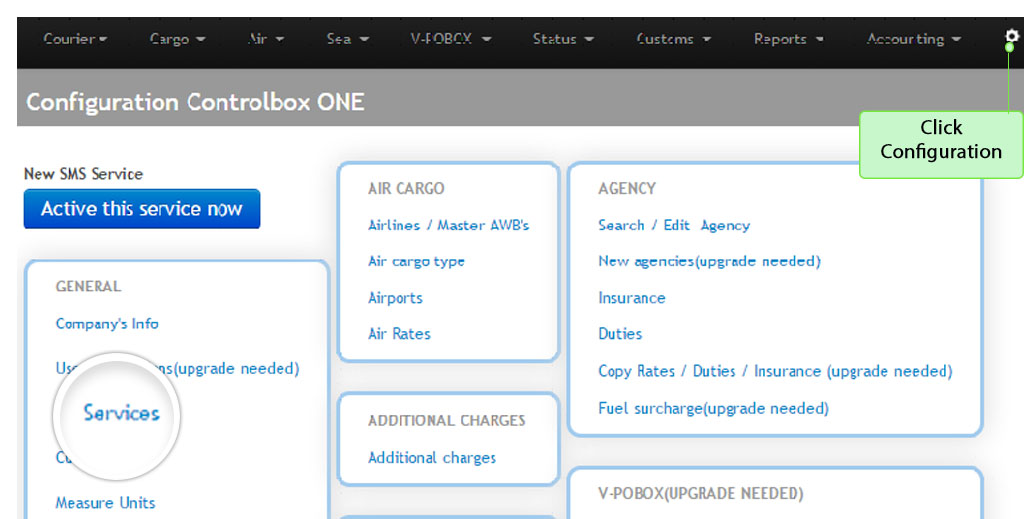
4.2 To edit the services previously configured by the system, you must click on the numbers located on the left side of the screen; by doing this the system will allow you to edit the selected service. In case you need to add a new service just click on the Add option and you could create it, as shown in the following screen:
4.3 Next you must edit the information according to the service that you are going to charge. First click on Edit and then in the new screen you will find all the blanks fields of the service, below you will find some descriptions of them:
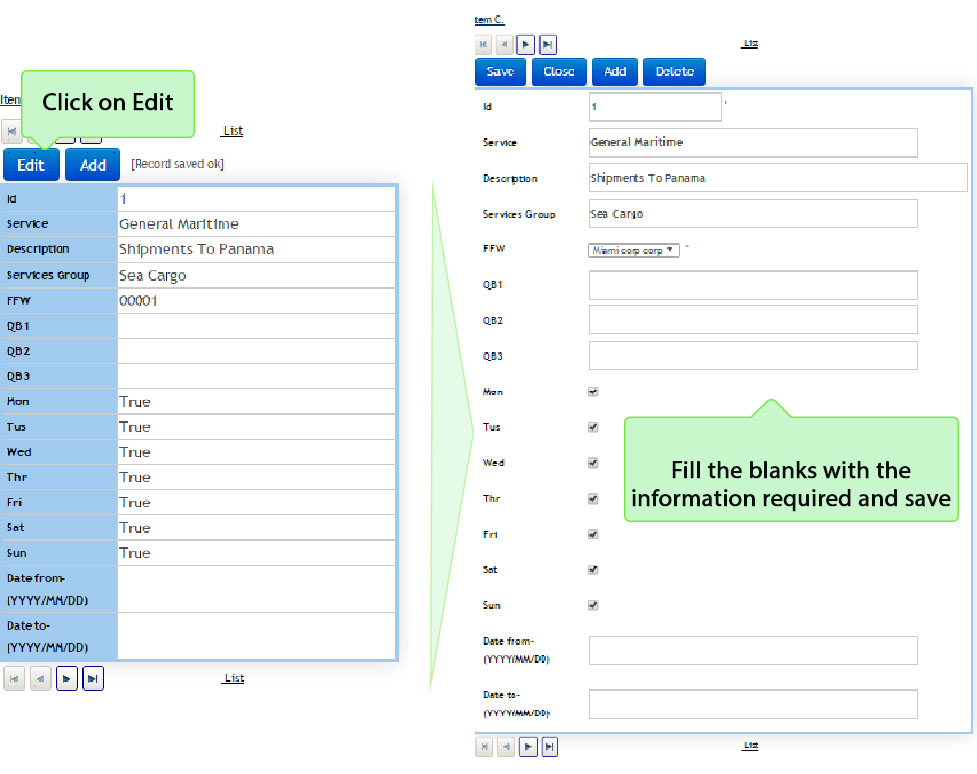
→ID: Service number assigned by the system for internal reference. It can't be modified.
→SERVICE: Name of service
→DESCRIPTION: Additional information about the service.
→SERVICES GROUP: By appointing various services with the same group name , this can be selected at the time of creating a consolidated and filter. Only certain services can be consolidated
→FFW: Indicates the name of the company, it can't be changed
→QB1: Fields used for reference when ControlBox integrates with an accounting software
→ "Monday...Sunday" : You must select the days that the service is available.
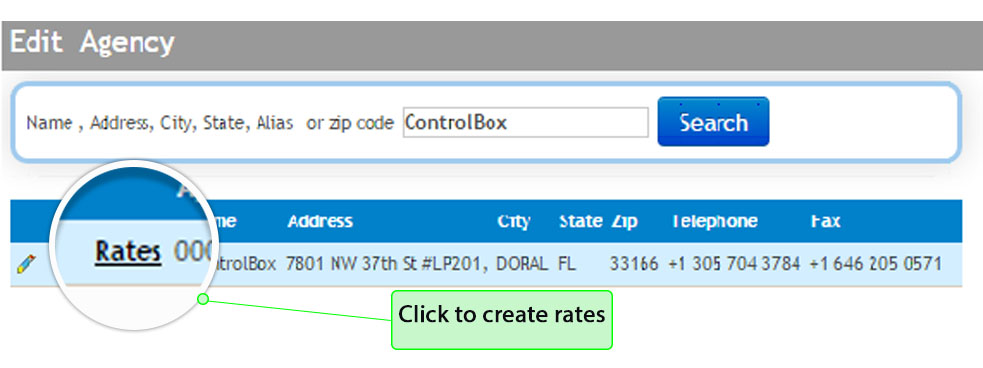
4.4 After inserting the necessary services, it is time to create the rates. For this, go back to step 3.4 (Edit agency) then click on Rates as follows:
4.5 When the system shows this section, you must fill the blanks fields according the rates used by your company. After filling the information click on Add and below you will see the agency and the new rate created. This is the last step to start creating a courier waybill.
Every required field will be explained below the following screen:
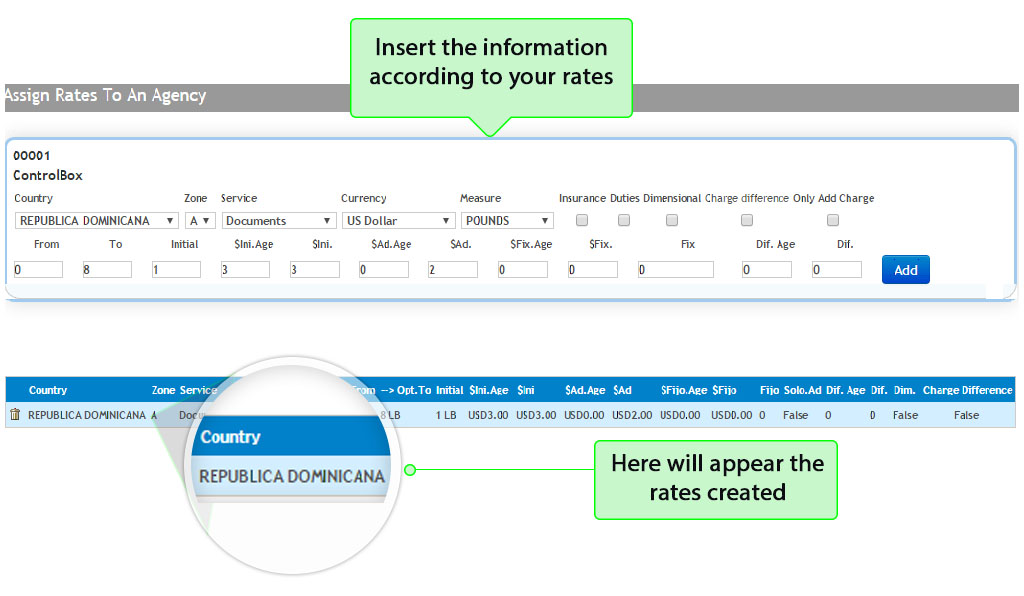
→ COUNTRY: Destination country of the cargo.
→ ZONE: Geographic zone where the cargo is going, these zones can be configured in the creation of the cities of each country.
→ SERVICE: The type of services provided that were created in configuration/services.
→ CURRENCY: Currency to charge in.
→ MEASUREMENT: Measurement to charge in.
→ INSURANCE: If selected, when a Courier waybill is created the cargo will require to have an insurance.
→ DUTIES: If selected, when a Courier waybill is created , a declared value is mandatory to calculate duties.
→ DIMENSIONAL: If selected, the values in "From" and "To" will be taken into account as cubic feet and the value of the cargo will be calculated depending on the volume of the same cargo.
→ CHARGE DIFFERENCE: If selected, the largest between physical weight and volume will be charged.
→ ONLY ADDITIONAL CHARGE: If selected, only the values $Ad.Age and $Ad will be charged
→ FROM: Beginning range to be charged in Lb, Kg or cubic feet
→TO: Ending range to be charged in Lb, Kg or cubic feet
→ INITIAL: The number of Lb, Kg or cubic feet that will be taken into account for the initial or minimum amount to be charged (Ex. If your fee is from 1 to 20 Lb with a minimum charge of 4 Lb, in the blank field you have to enter 4 and then put the value charged for the first 4 pounds)
→$INI.AGE: This is the cash value that corresponds to the agency for the first X pounds set in the "Initial" field
→$INI.: This is the cash value that corresponds to the company for the first X pounds set in the "Initial" field
→$AD.AGE: This is the money value to the agency for each Lb, Kg or cubic feet this was the "initial" value to be charged
→$AD.: This is the cash value that corresponds to the company for each Lb, Kg or additional cubic feet outside the value "initial"
→$FIX.AGE: This is the cash value that corresponds to the agency and is fixed regardless of the values "from" and "to"
→$FIX:This is the cash value that corresponds to the company and is fixed regardless of the values "from" and "to"
→FIX: Is the description of the fixed charge set in the tariff, and come out on the receipt / waybill for each client. (Ex. Send SMS)
→DIF.AGE: This is the cash value that corresponds to the agency and works only if the option to "charge difference" is selected. This value is multiplied by the result of the physical volumetric weight less weight if greater than zero.
→DIF.: This is the cash value that corresponds to the company and works only if the option to "charge difference" is selected. This value is multiplied by the result of the physical volumetric weight less weight if greater than zero.
5. How create a New Courier Waybill
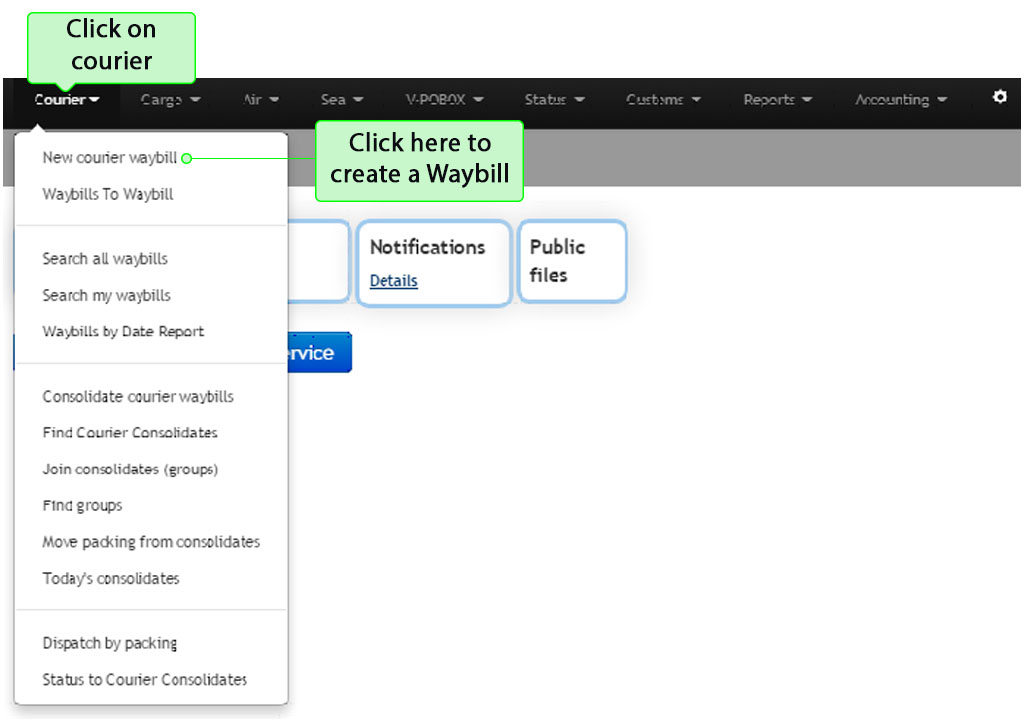
5.1 To start creating a new courier Waybill you must click on Courier and select the option New Courier Waybill, as shown bellow:
5.2 The courier waybill is sent with the cargo as priority mail. In the following image you can create the courier waybill by filling out all required information. In order to create a new waybill it is important to have an existing service for the destination city.
The boxes with the item * are mandatory. Below the screen you will see explained some required information.
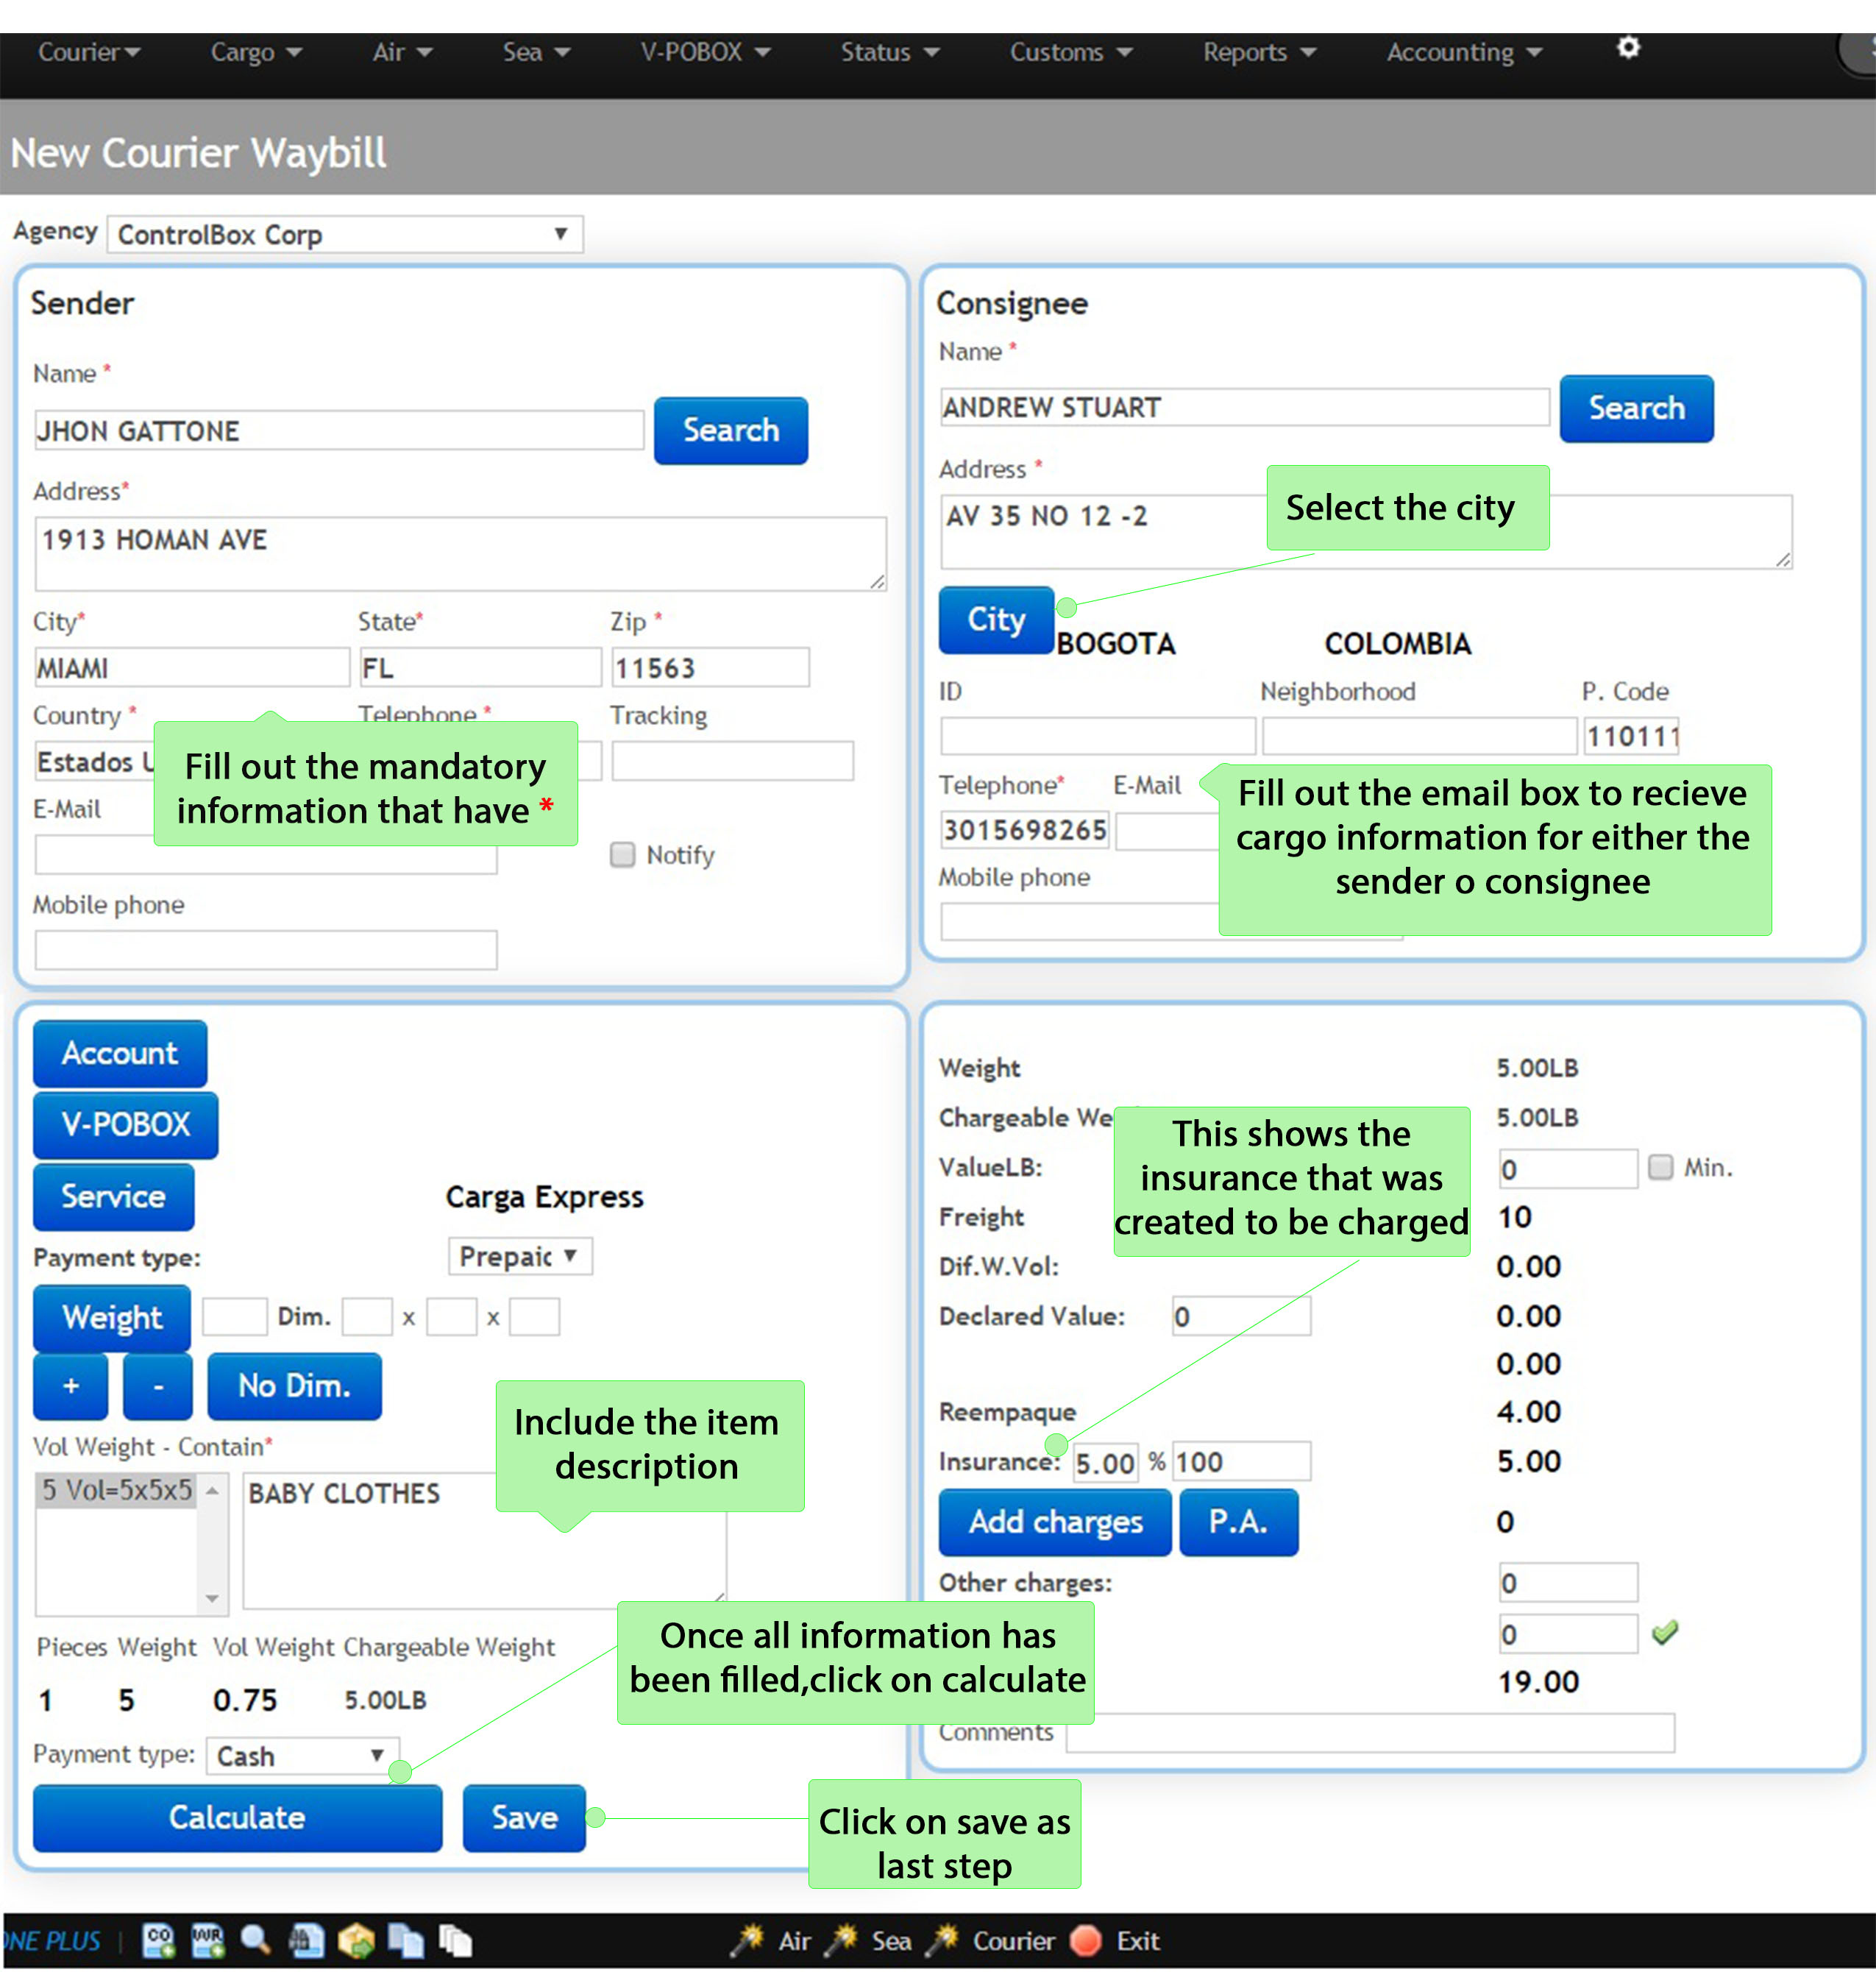
→Service: Select the service previously created, only those created will be seen according to the destination city.
→Payment Type: Select if it is prepaid or COD.
→No Dim: Used to set the dimensions from 0.
→+: This symbol will allow you to add the package details including dimensions.
→Value: Value per Lb for the agency should be higher than the value configured in the duties.
→Declared Value: It shows the fees previously configured.
→Insurance: It shows the insurance previously configured.
→Additional Charges: Add additional charges that have been already configured.
→P.A: Add tariff codes.
5.3 After saving the courier waybill, the system will display the next options which will be explained in greater detail in the New Courier Waybill section.
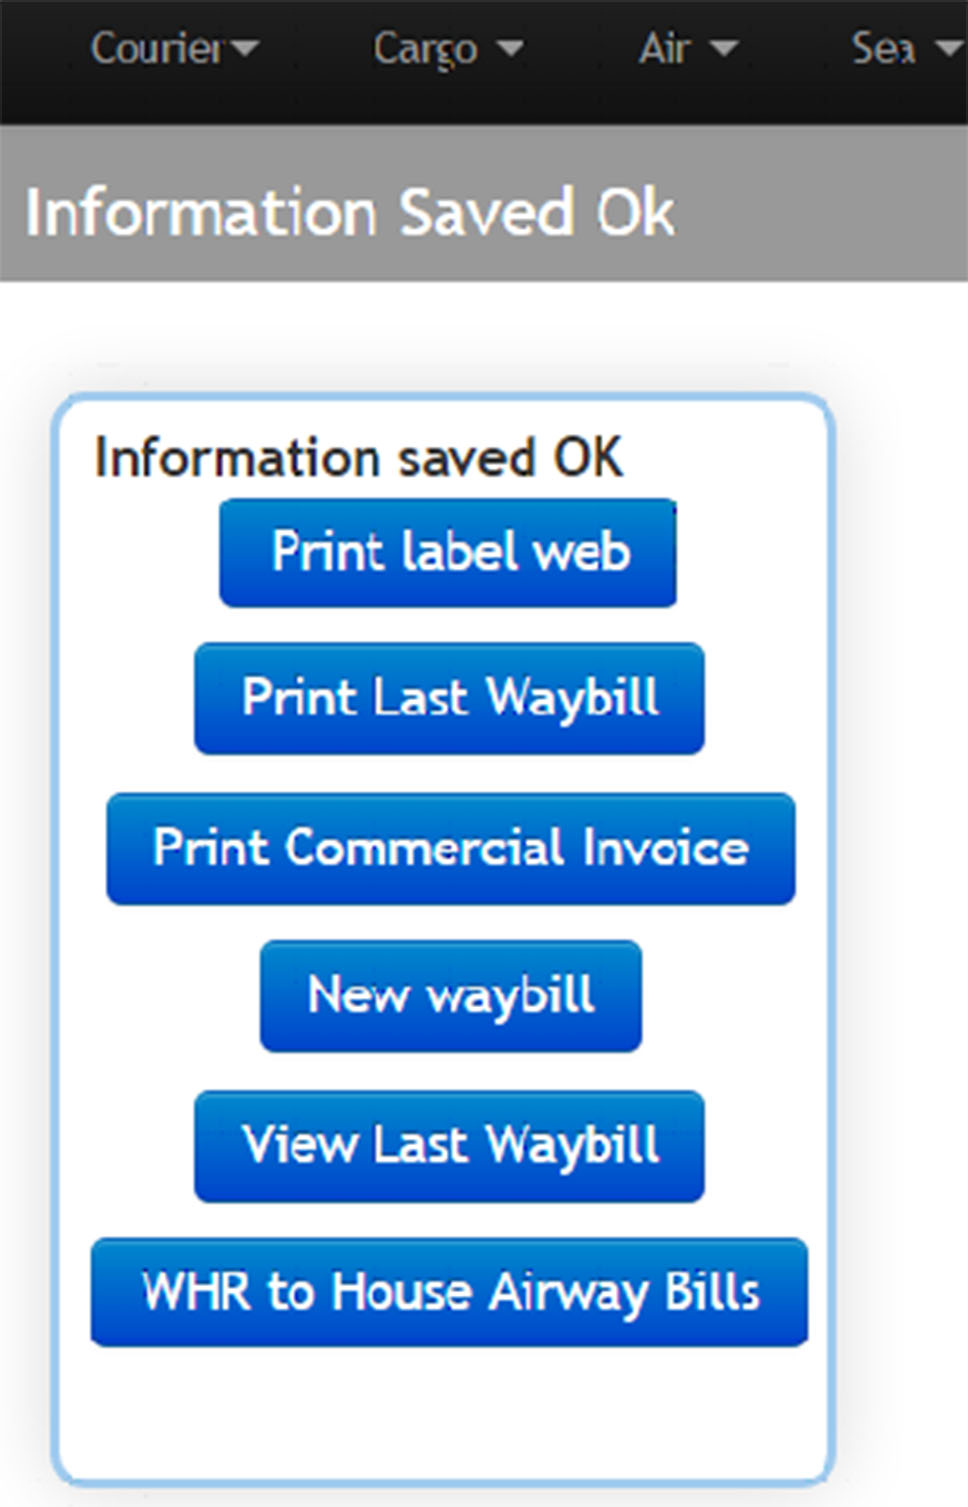
⇒If your Browser is configured to open new windows automatically, you may see the new window with the image of the Waybill, as shown bellow:
⇒ This will be the Courier Waybill Printing as last step in this initial configuration of the system.