
1.New Courier Waybill
⇒After doing the initial configuration, you will be able to create a courier Waybill. Before moving forward keep in mind that every time that you search the destination city, you must have created a service for that city before, otherwise the system won't have any service information about that city to charge.
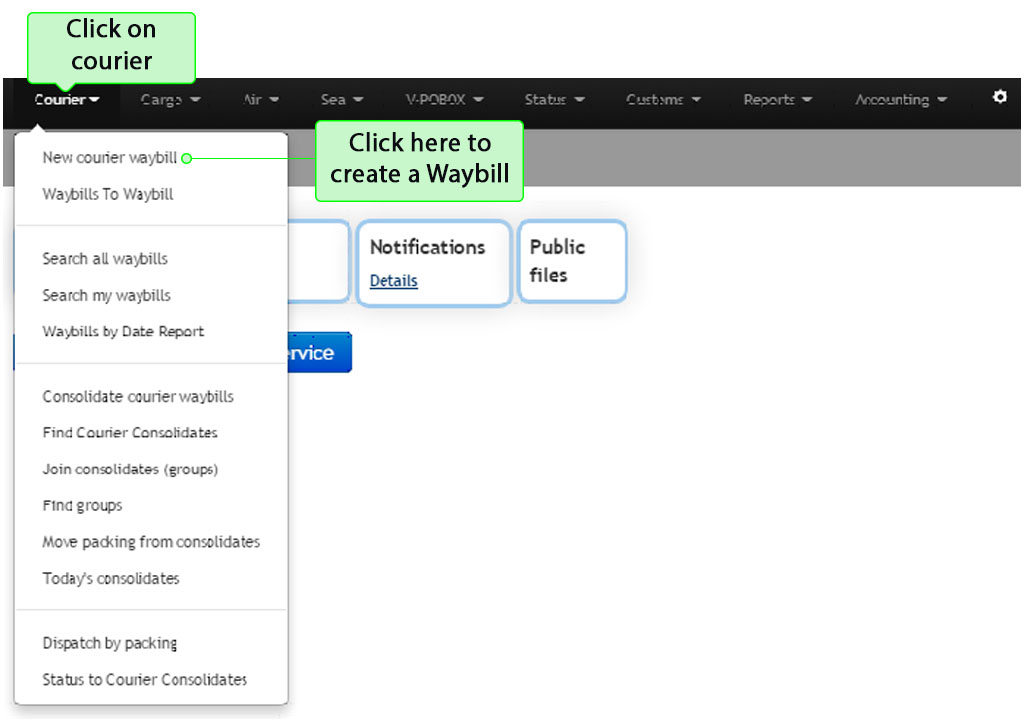
1.1 To start creating a new courier Waybill you must click on Courier and select the option New Courier Waybill, as shown bellow:
1.2 The courier waybill is sent with the cargo as priority mail. In the following image you can create the courier waybill by filling out all required information. In order to create a new waybill it is important to have an existing service for the destination city.
The boxes with the * symbol are mandatory. Bellow the screen you will find explained some required information.
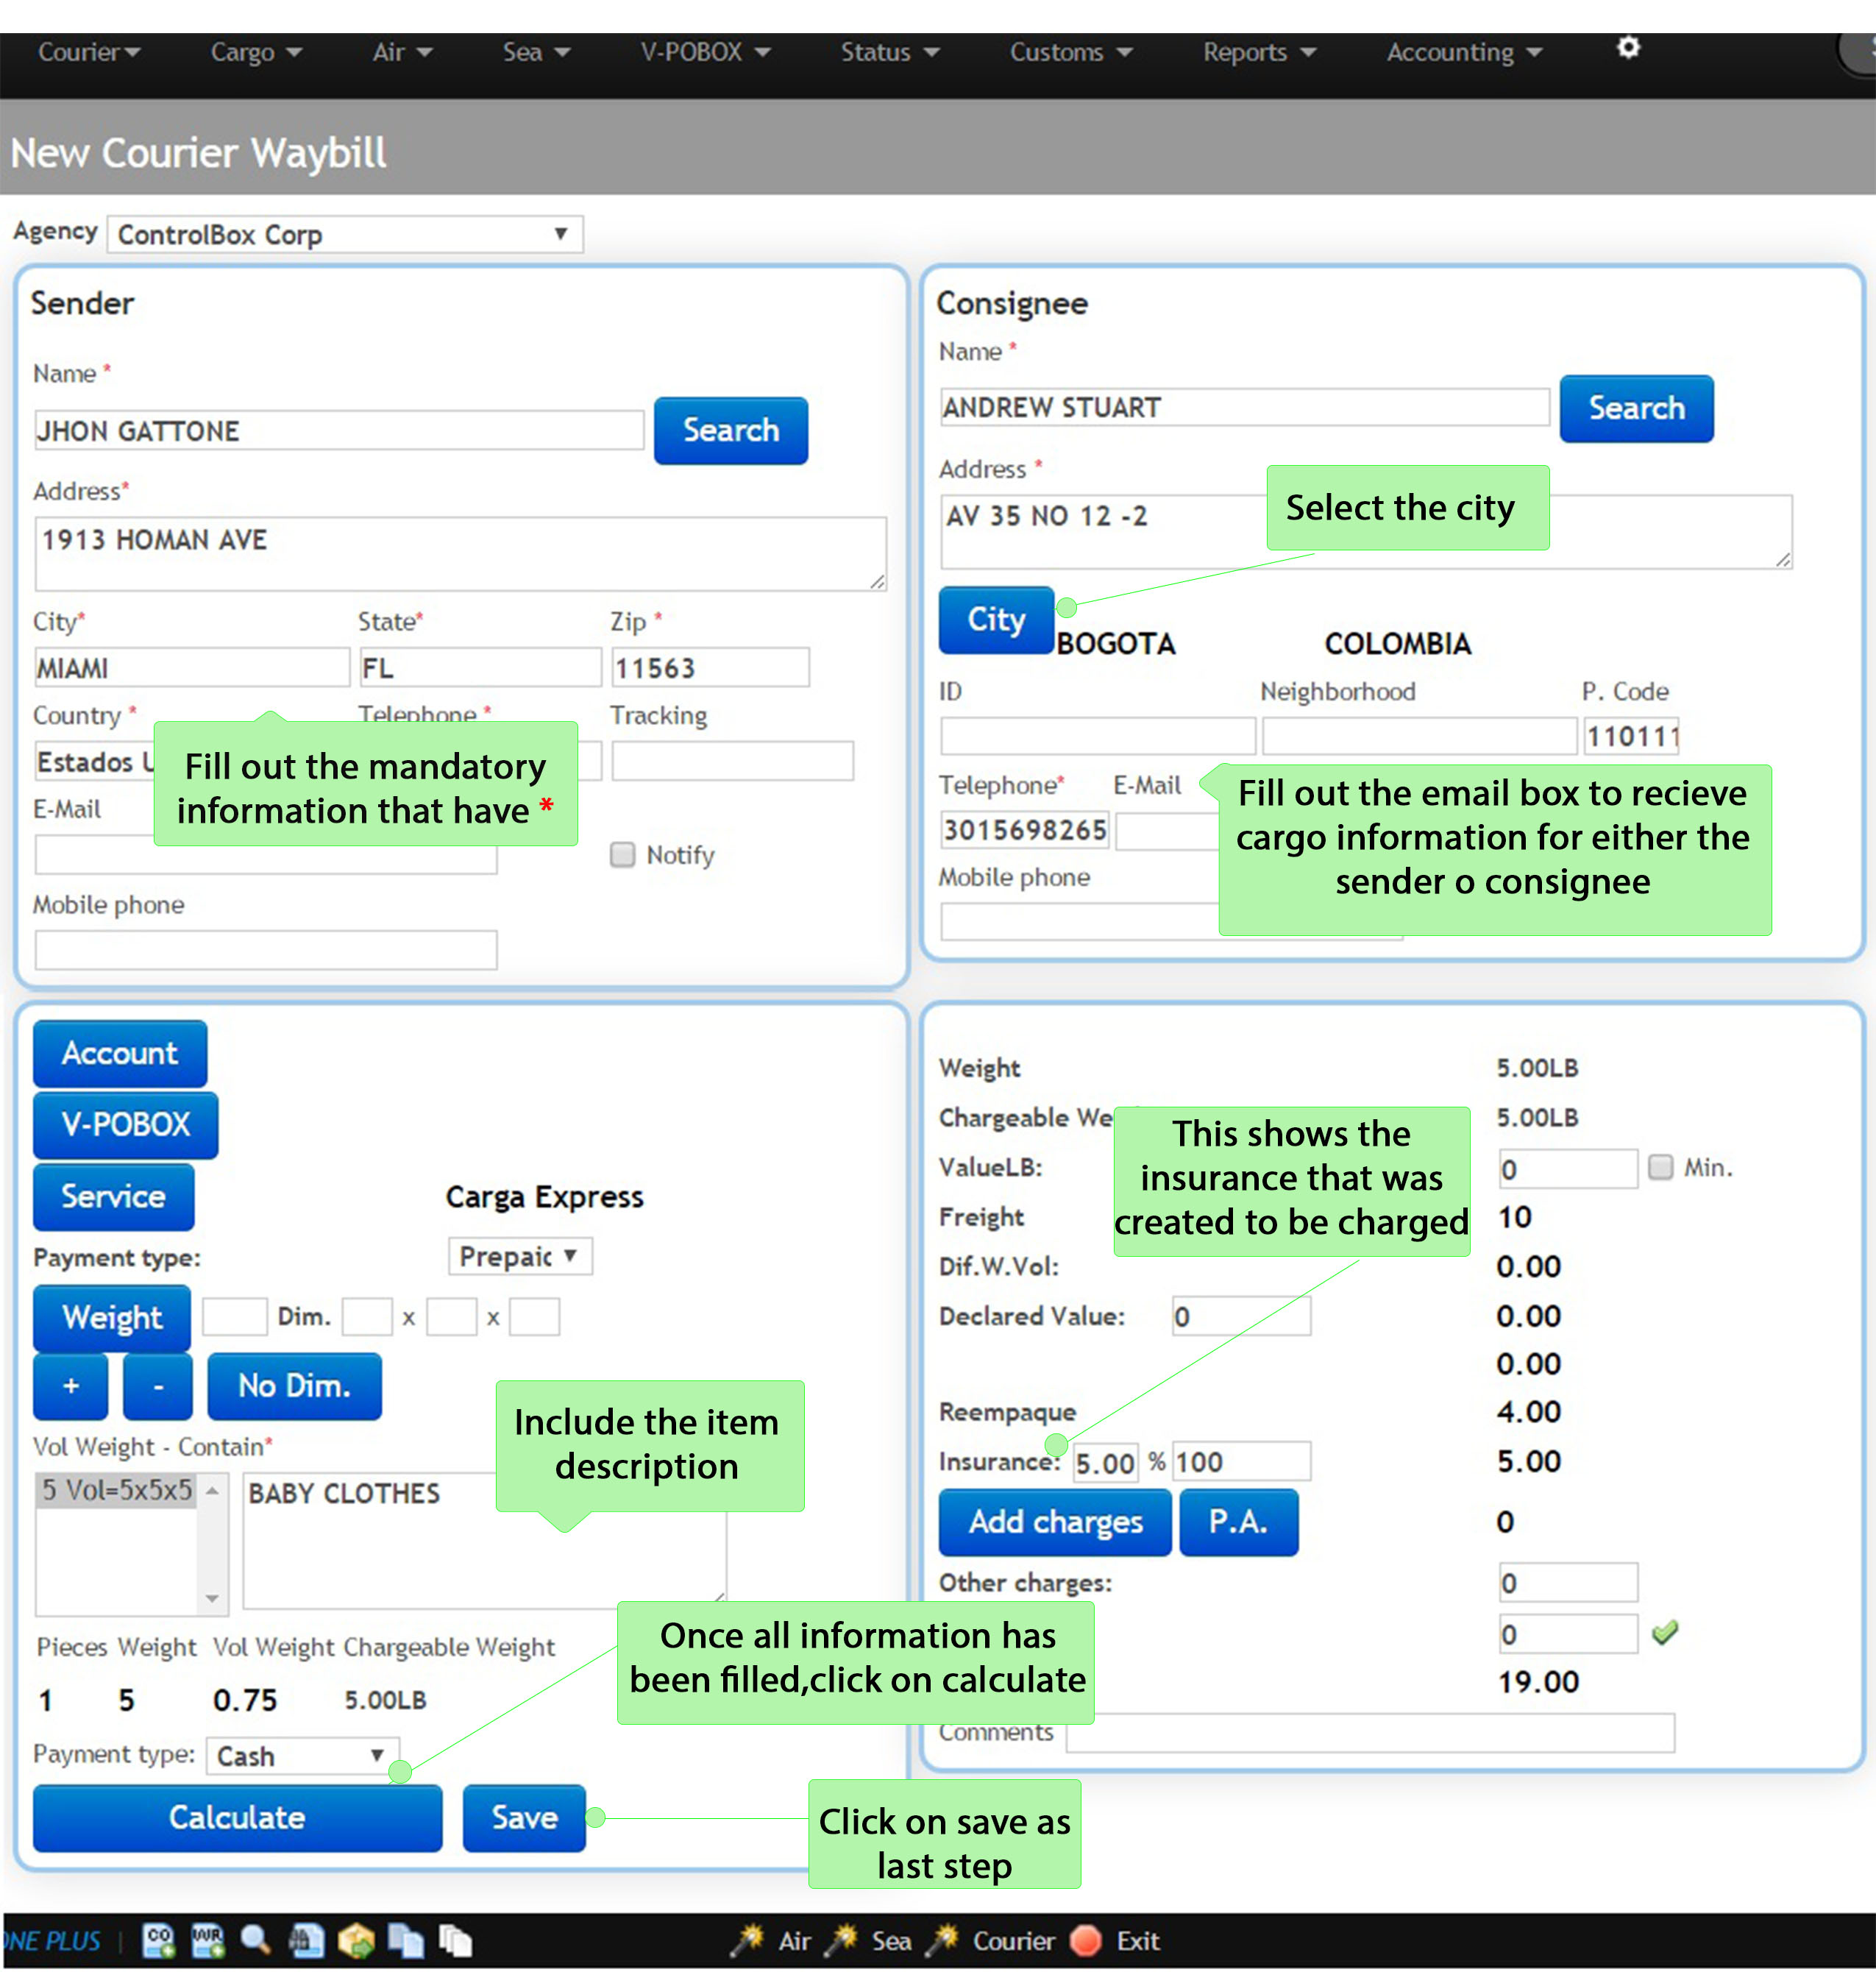
→Service: Select the service previously created, only those created will be seen according to the destination city.
→Payment Type: Select if it is pre-paid or COD.
→No Dim: Used to set the dimensions from 0.
→+: This symbol will allow you to add the package details including dimensions.
→Value: Value per Lb for the agency should be higher than the value configured in the duties.
→Declared Value: It shows the fees previously configured.
→Insurance: It shows the insurance previously configured.
→Additional Charges: Add additional charges that have been already configured.
→P.A: Add tariff codes.
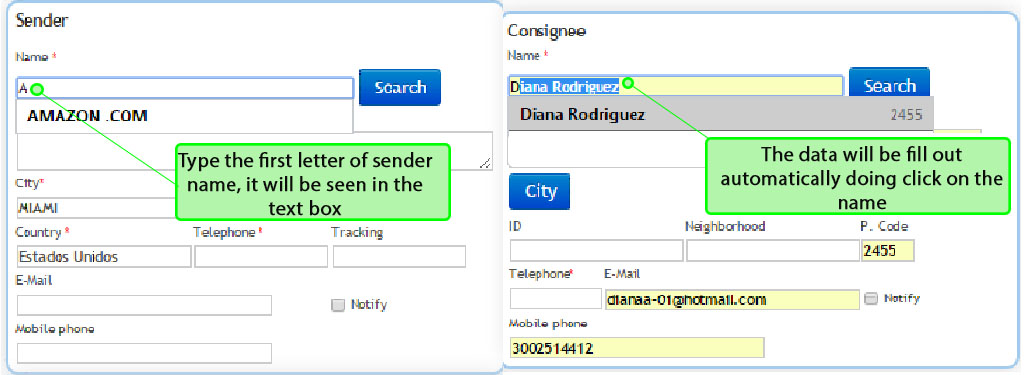
1.3 The Search sender button and the Search consignee button can be activated with just the first letter of the name if the person has previously used your service. You can select them by clicking on their name. The main advantage with this searching option is that you can save your time by getting access to the most frequent senders and beneficiaries.
1.4 When you save the courier waybill created in the last steps, the system will show the next screen with some options explained bellow:
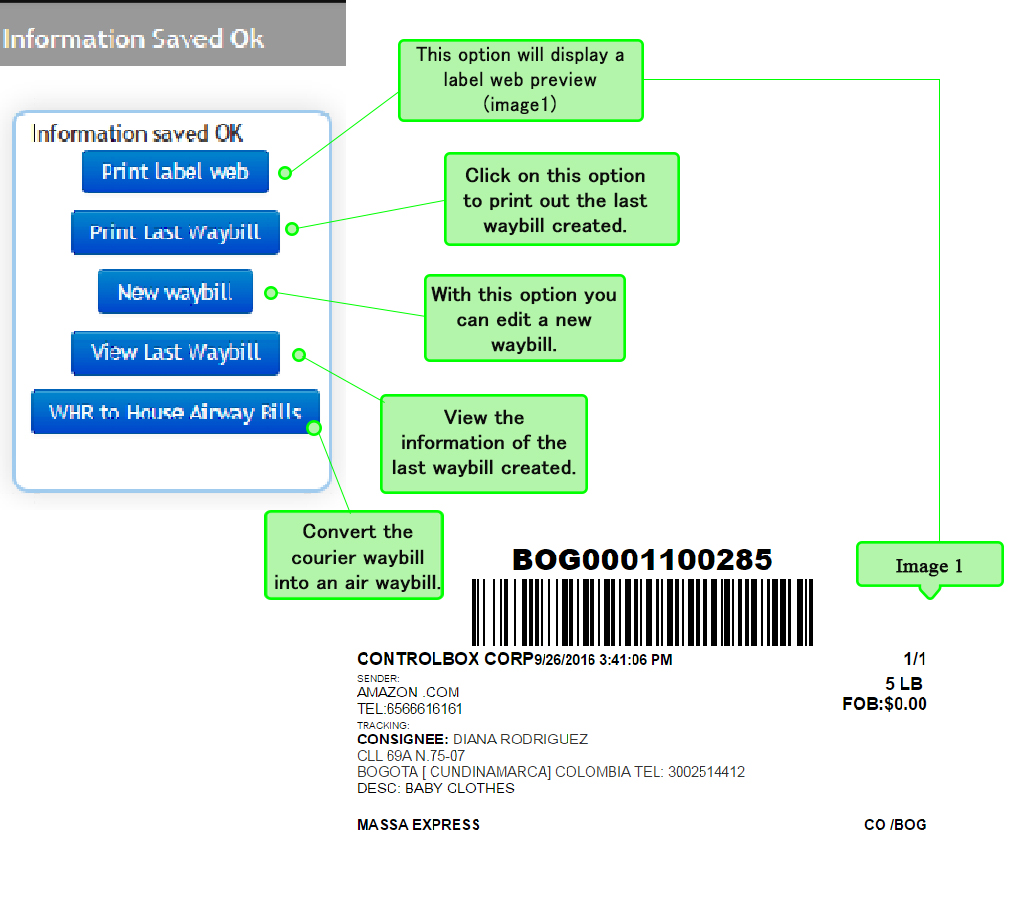
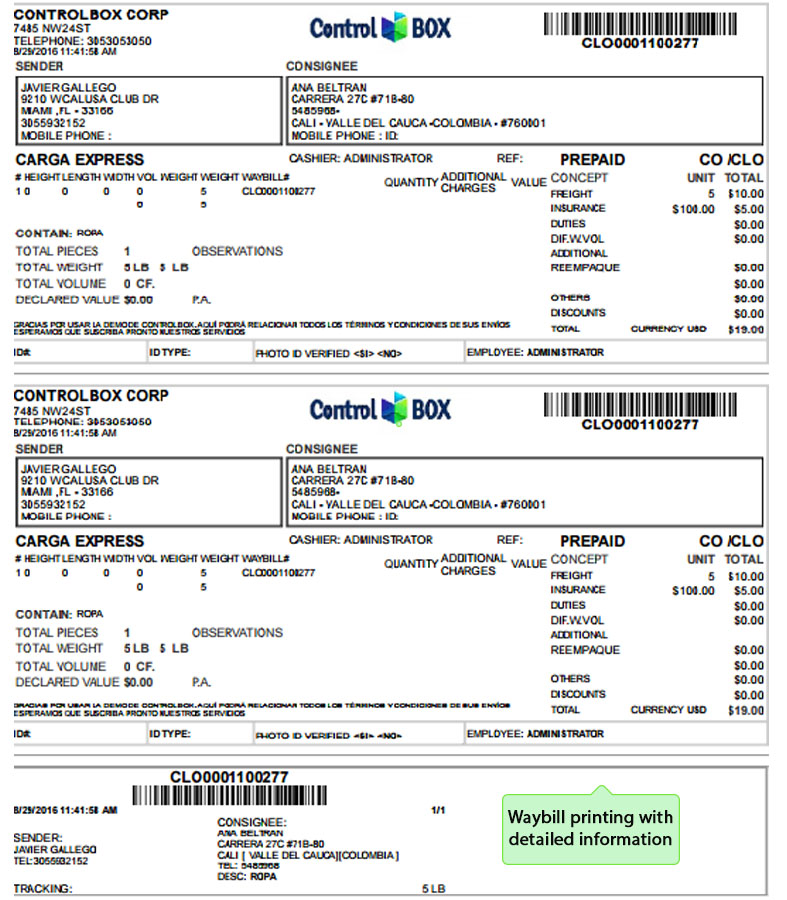
1.5 By clicking on Print Last Waybill you will see all the detailed information of the sender, consignee and the charge for the services as shown bellow:
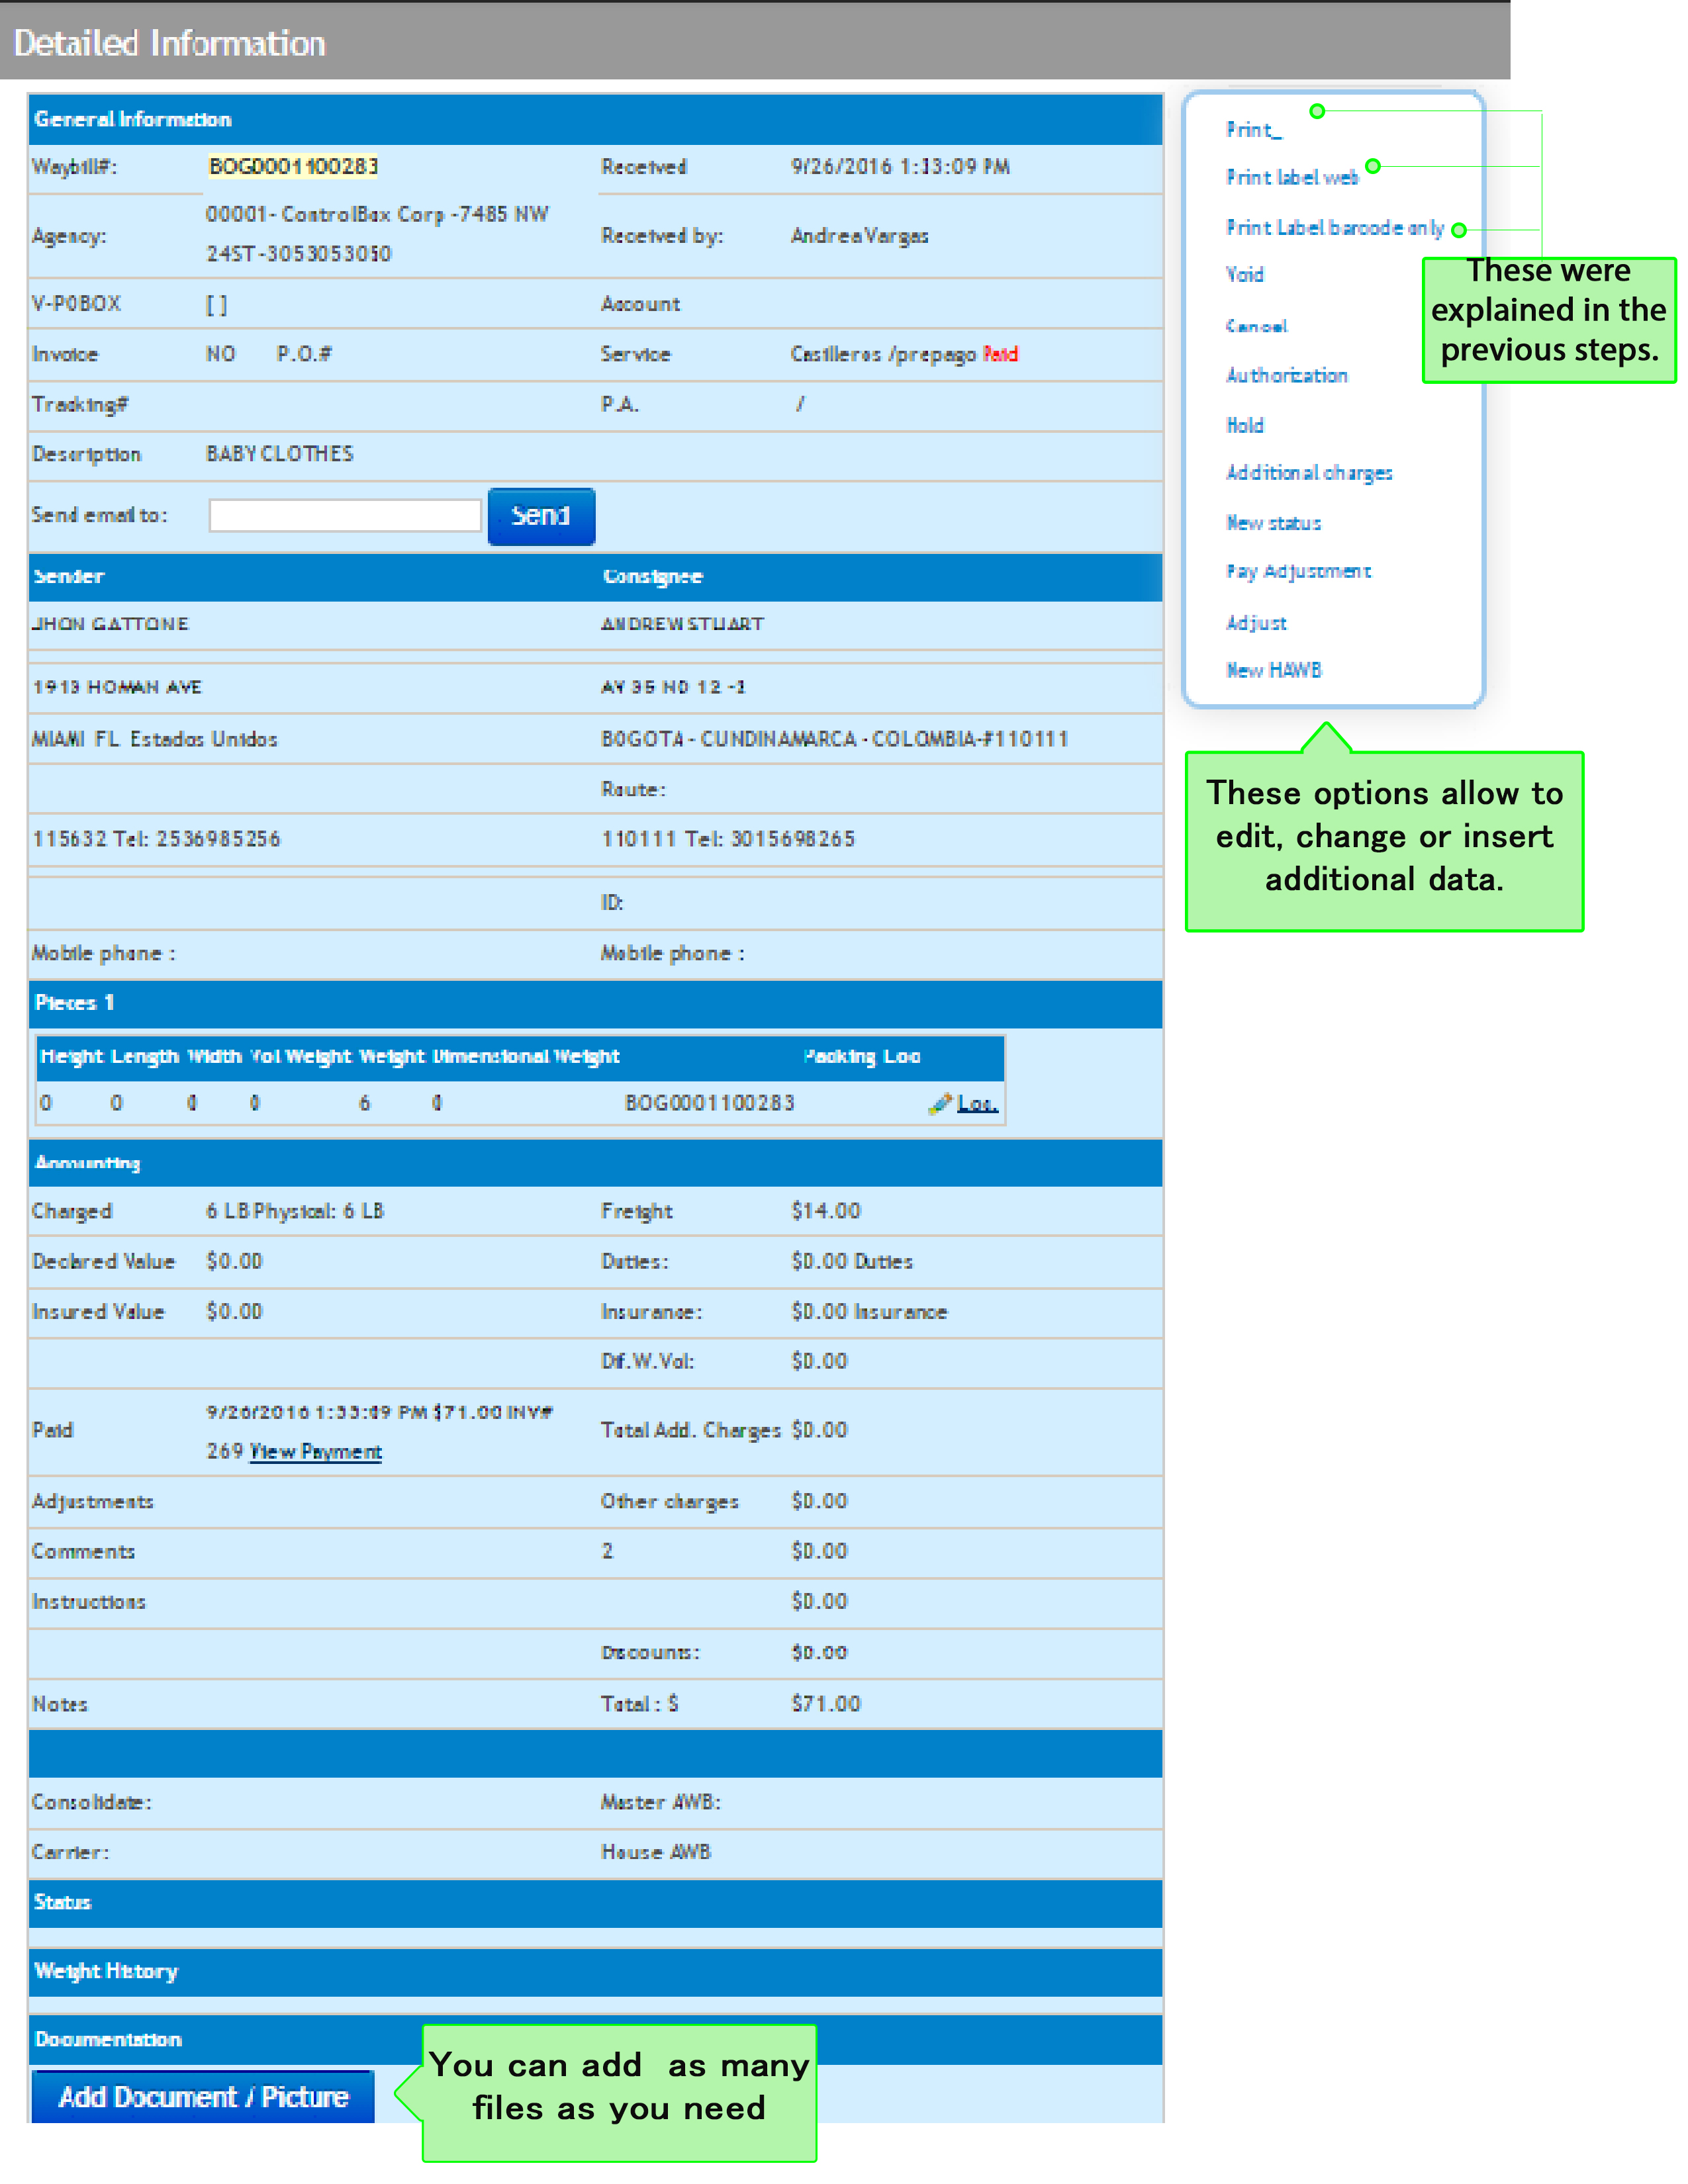
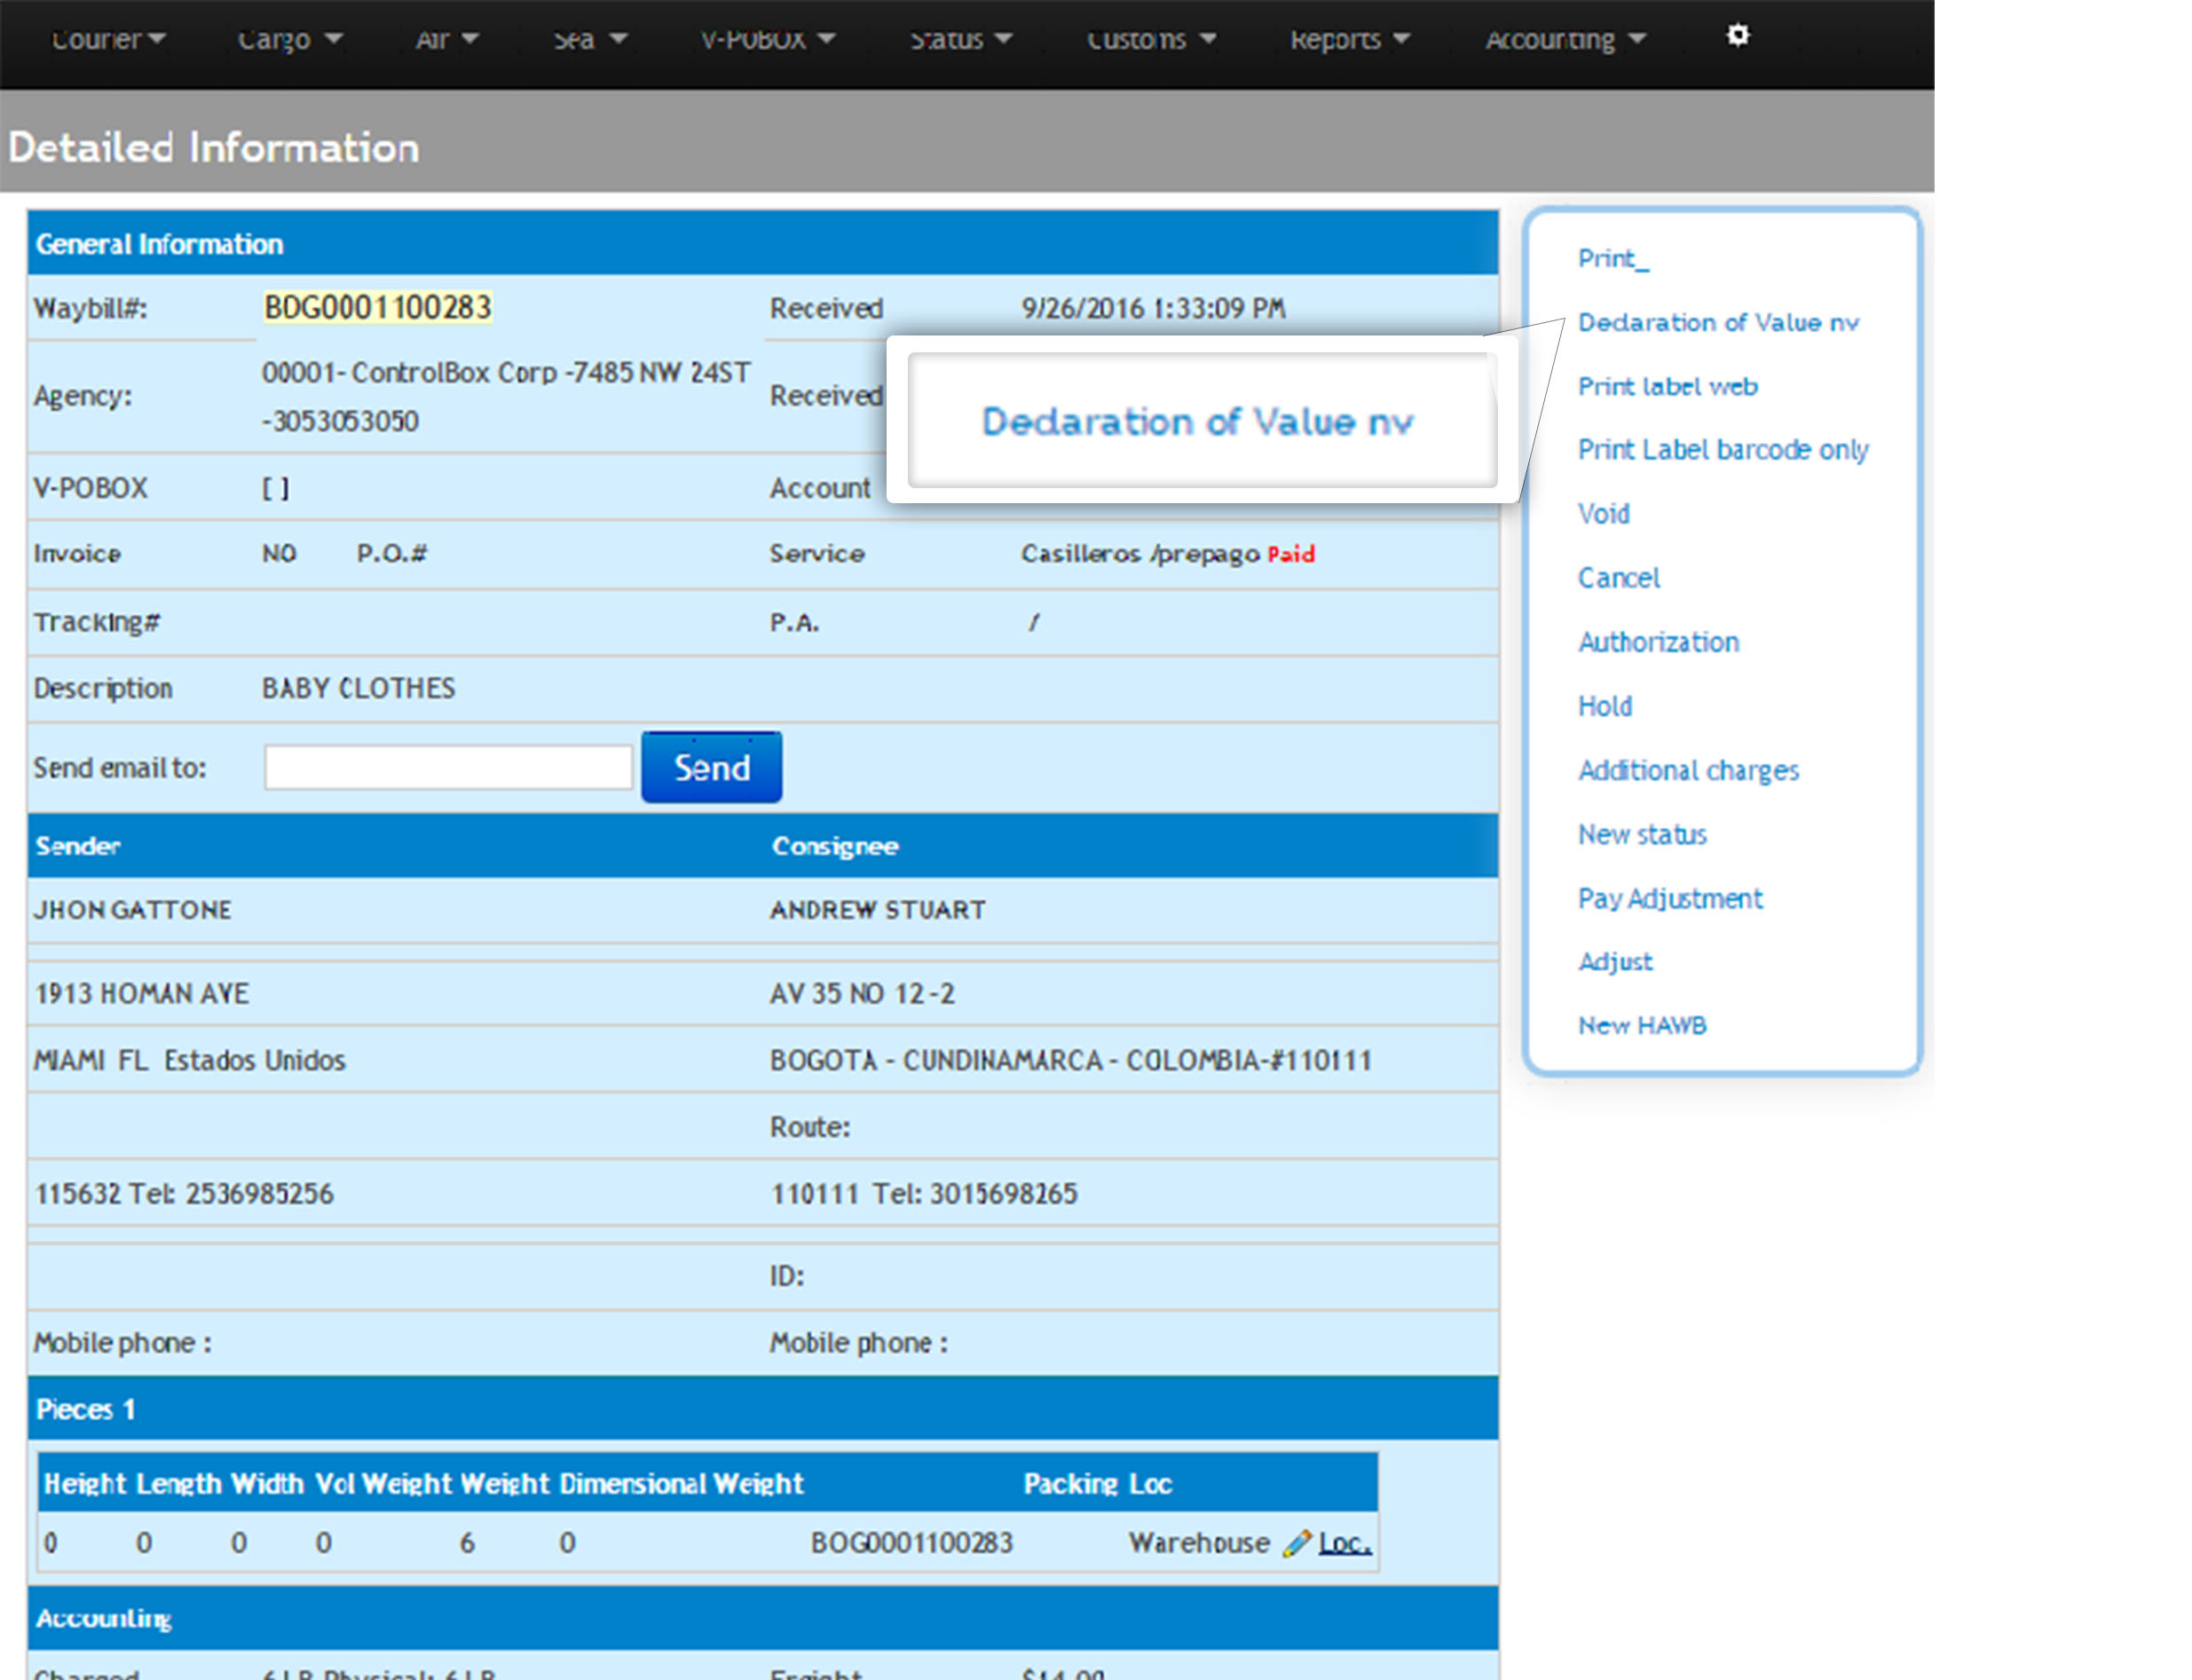
1.6 When you click on View Last Waybill you will have the possibility to edit different options according to your needs as it is explained on the following screen:
1.7 The additional options shown in the last screen will allow changes in the courier waybill as shown bellow.
Bellow every screen you will find explained every item:
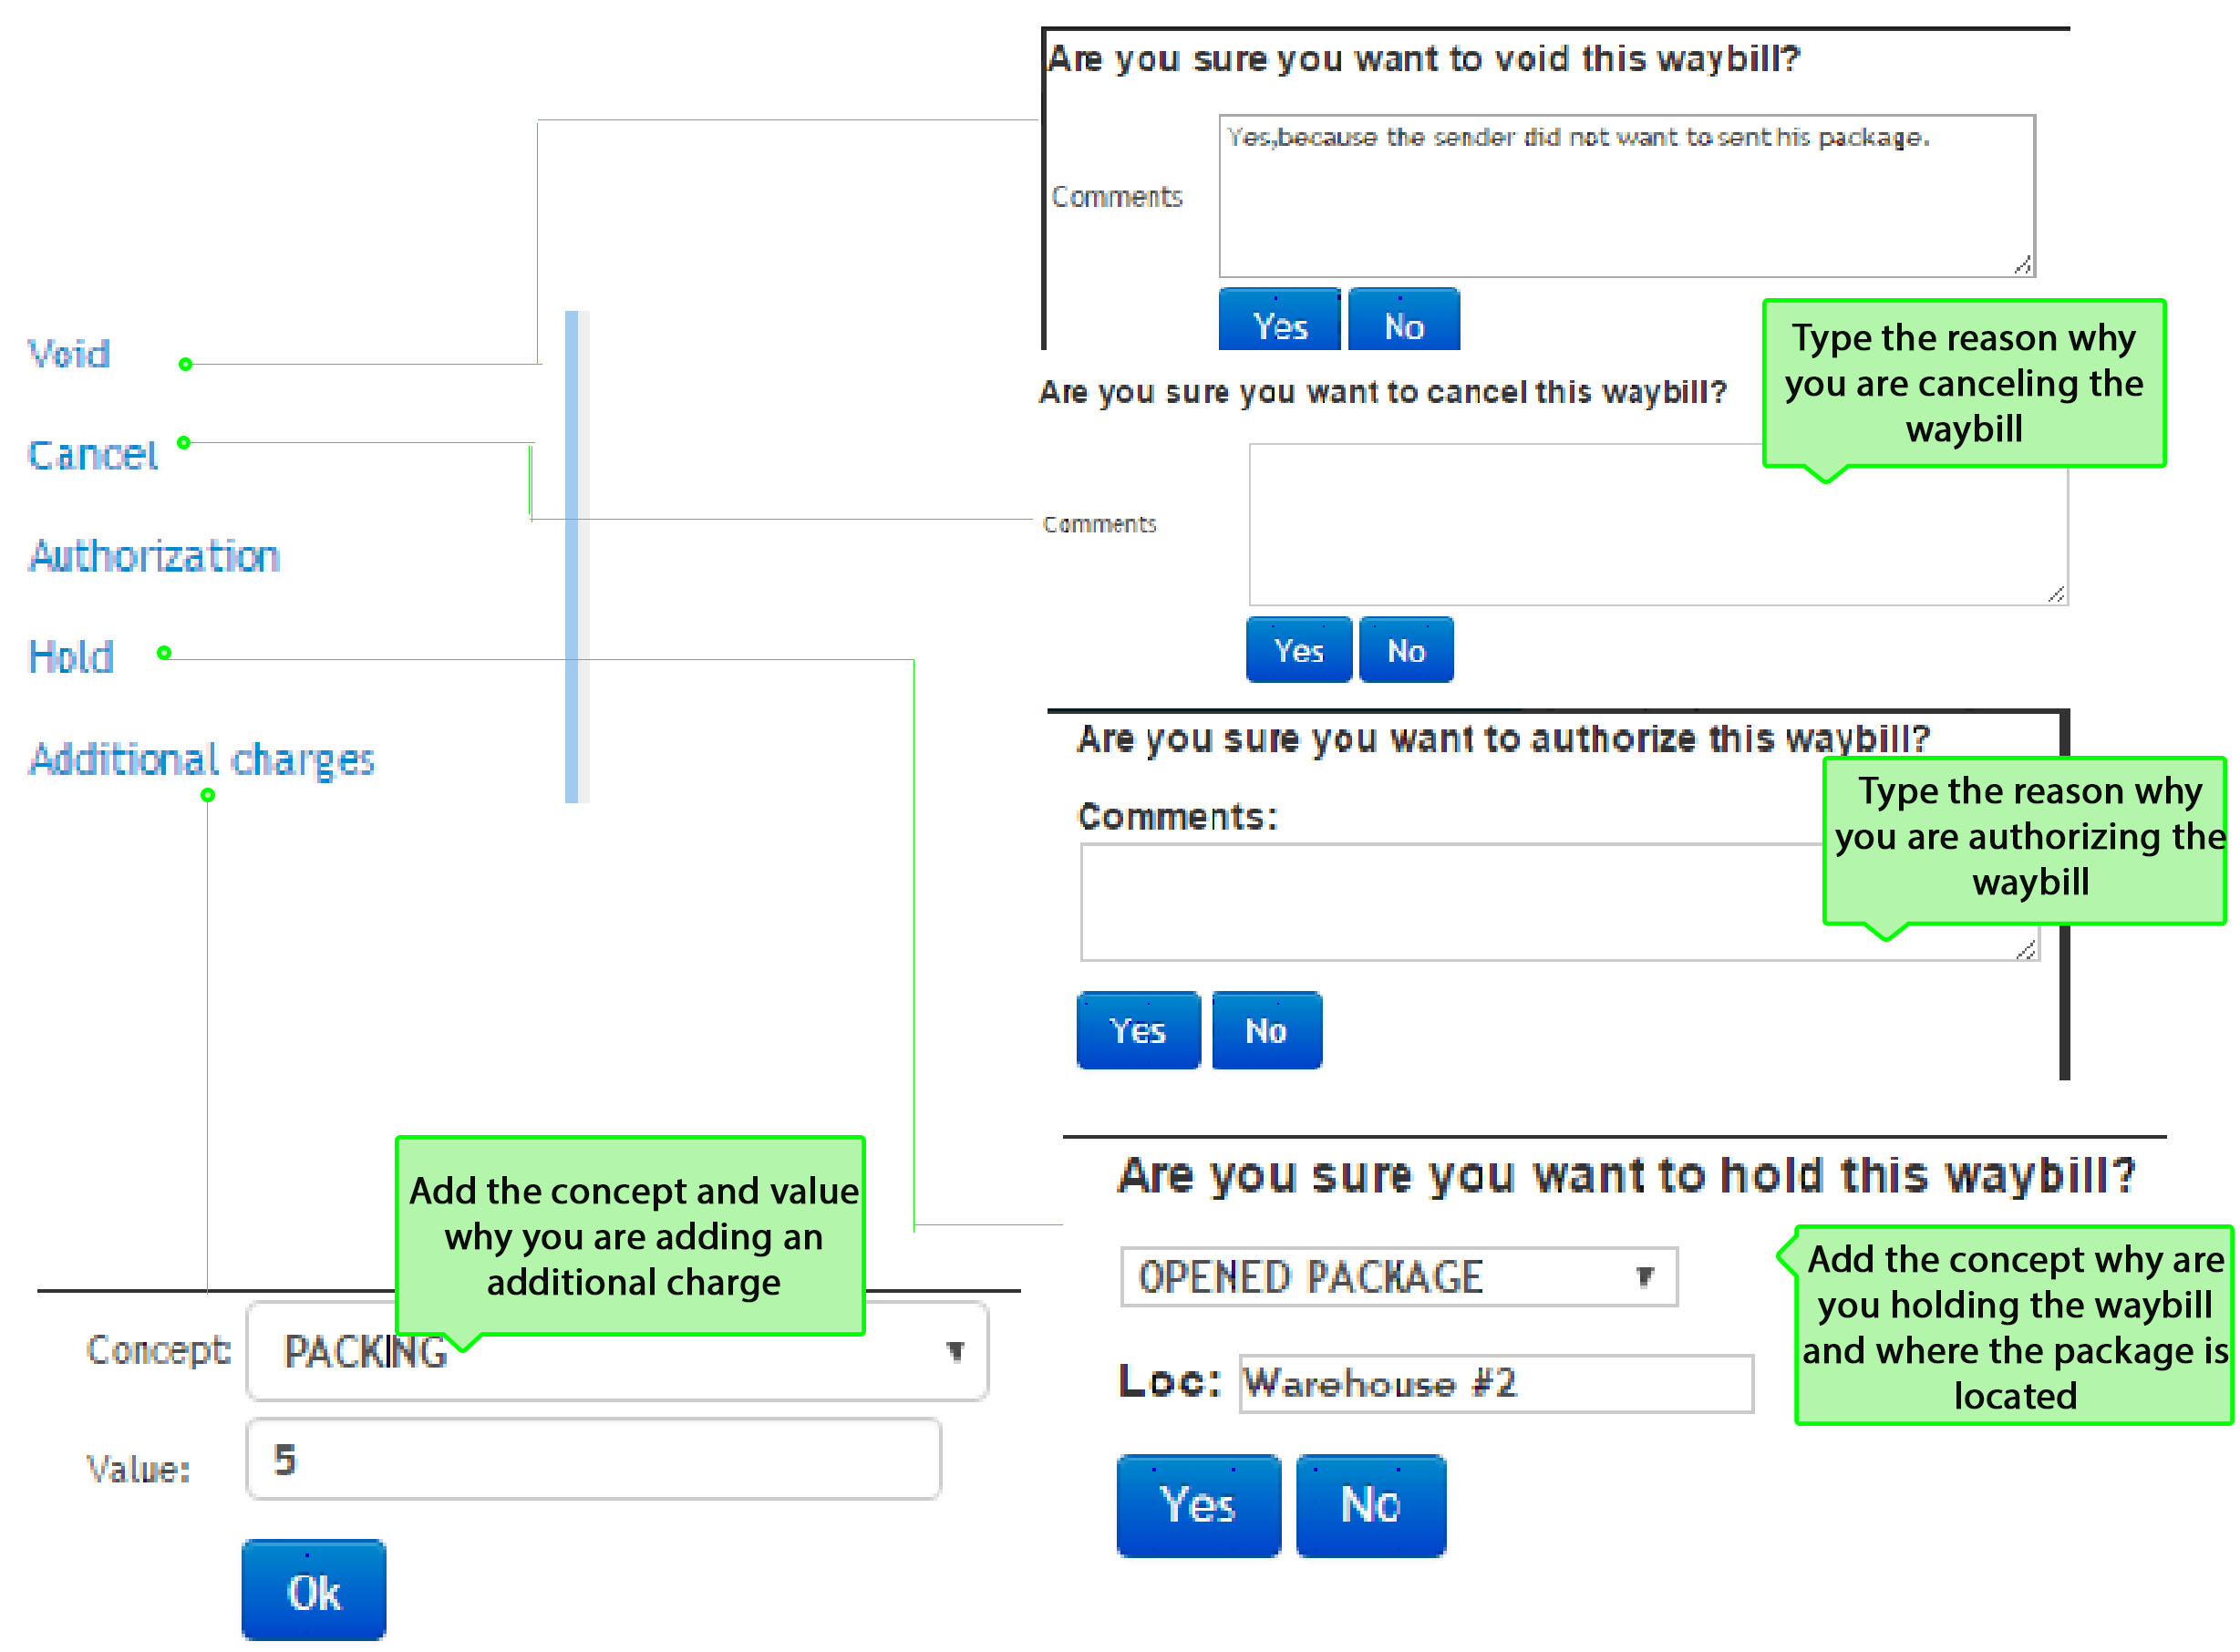
→Void: When you void the waybill, the status will change automatically, if you want you can add a comment (this is optional)
→Cancel: When you cancel the waybill, the status will change automatically, you can add a comment to remind you why the waybill was cancelled.
→Authorization: With this option the waybill will be available to shipment. The comment is optional if you want to type any information.
→Hold: To hold a courier waybill you must select what is the reason for it. Additional you can add a location, to know where the package is. (To know how create the items to hold a courier waybill go to the section "Configuration/General/Holding reasons").
→Additional charges: You can select the additional charge configurated previously and add the value for that charge and the waybill will have the new changes (To see how to configurate go to the section "Configuration/Additional Charges").
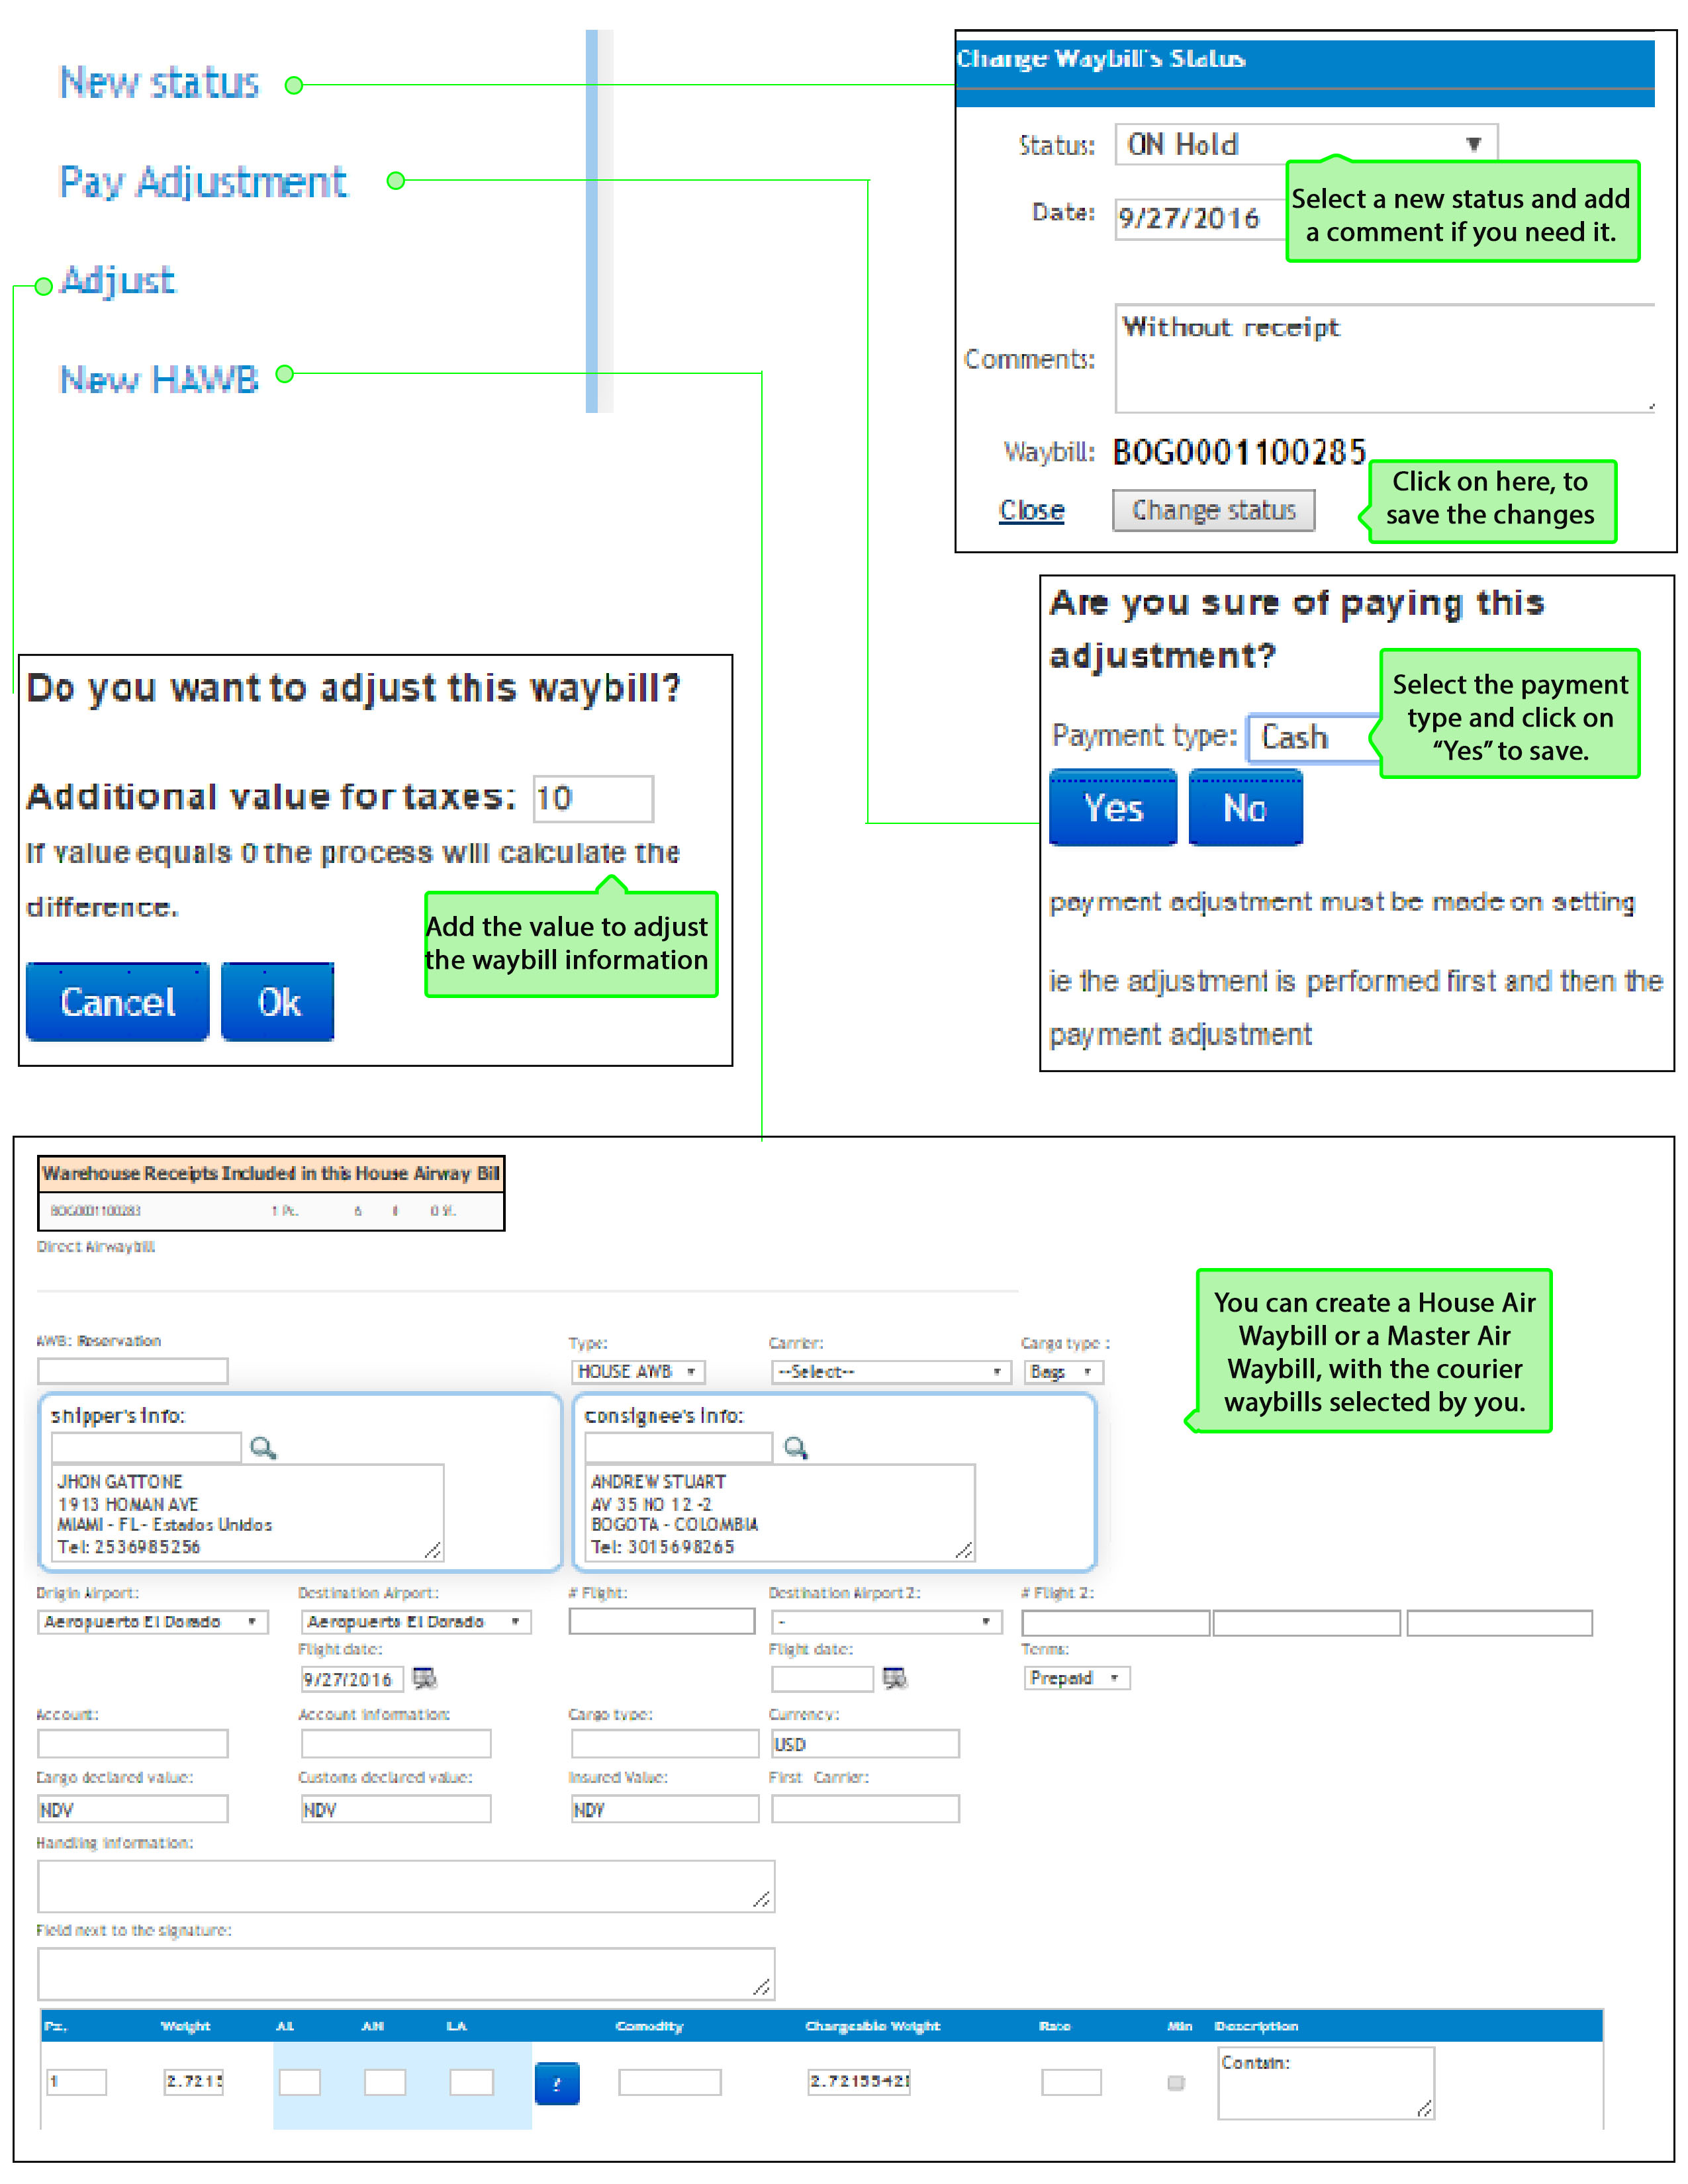
→New Status: Select the new status to the courier waybill, add a comment it is optional, but it helps you to know the progress of the courier waybill. (To see how to create the status go to the section "Configurations/Courier Status")
→Pay Adjustment: You have the option to change the payment method, in this item you must select between these option: cash, check and credit card..
→Adjust: Add an additional value taxes if is necessary, every change made in the courier waybill with these options will appear in the detail information of the courier waybill. ( left side of the options menu as shown in the step 1.6).
→New HAWB: From this option you can create a House Air Waybill or a Master Air Waybill, but if you want to see how to create those waybills with more detail you can go to the section "Air/ New Master Air Waybill".
1.8 As last step you can print the commercial invoice, this is an additional item that you can whether show it or not in the menu according to your needs. The commercial invoice will be configured to the country previously selected. (To see how to configure the country and the commercial invoice button go to the section "Configuration/Maintenance/Config"). In the following screen you will see a commercial invoice example:

1.9 In the next image you can see the button location if you decide to add it into the options menu. (You can see the difference from the 1.6 step)
⇒ According to your needs, you can decide if the button should appear or not.