6. Consolidate courier waybill
⇒ The main purpose of doing a consolidated cargo is the integration of certain number of courier waybills. You may have different packages to be sent to a country through different senders, whether at the same consignee or not, the intention is to send a cargo while saving logistics costs in different transportation media. In this section you will learn how to consolidate waybills.
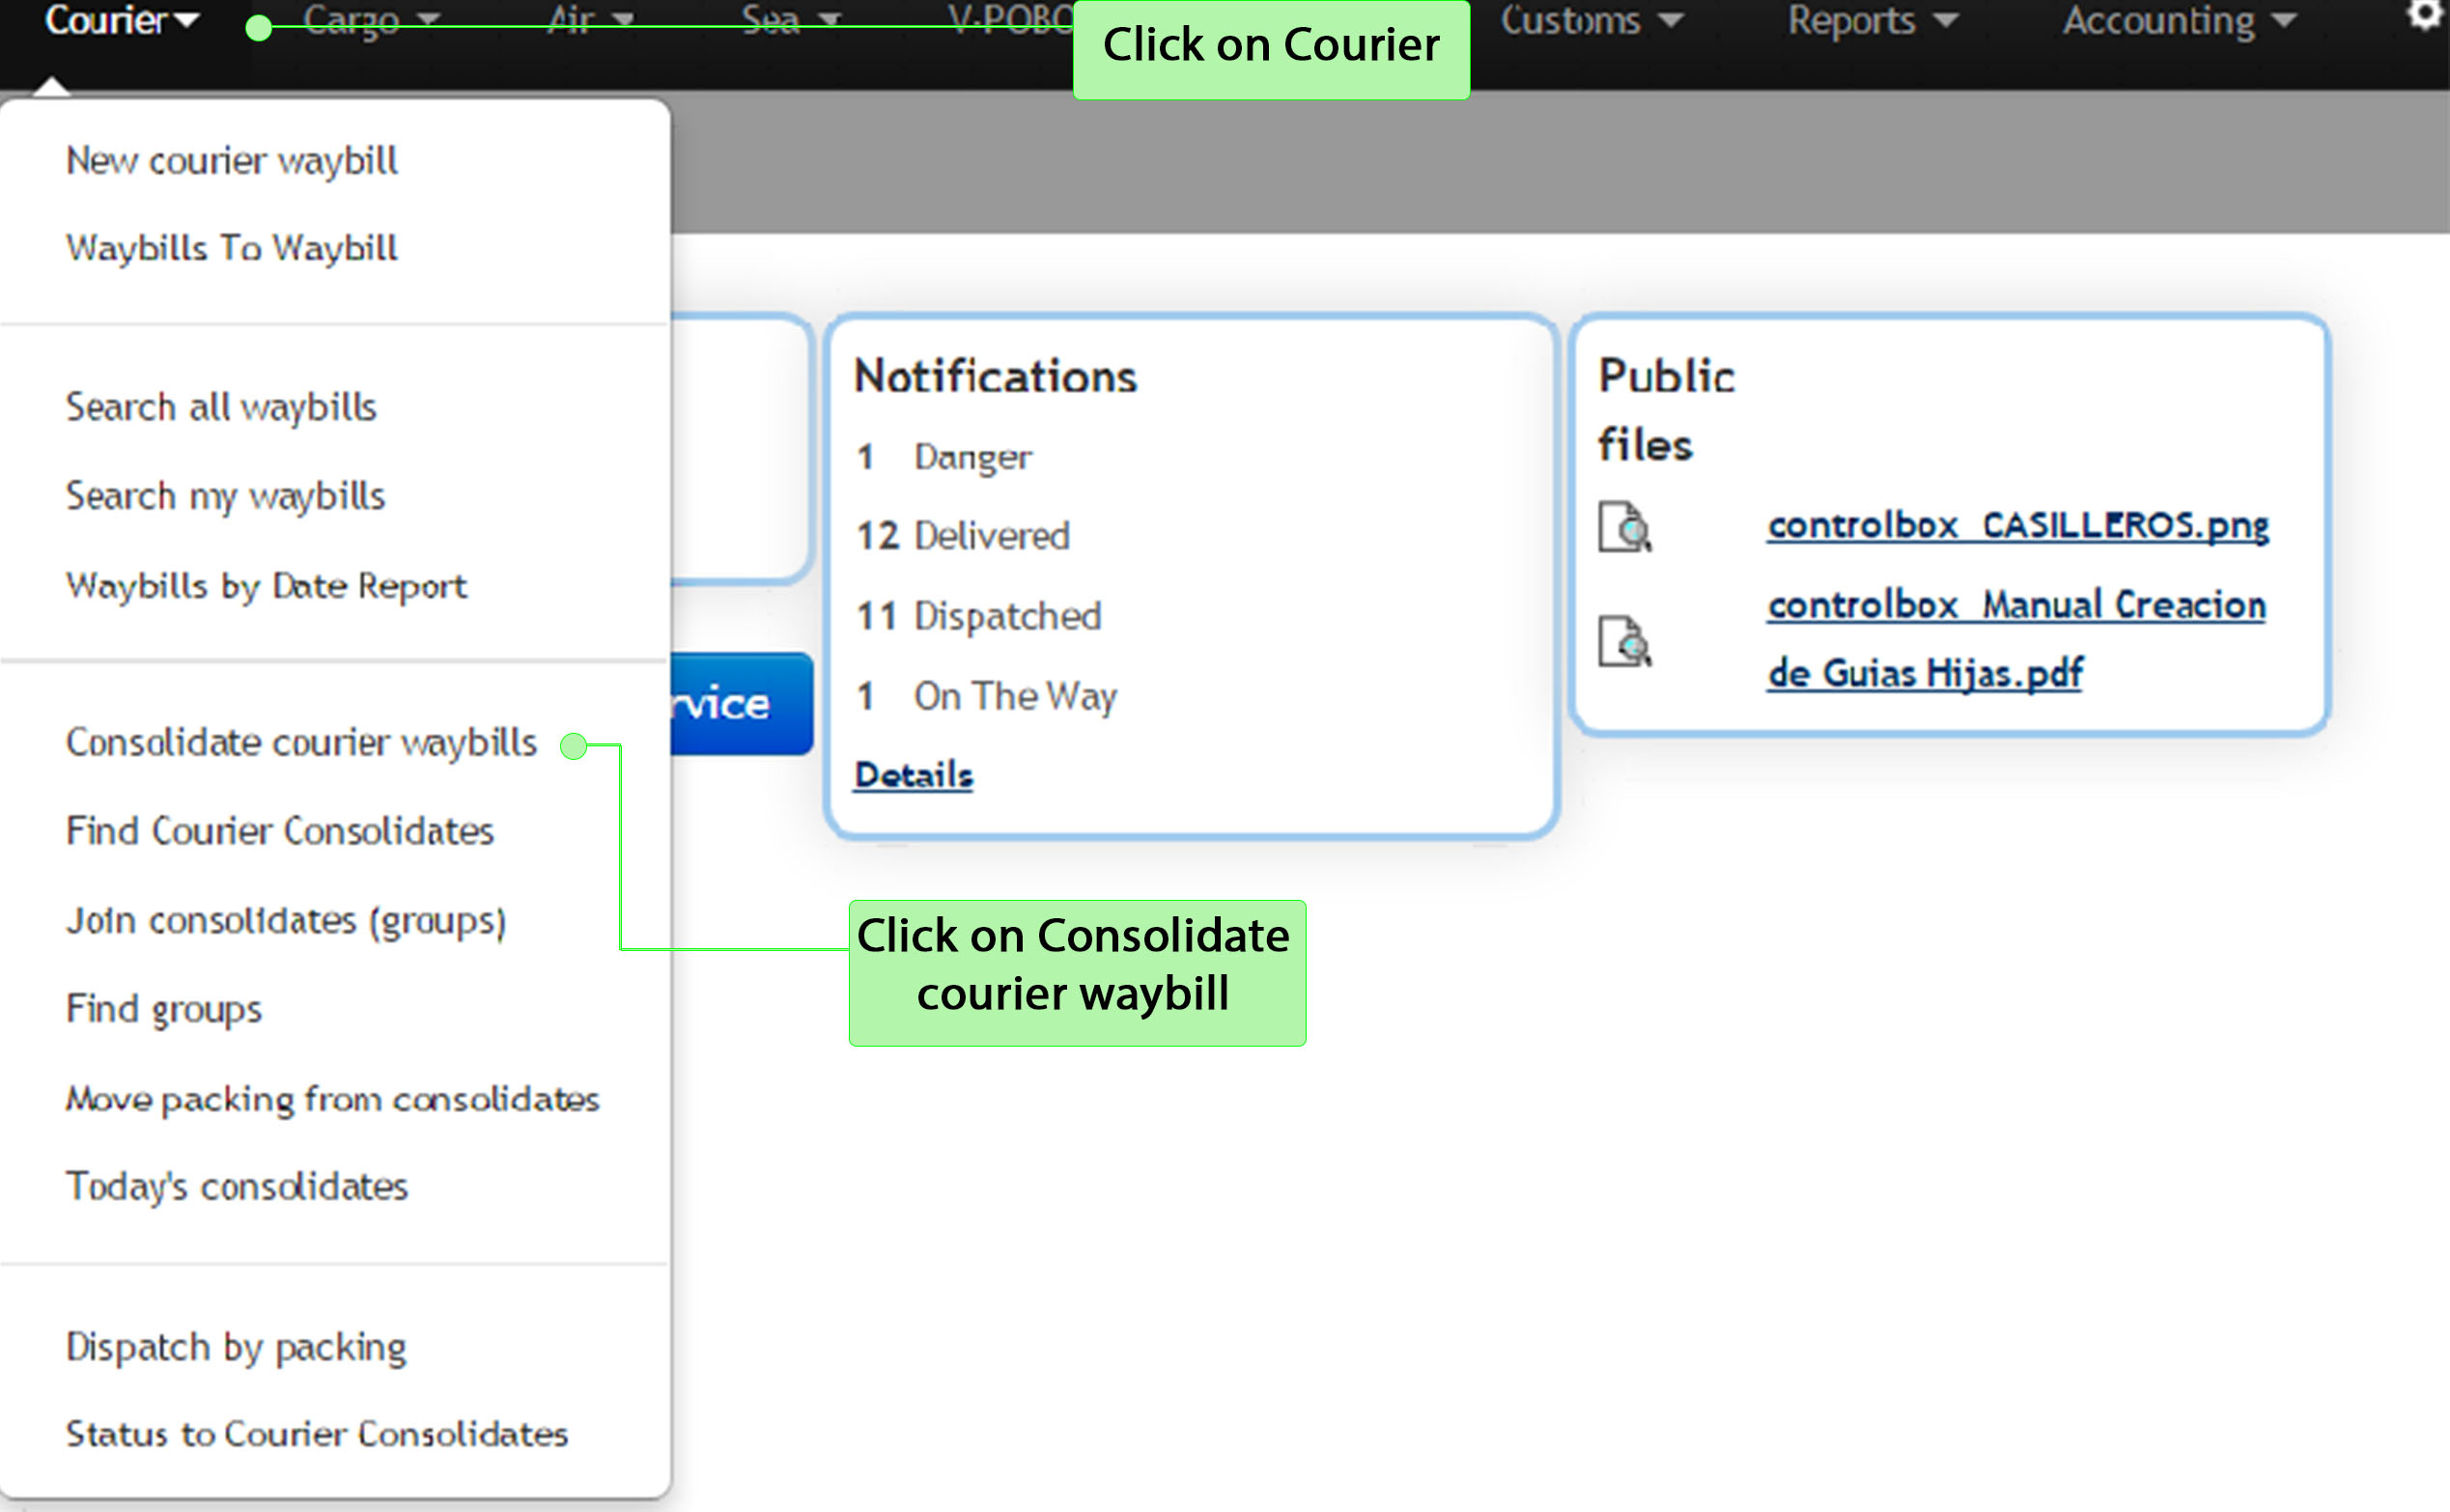
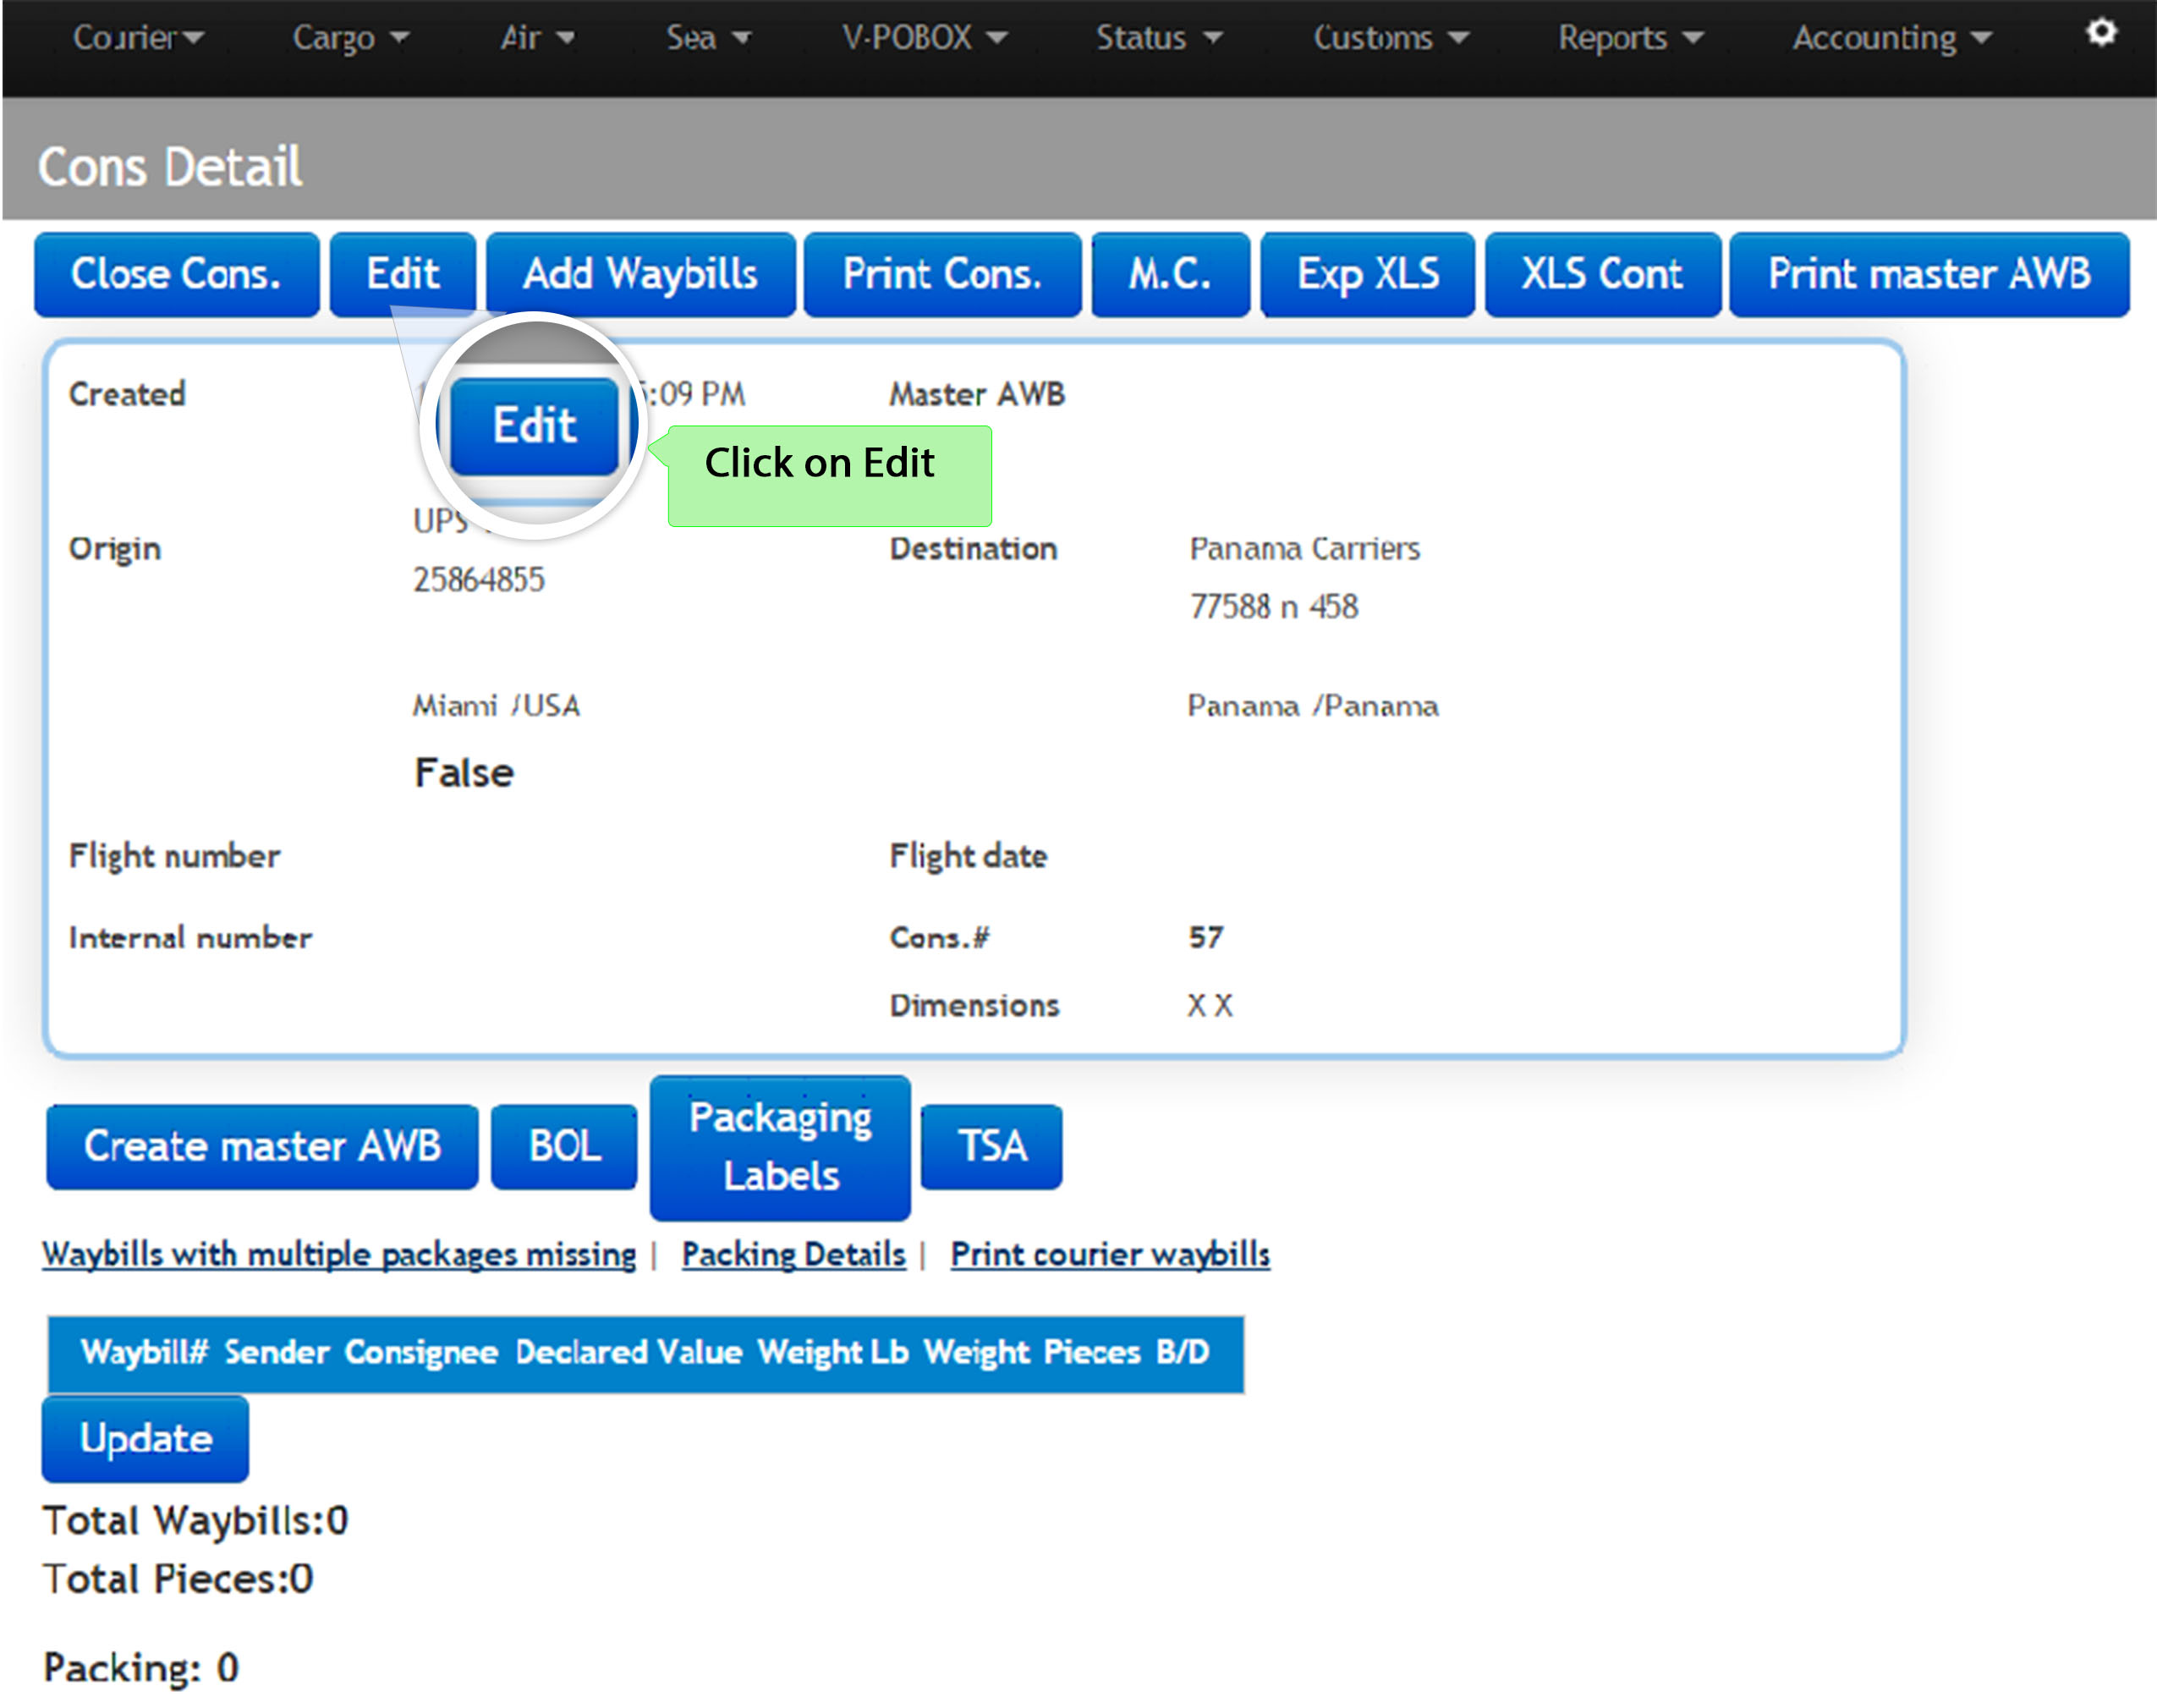
6.1 To start this process follow the next steps, as shown bellow:
6.2 The next page will give you the option to edit details of the courier consolidation. There are some restrictions that you can add to the consolidation according to your process and rules of shipping (This is optional).
⇒ Select the camps and fill the information required to move forward to the next step. Then click on Create.
⇒ Below the image you will find explained some required information.
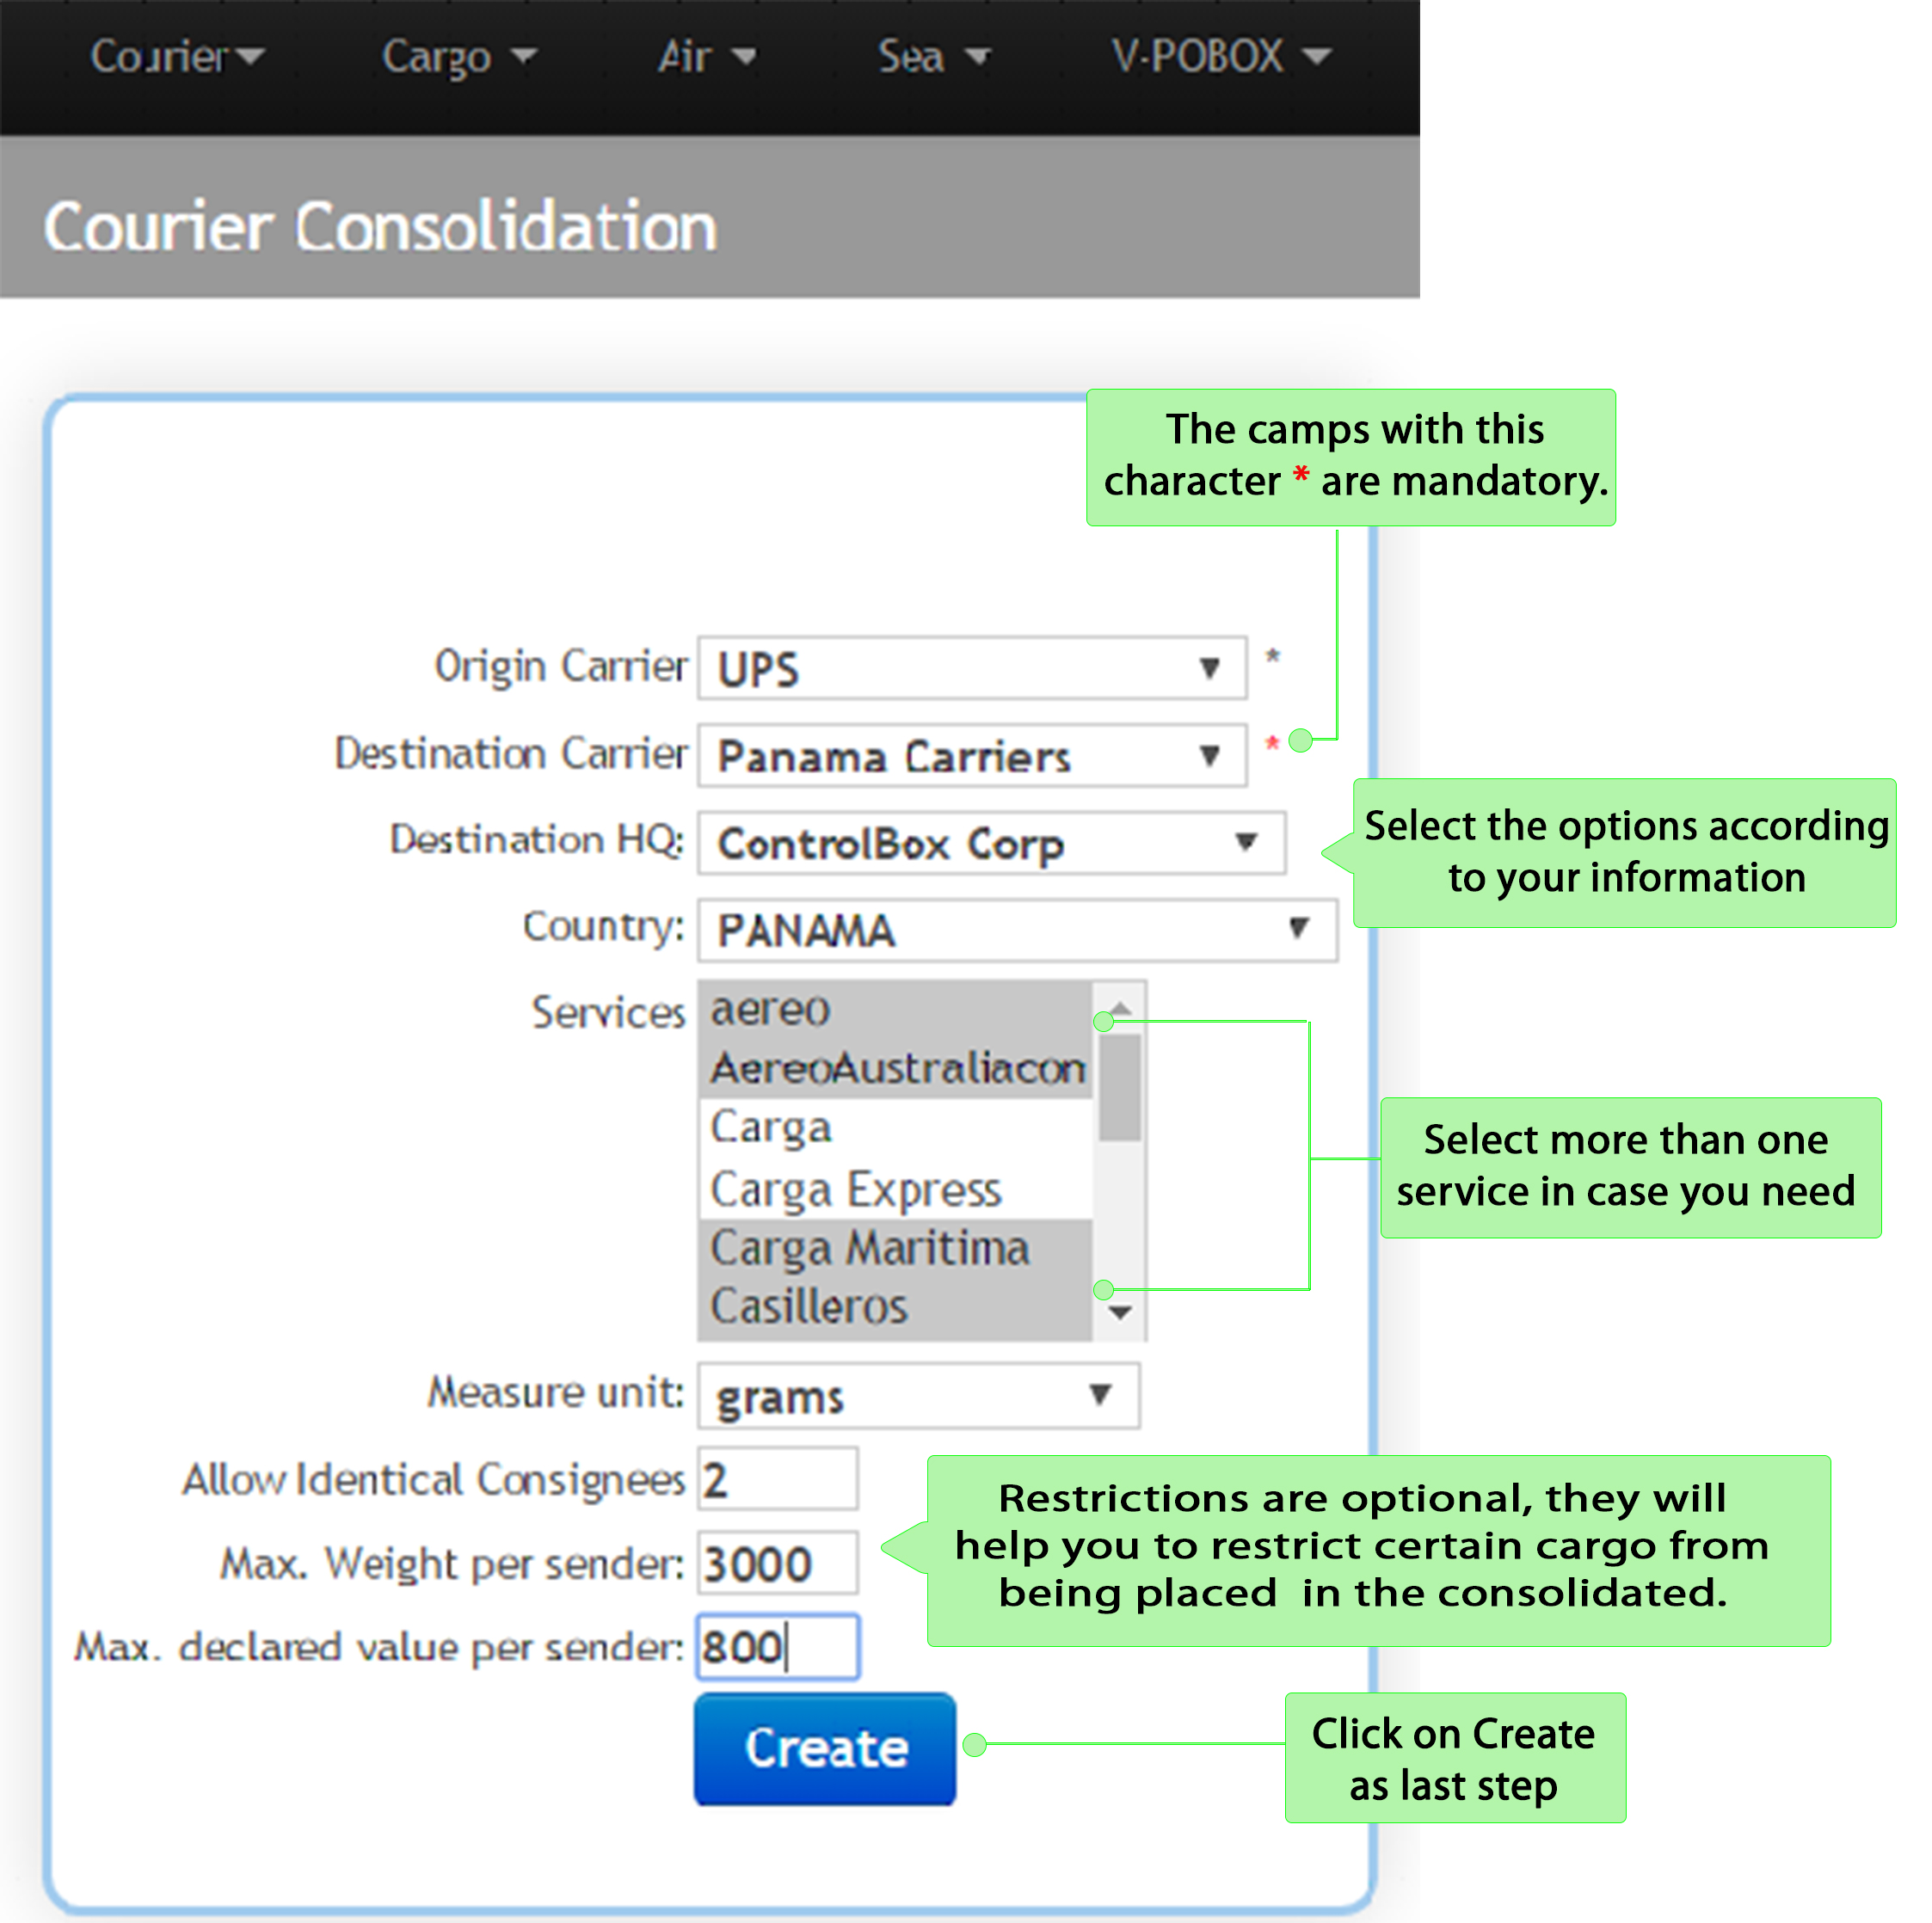
⇒Origin Carrier: The carrier that transports the cargo from the shipping place
⇒Destination Carrier: The carrier that transports the cargo to the delivery place.
⇒Destination HQ: The agency that will receive the cargo in the destination place
⇒Country: Select destination country
⇒Services: Select the services that will be included in the consolidation (You can select more than one service)
⇒Measurement Unit: Select the unit of measurement that will be used
⇒Allow identical consignees: You can set a limit of consignees or leave it empty
⇒Maximum Weight per Sender: Max. allowed weight
⇒Maximum Declared value per sender: Max declared value
Options Menu
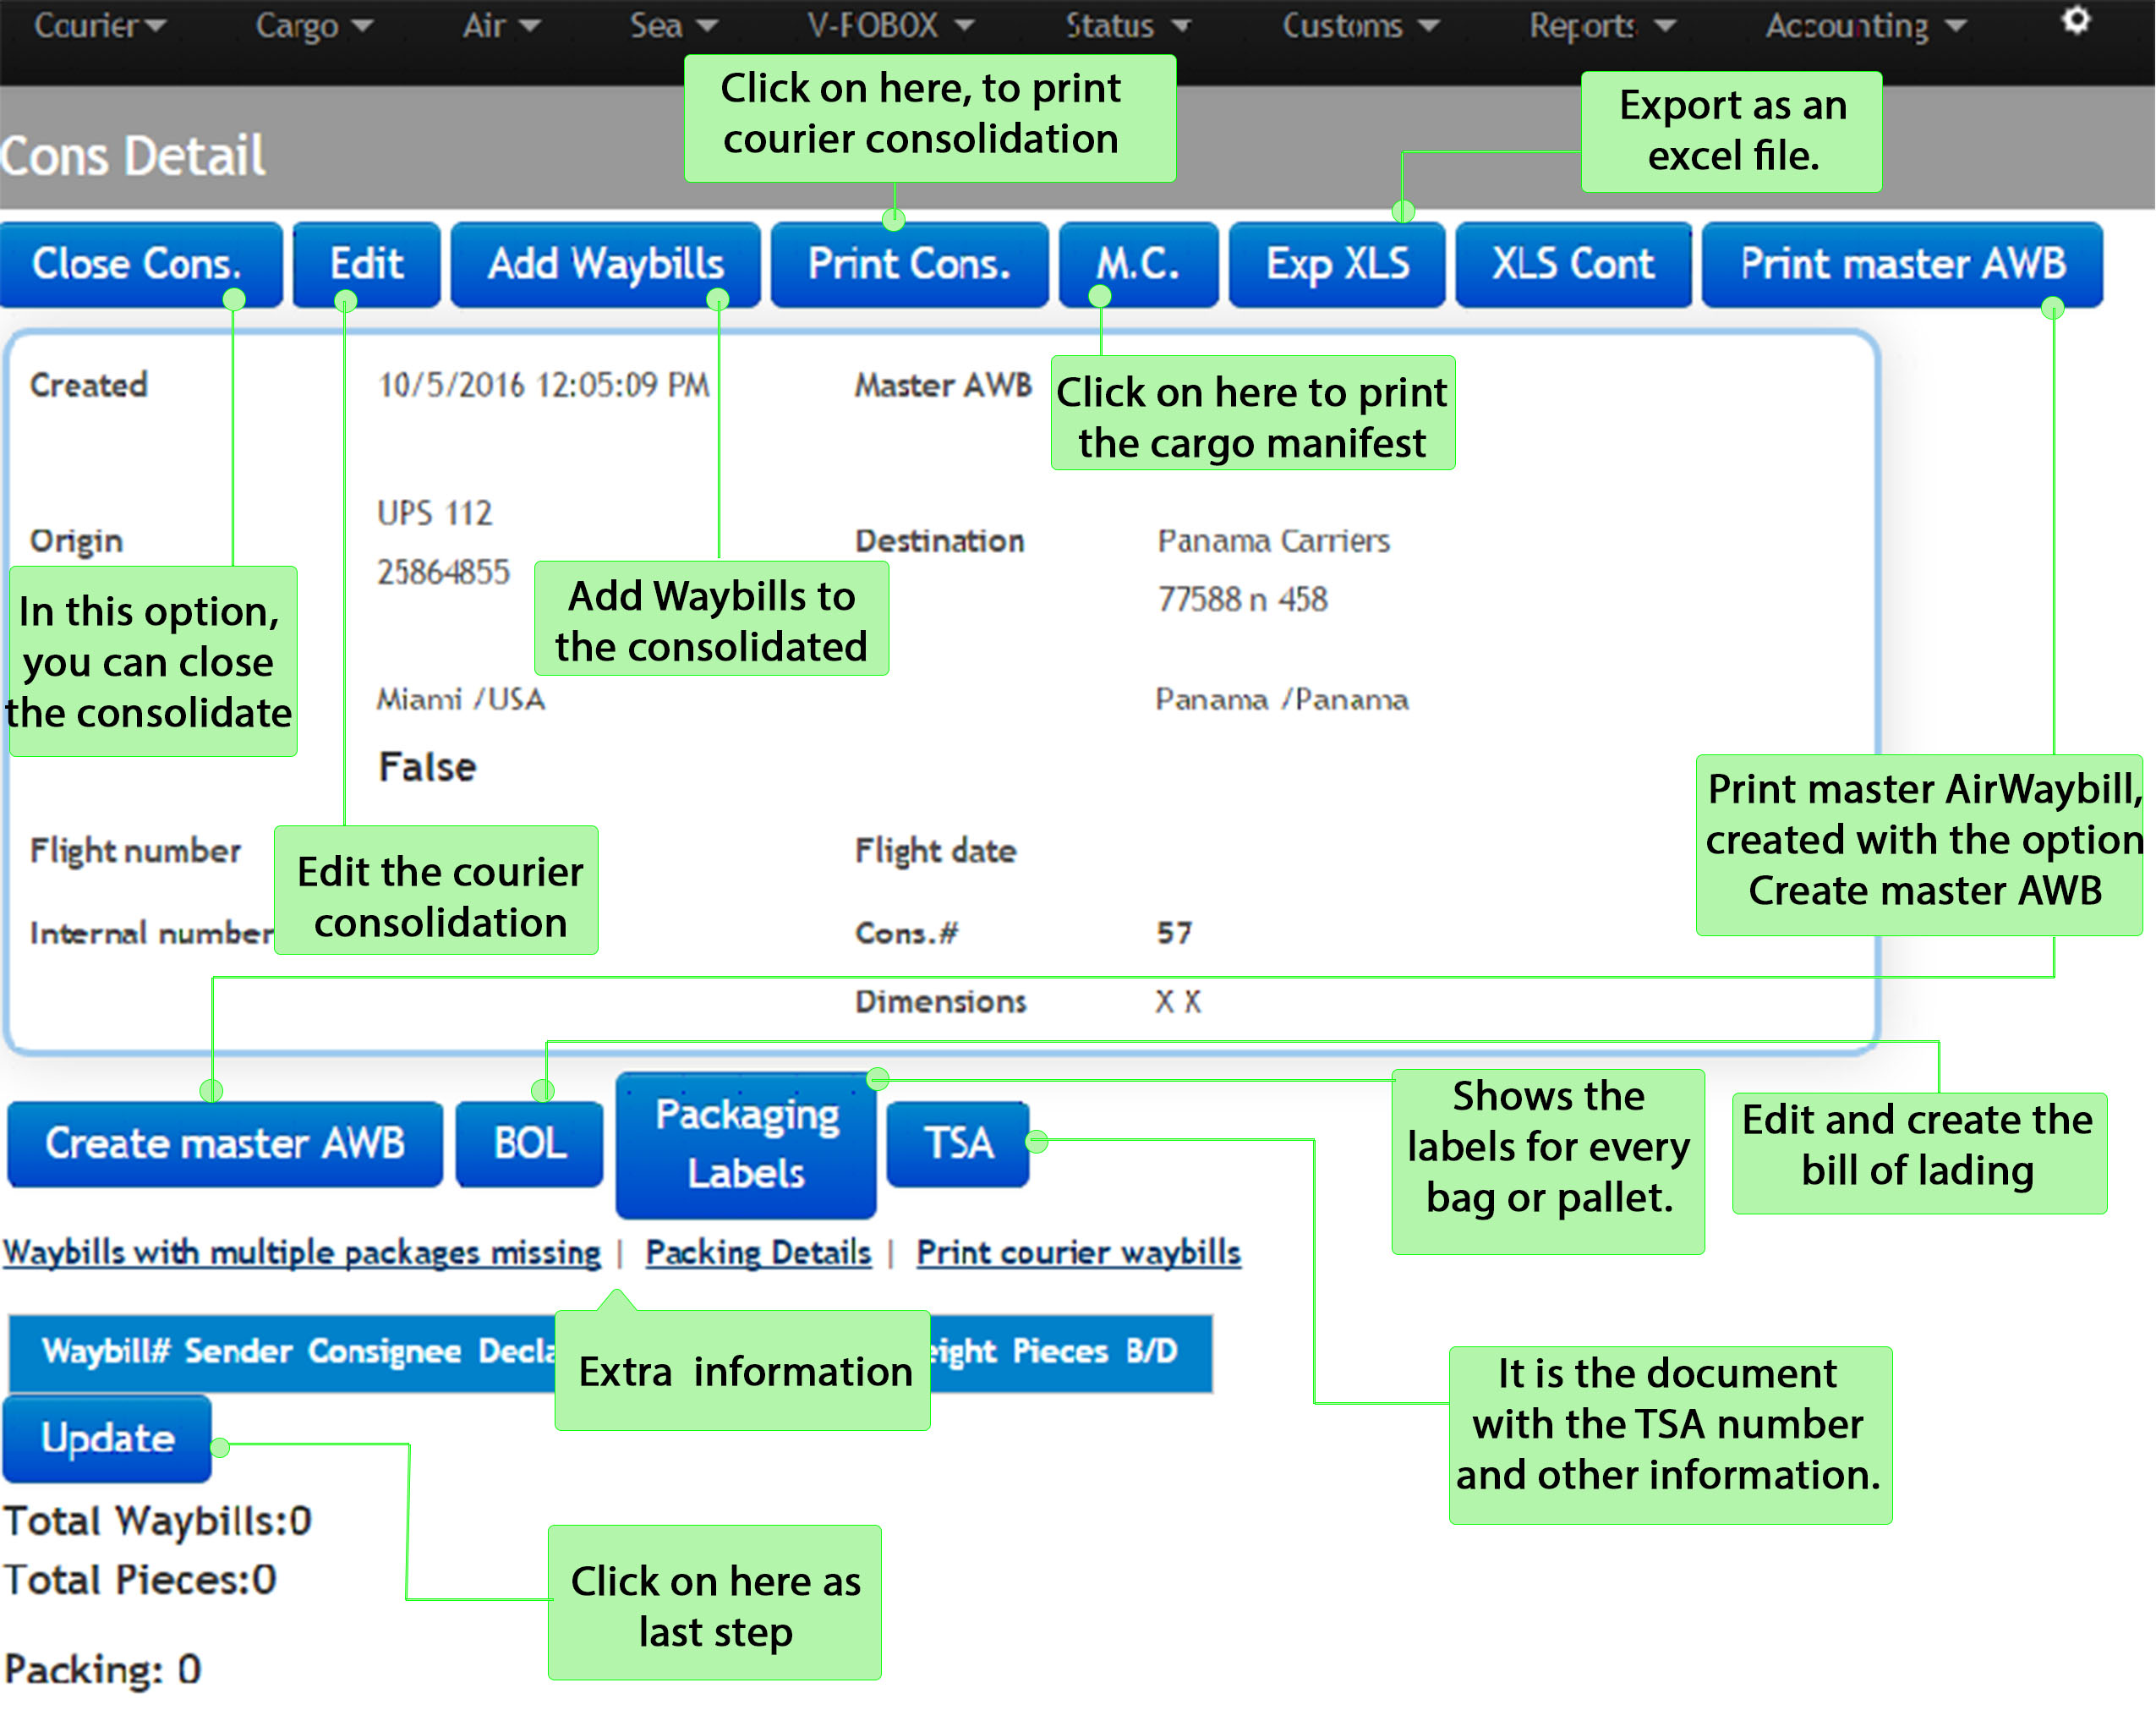
⇒ Once you click on Create, you will find many options to edit the courier consolidation, each one will be explained step by step as shown bellow:
 6.3 We are going to start with the option Edit since the option Close Consolidated will be used at the end of this process. By clicking on Edit you will be able to modify the information of the consolidated such as restrictions, carriers, country and services. When you finish, click on Save to update the new information. The following two screens will illustrate how do it:
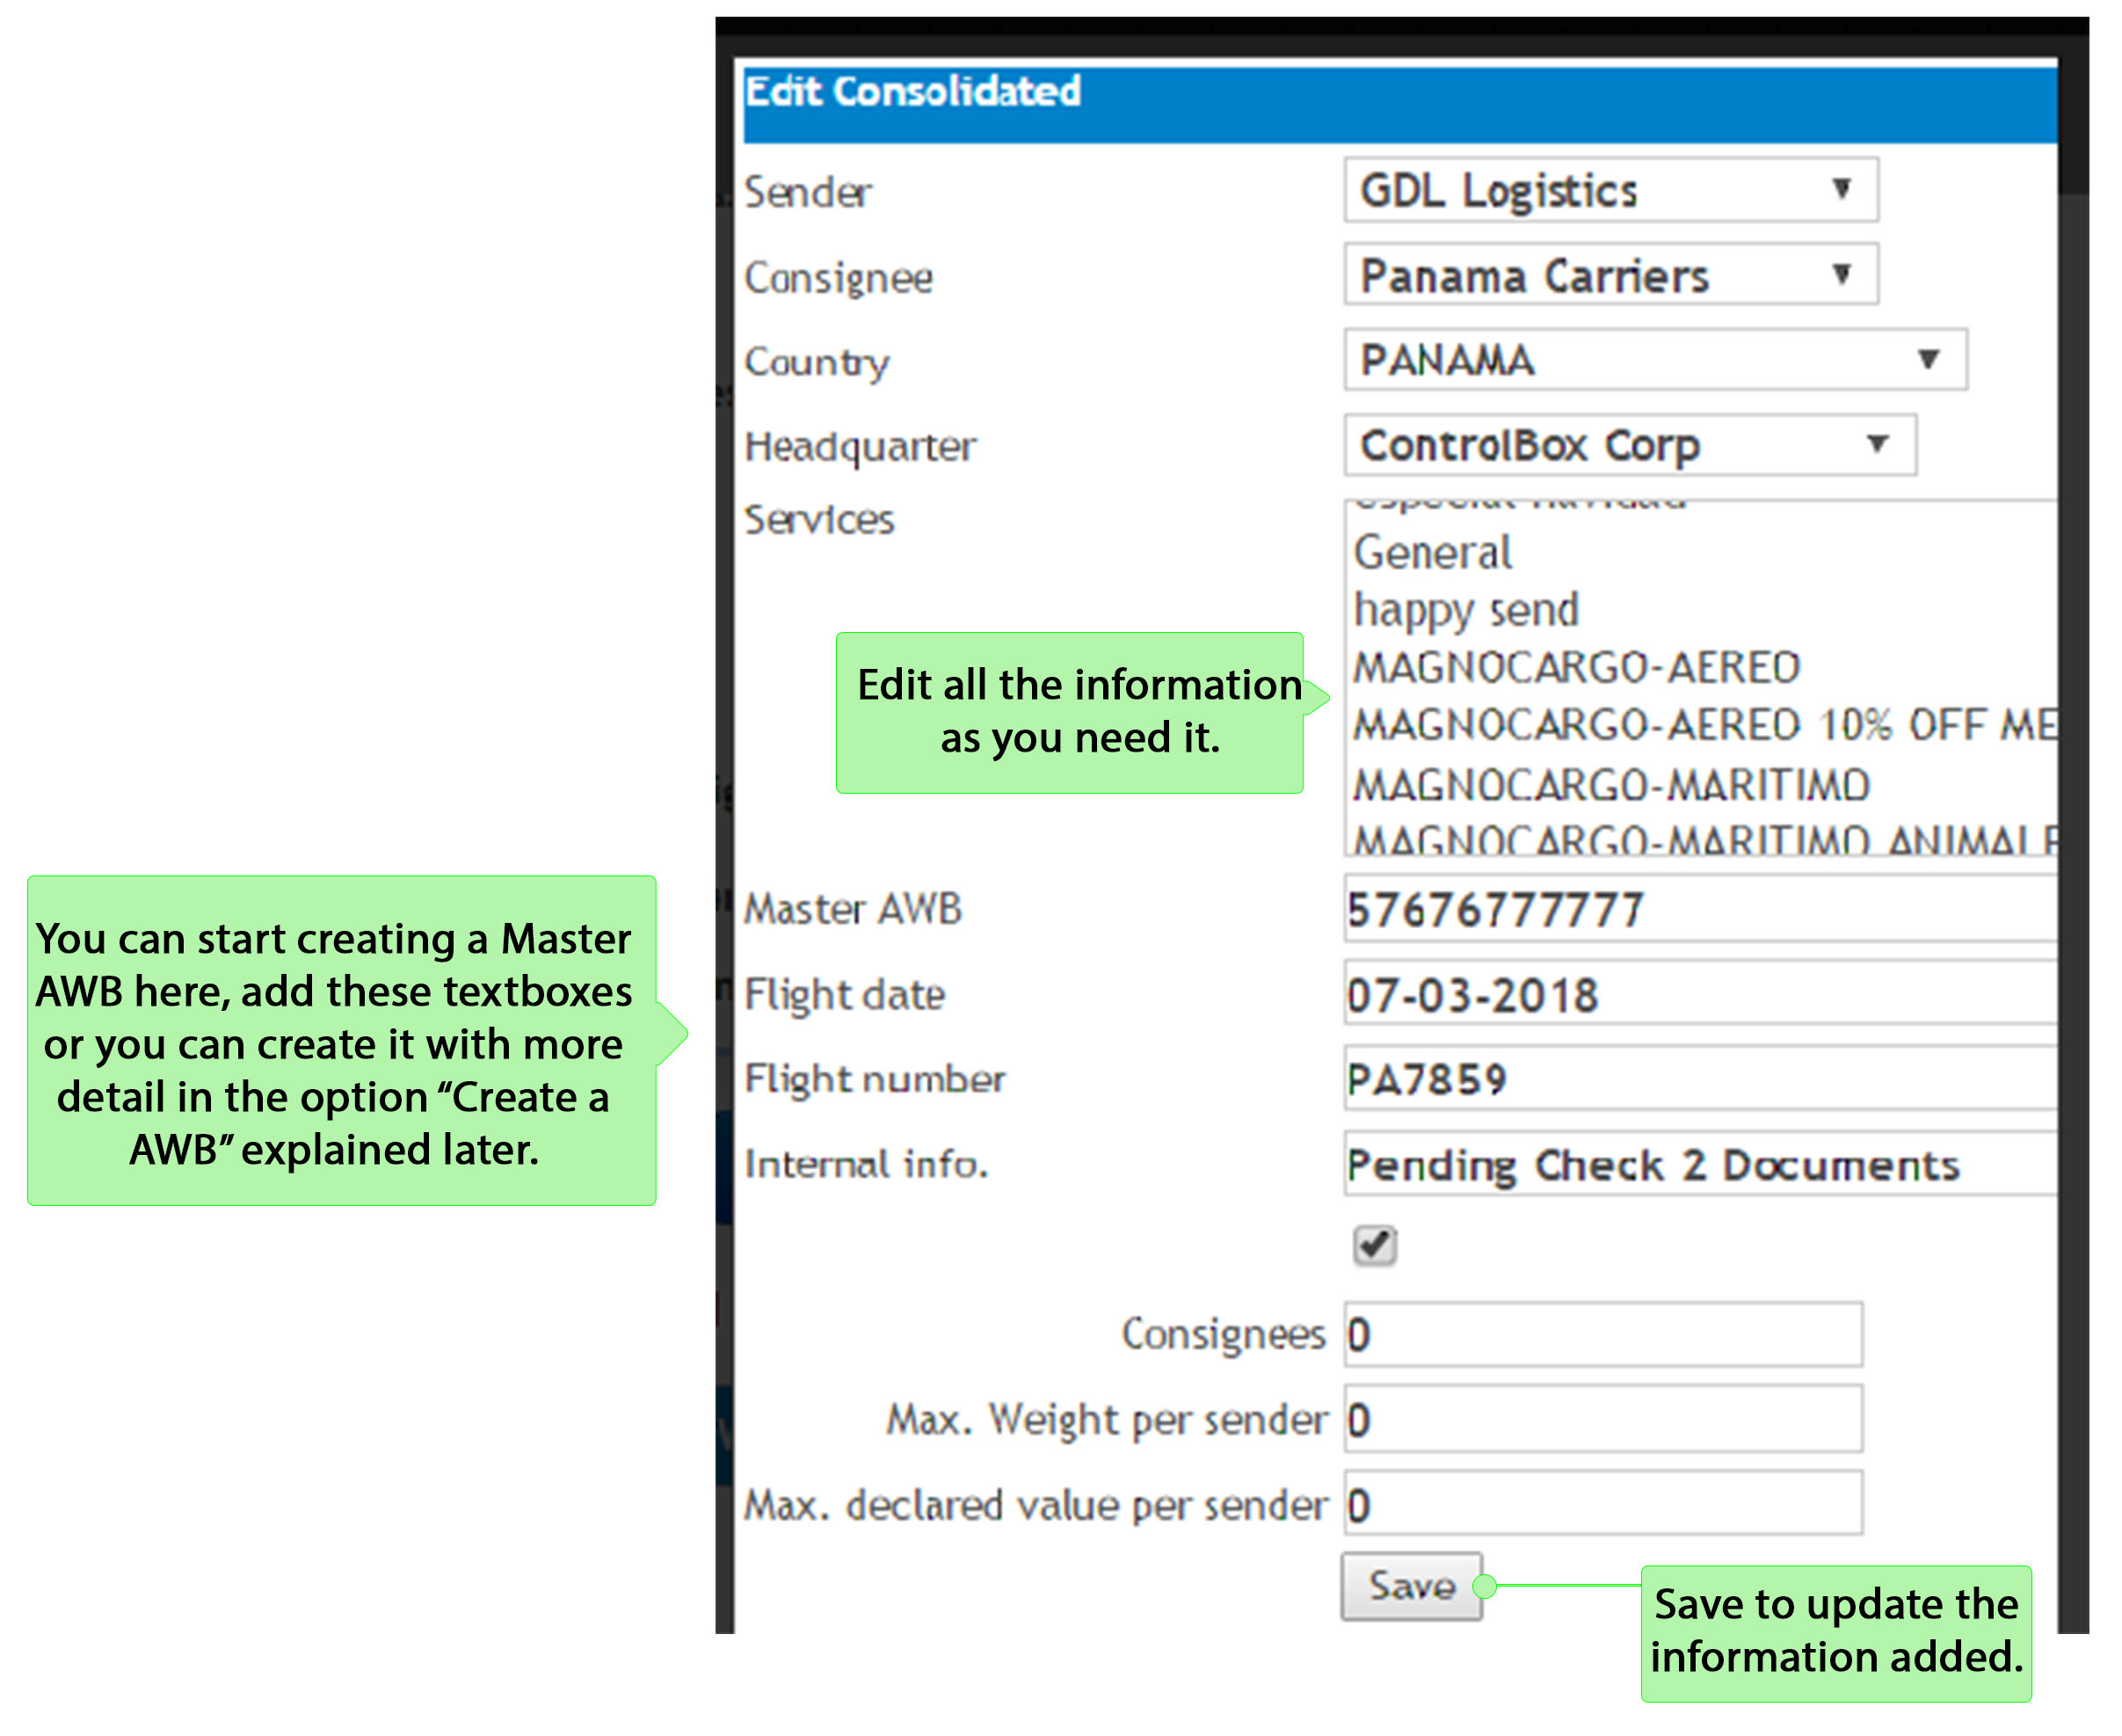
⇒ As you can see most of the options are the same as the 6.2 step, the additional option included is general information about the master AWB which can be modified, however it will be explained later with more detail in the option Create a AWB.
All the blank fields can be modified. As last step click on Save..
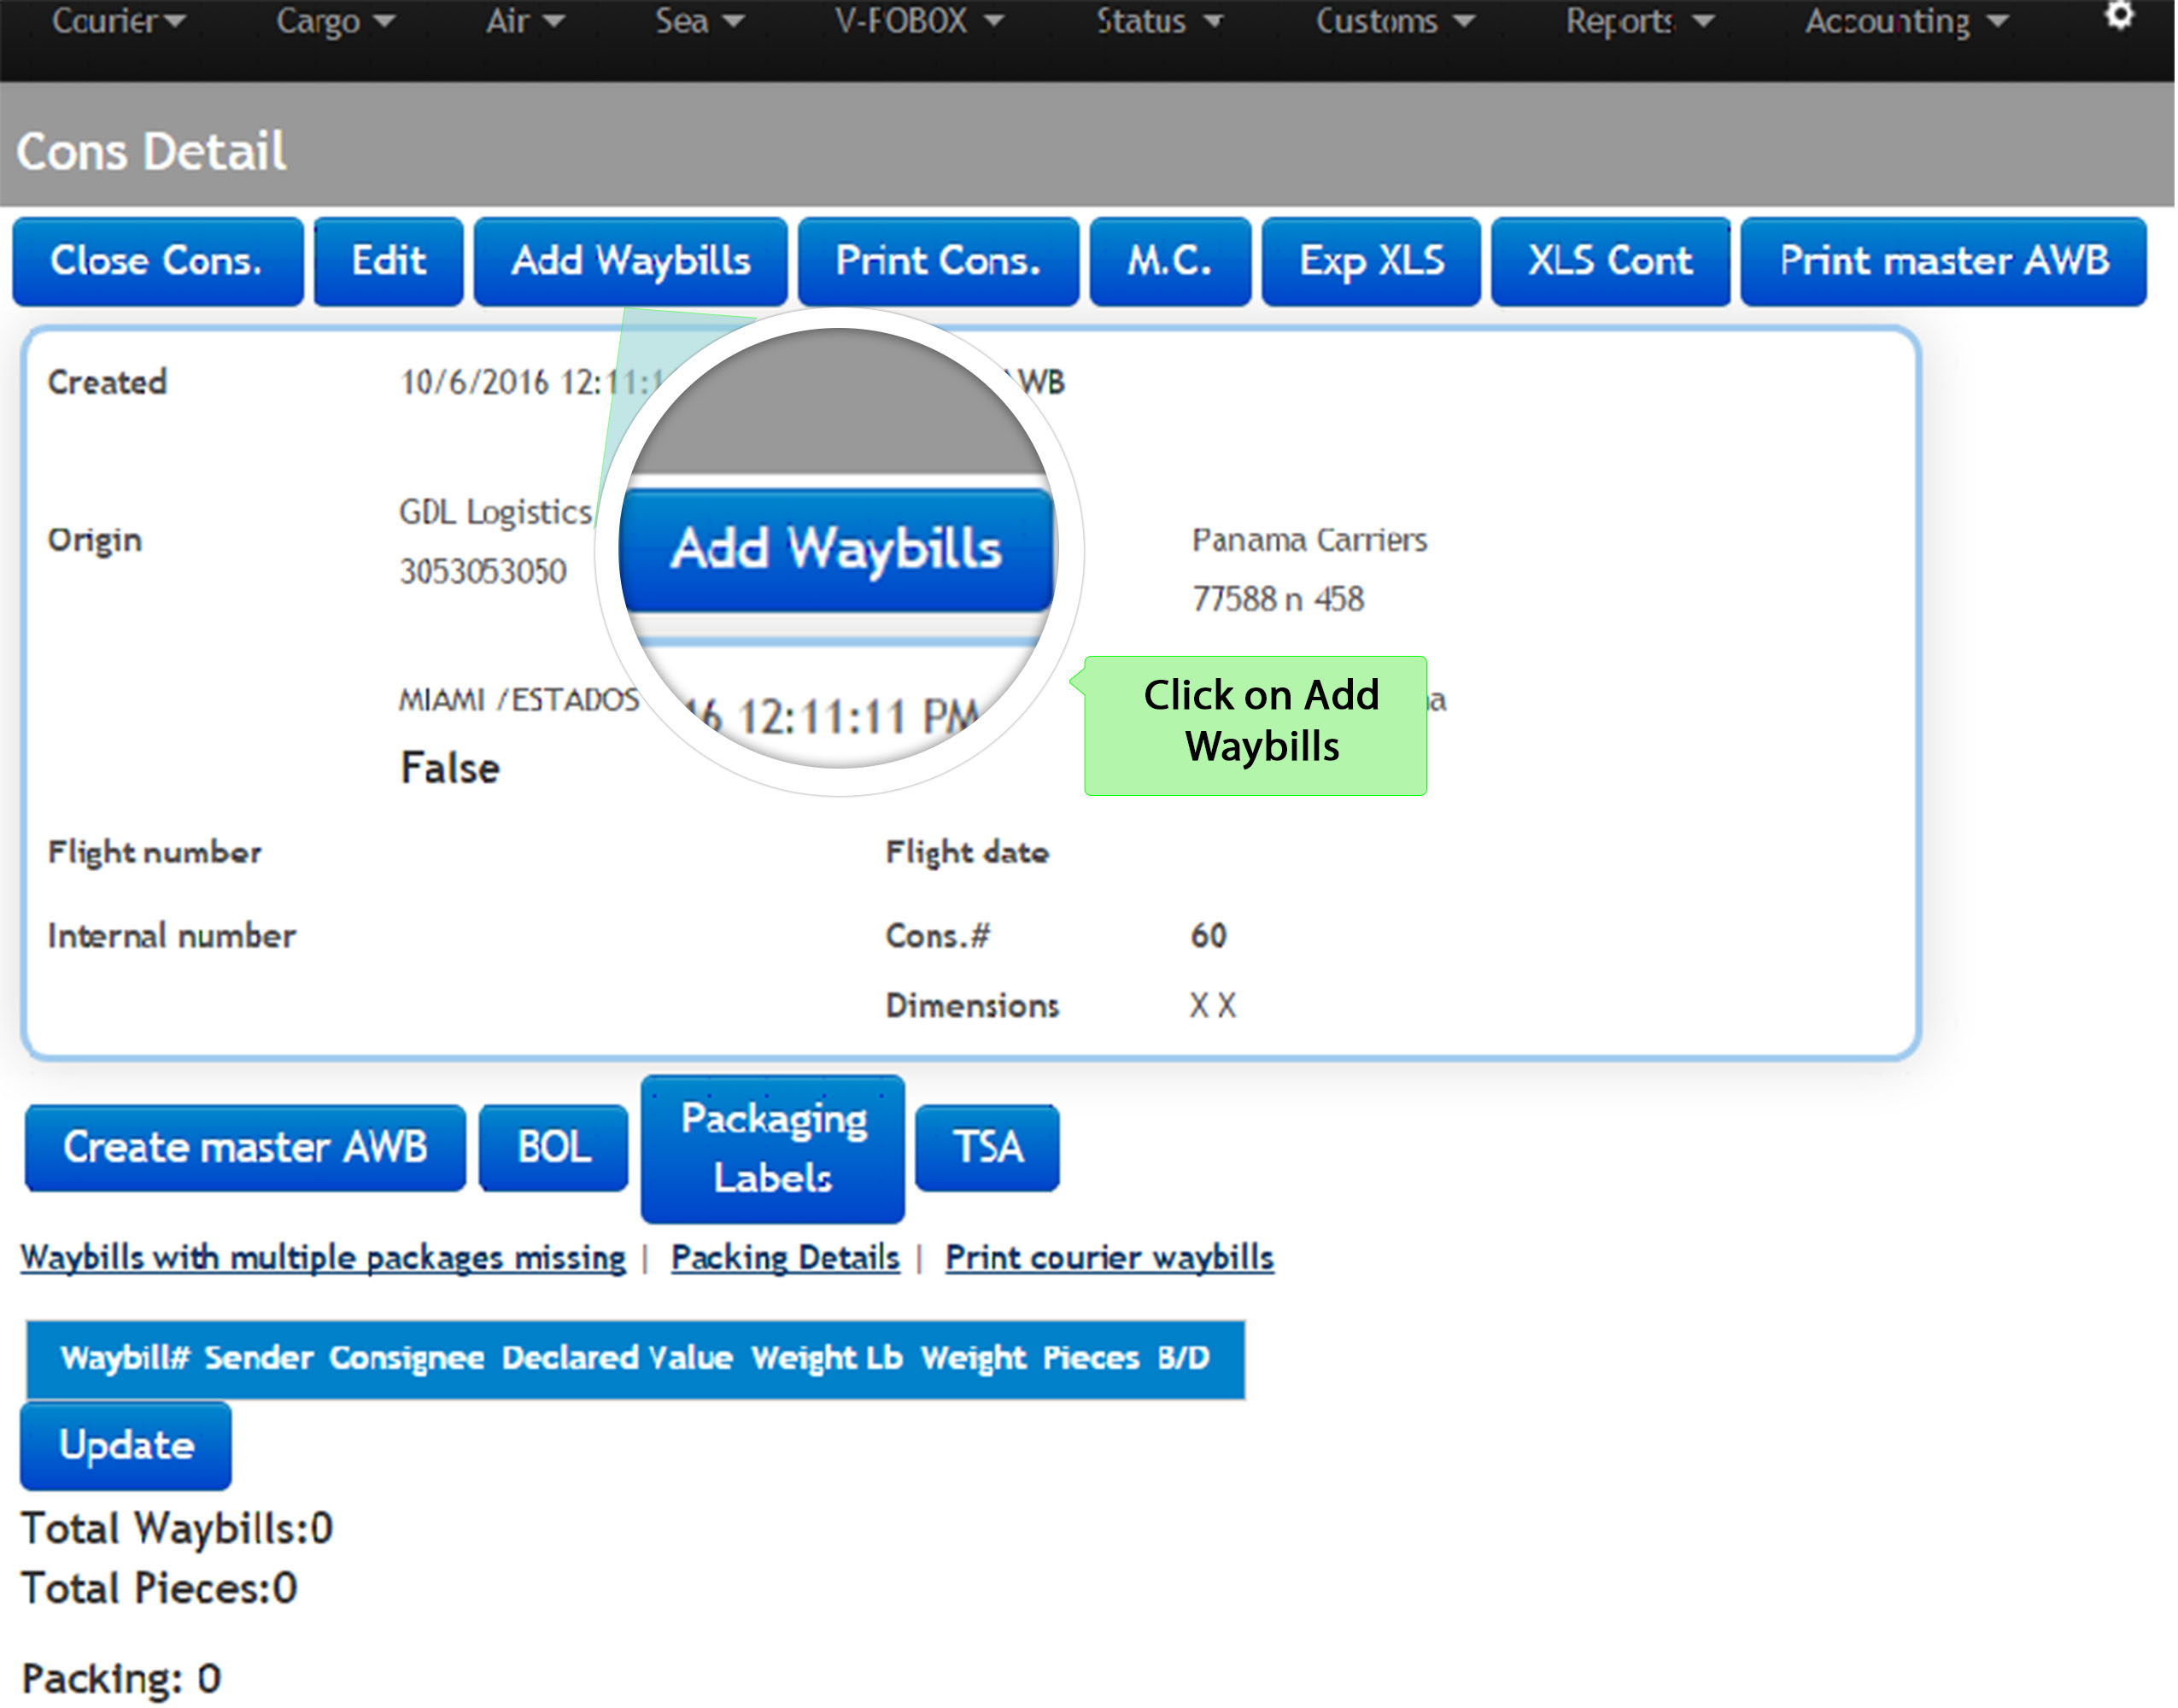
6.4 Once the consolidated is created, it's time to start adding courier waybills to your courier consolidated. For this, click on Add Waybills as shown bellow:
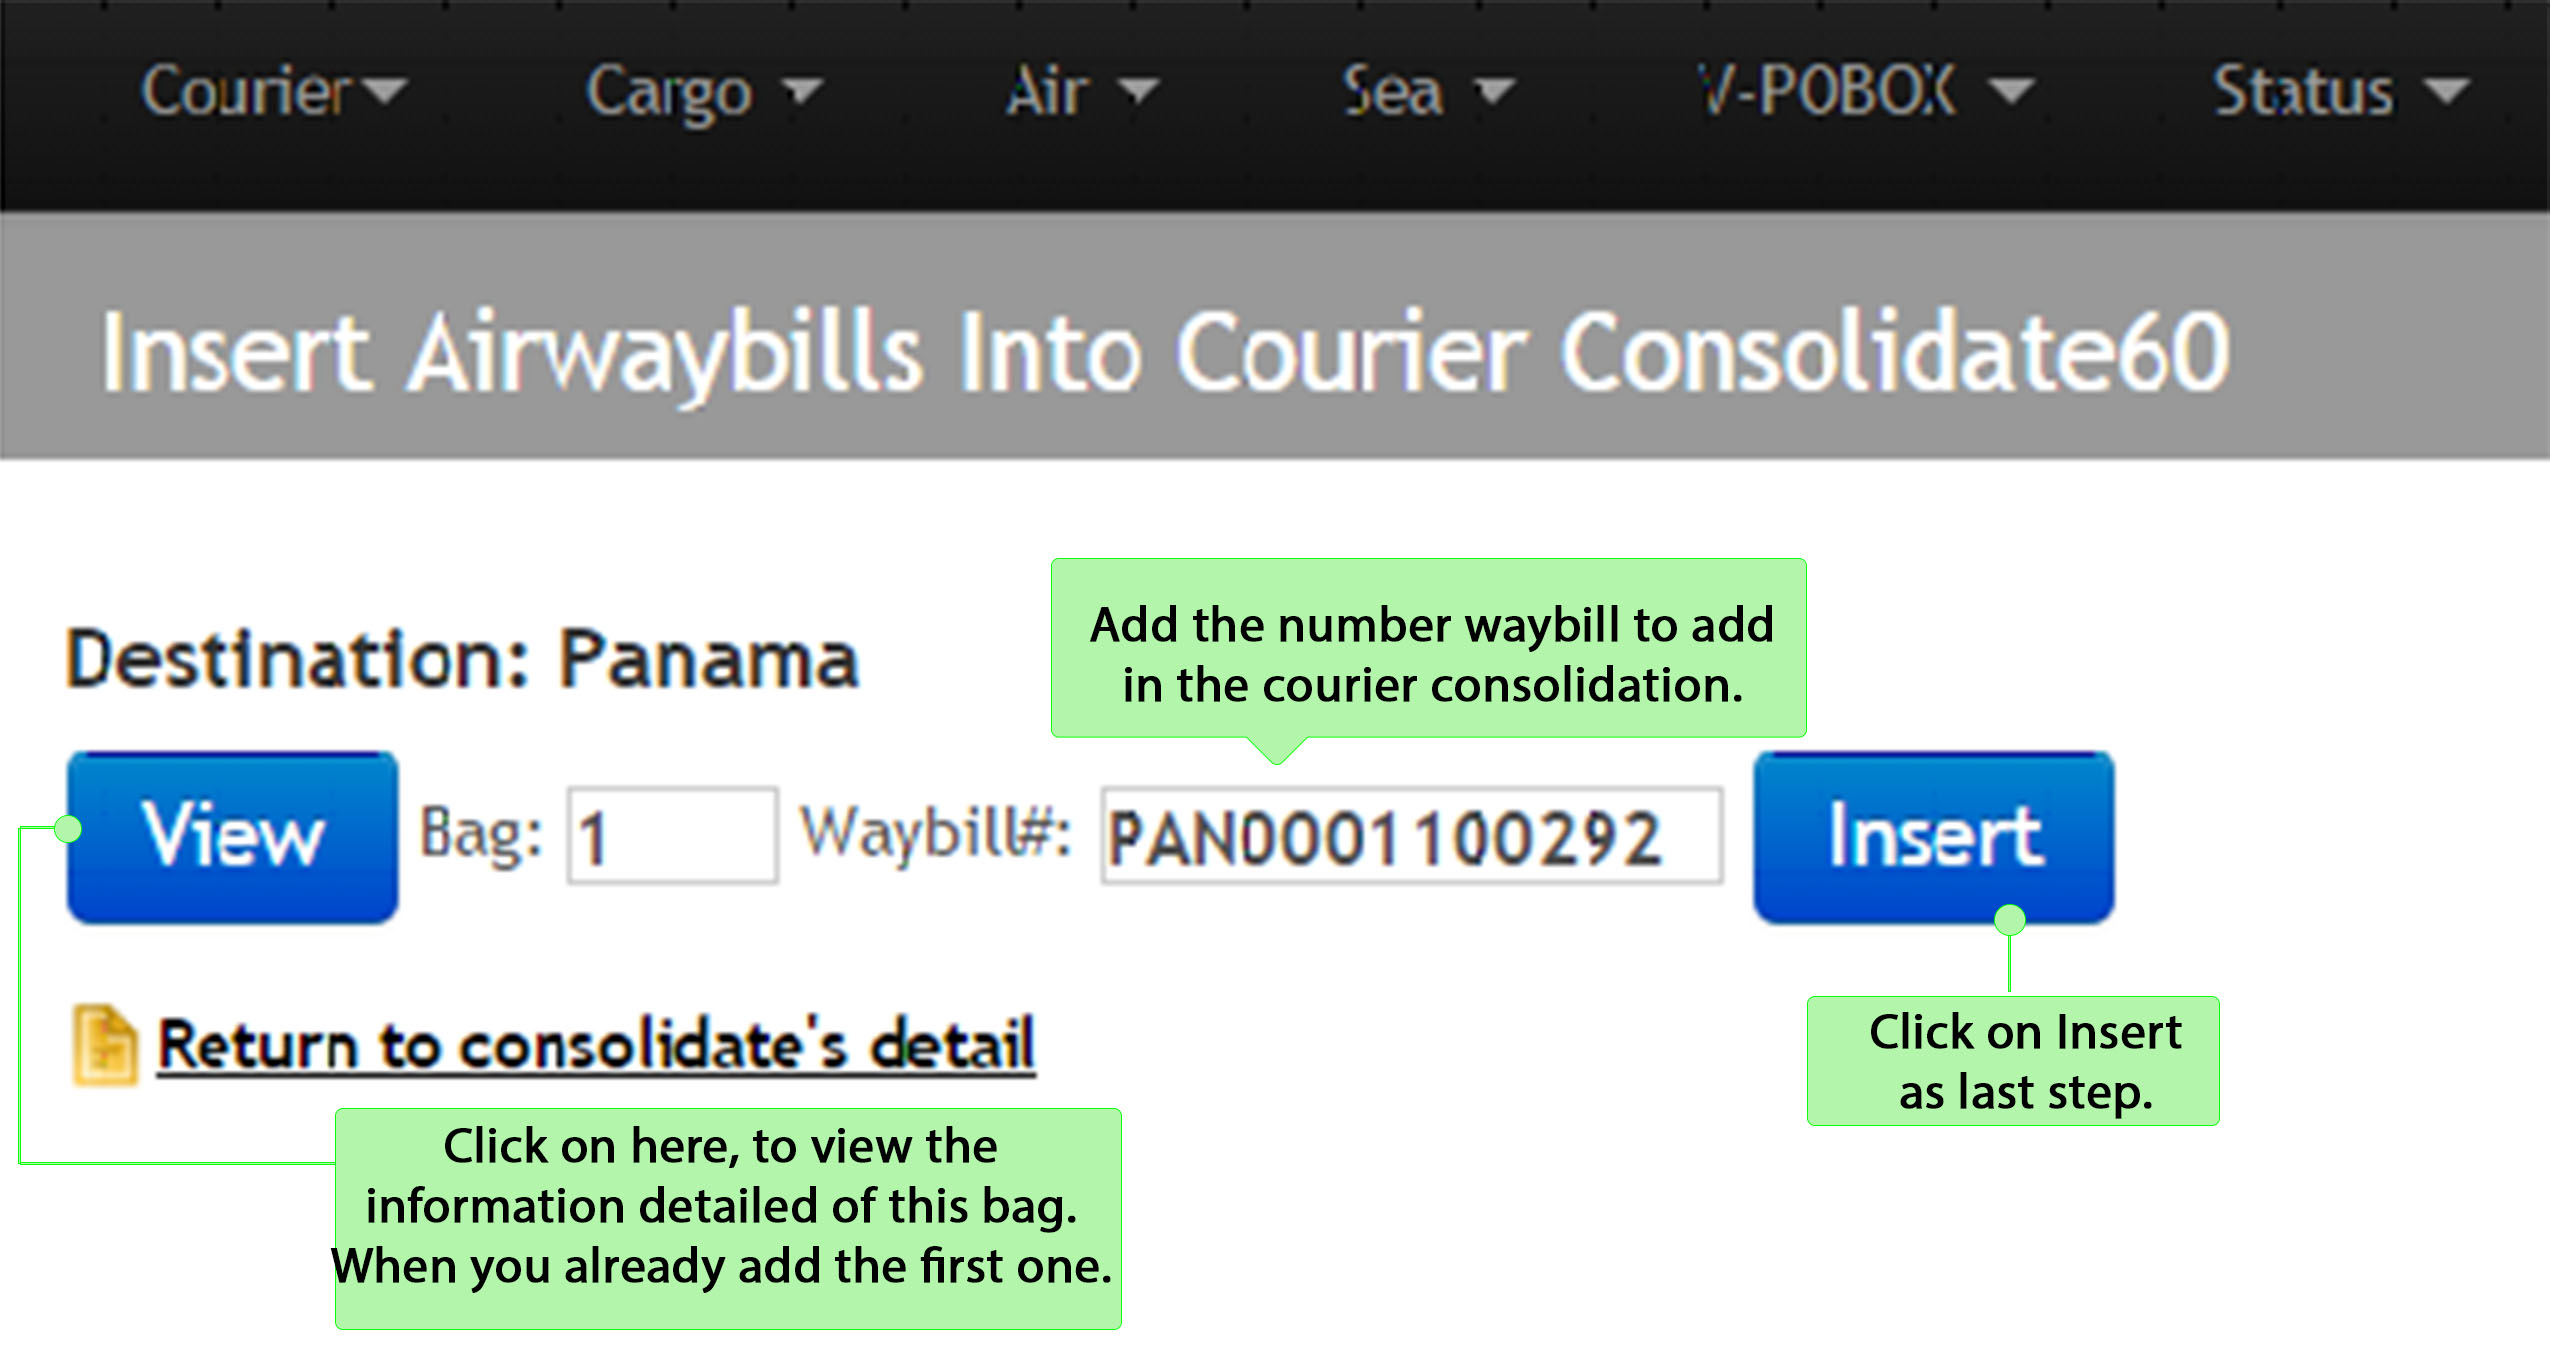
⇒ There are two ways to add a courier waybill: The first one is the manual way, you can copy and paste the waybill number and insert it. The second option is possible with a scanner, you can scan the bar code and it will appear in the text box. Assign a number to the bag where you can insert as many courier waybills as you need.
Once the necessary waybills are inserted, click on View to see all the waybills that belong to an specific bag.
Follow the instructions as shown bellow:
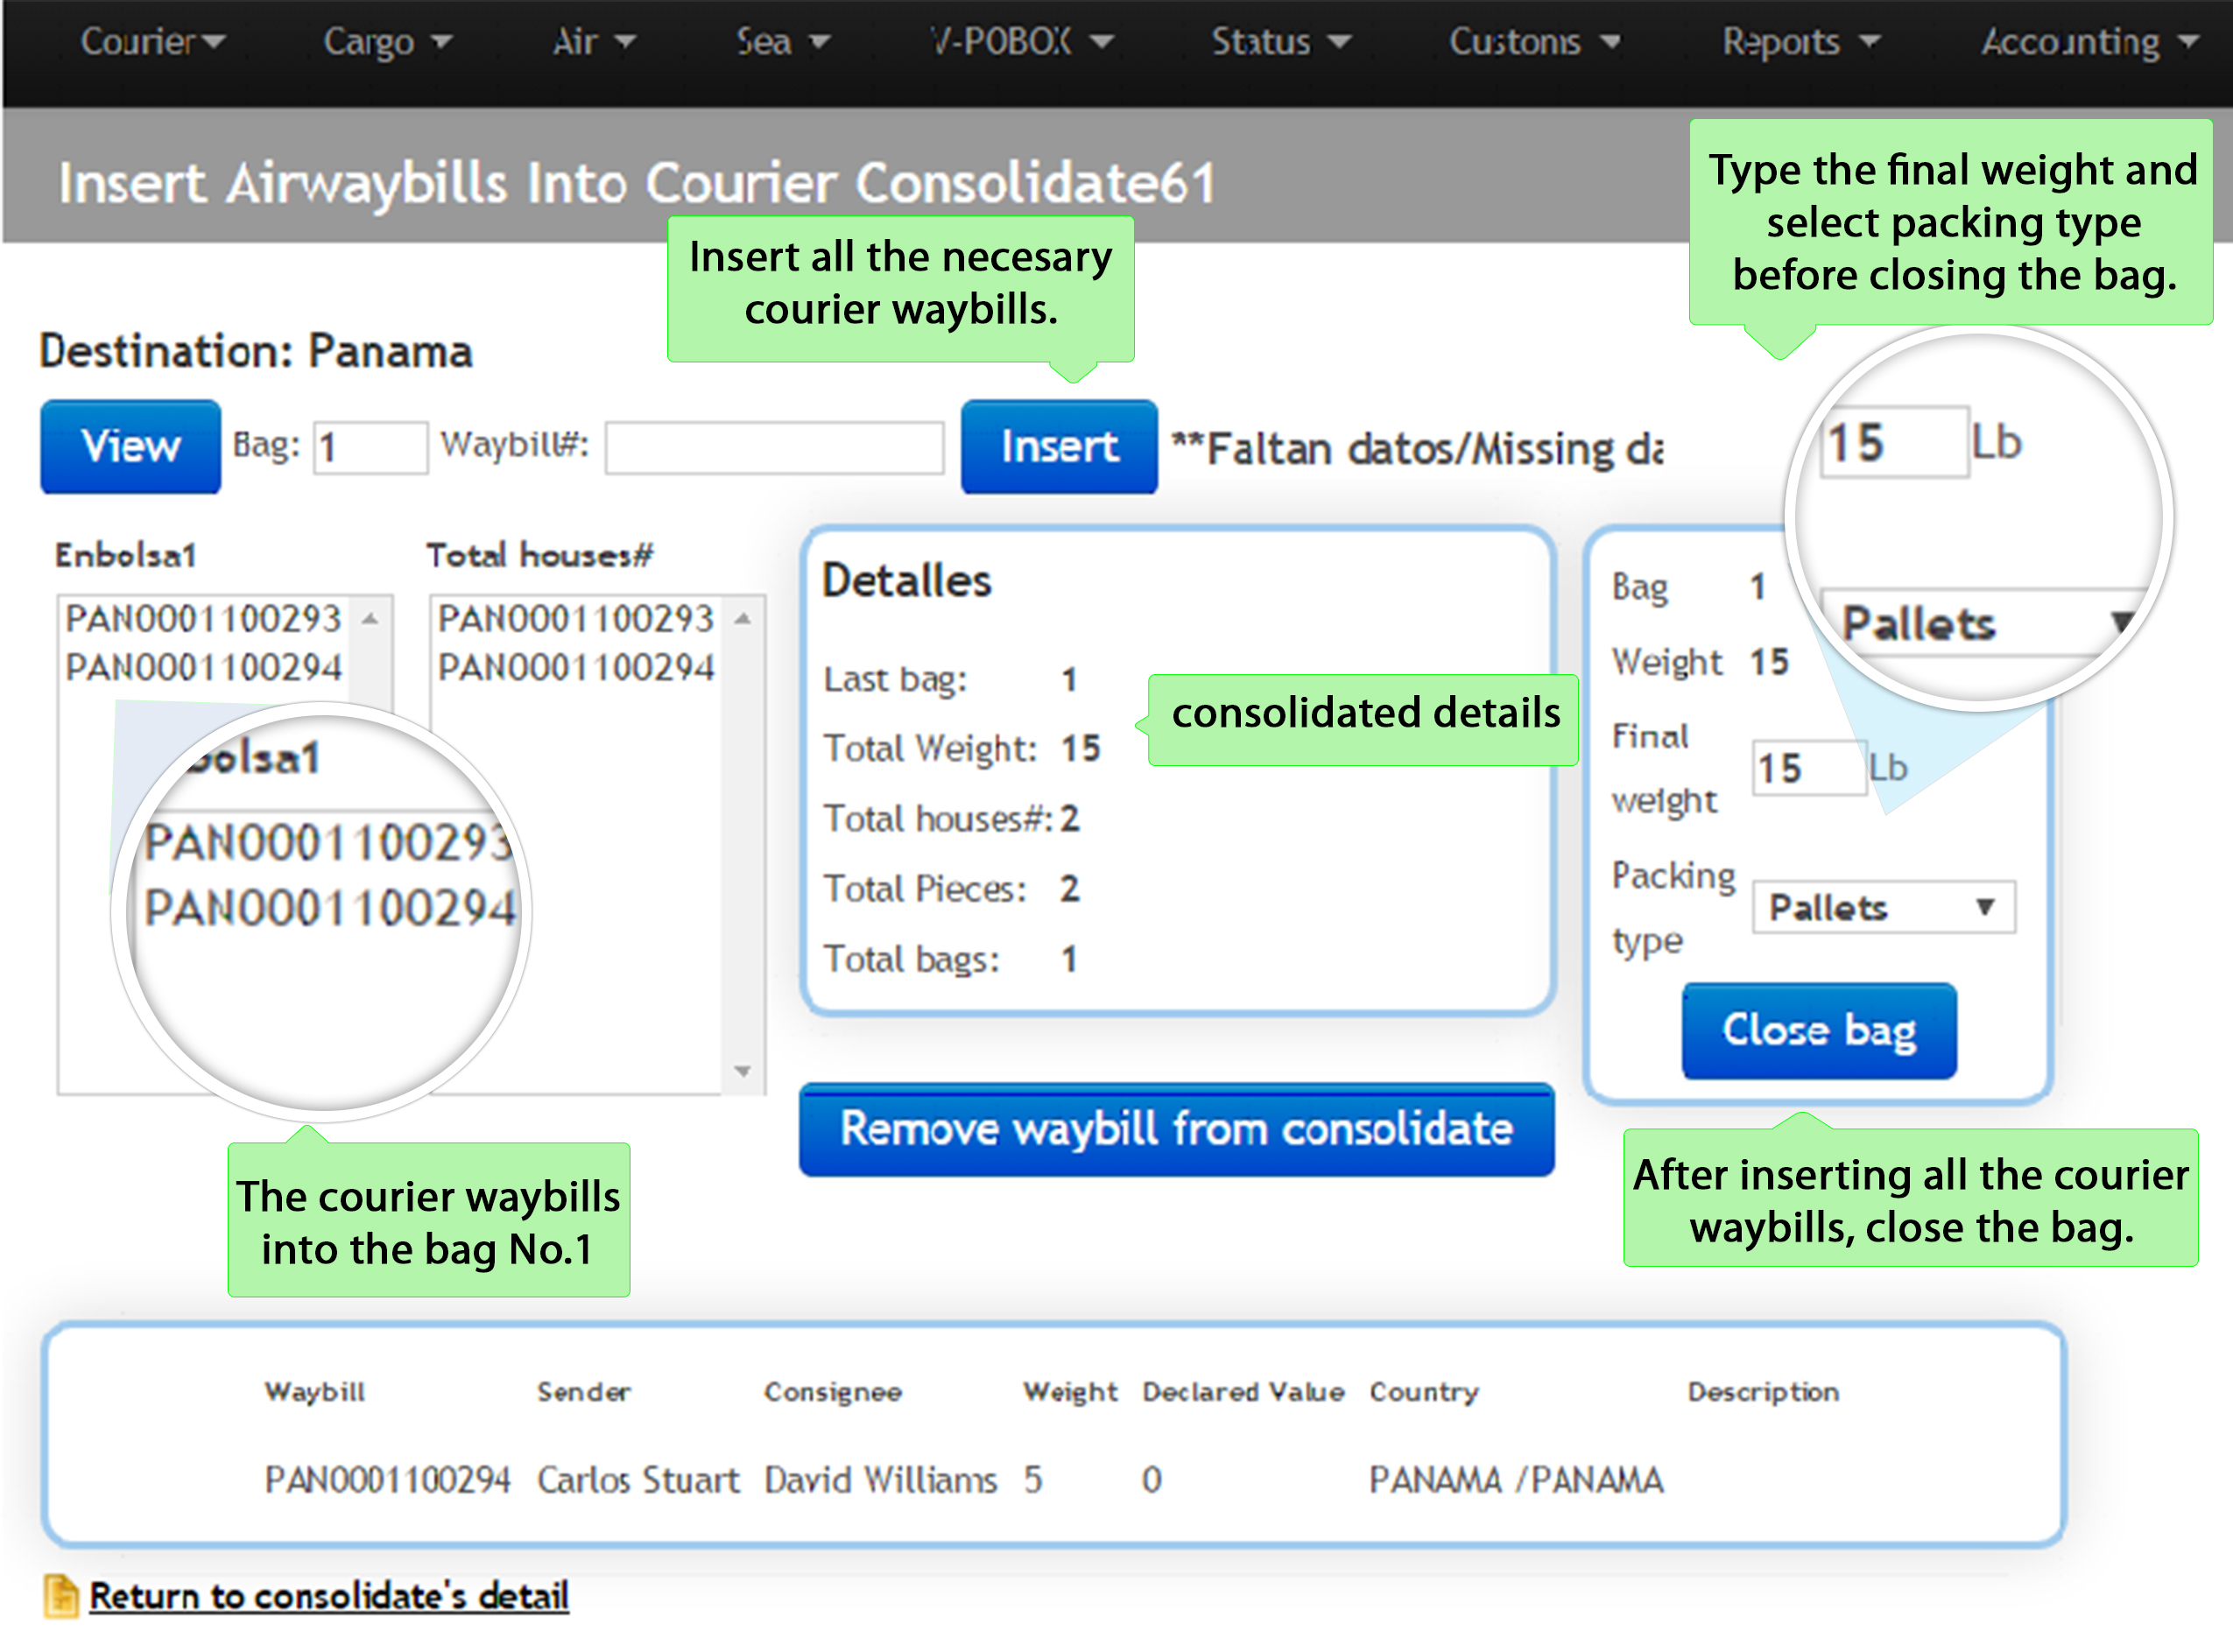
⇒ After clicking on Insert, you will see detailed information of the consolidated. On the left side you will see the number of waybills added to the bag, on the right side you will be able to choose the Final Weight and the Packing type of the current bag.
After doing this, it is time to close the bag, remember that if you need to add a new waybill in a bag previously closed, you just have to open it and add the courier waybill, then close the bag again and click on Return to consolidate´s detail as follows:
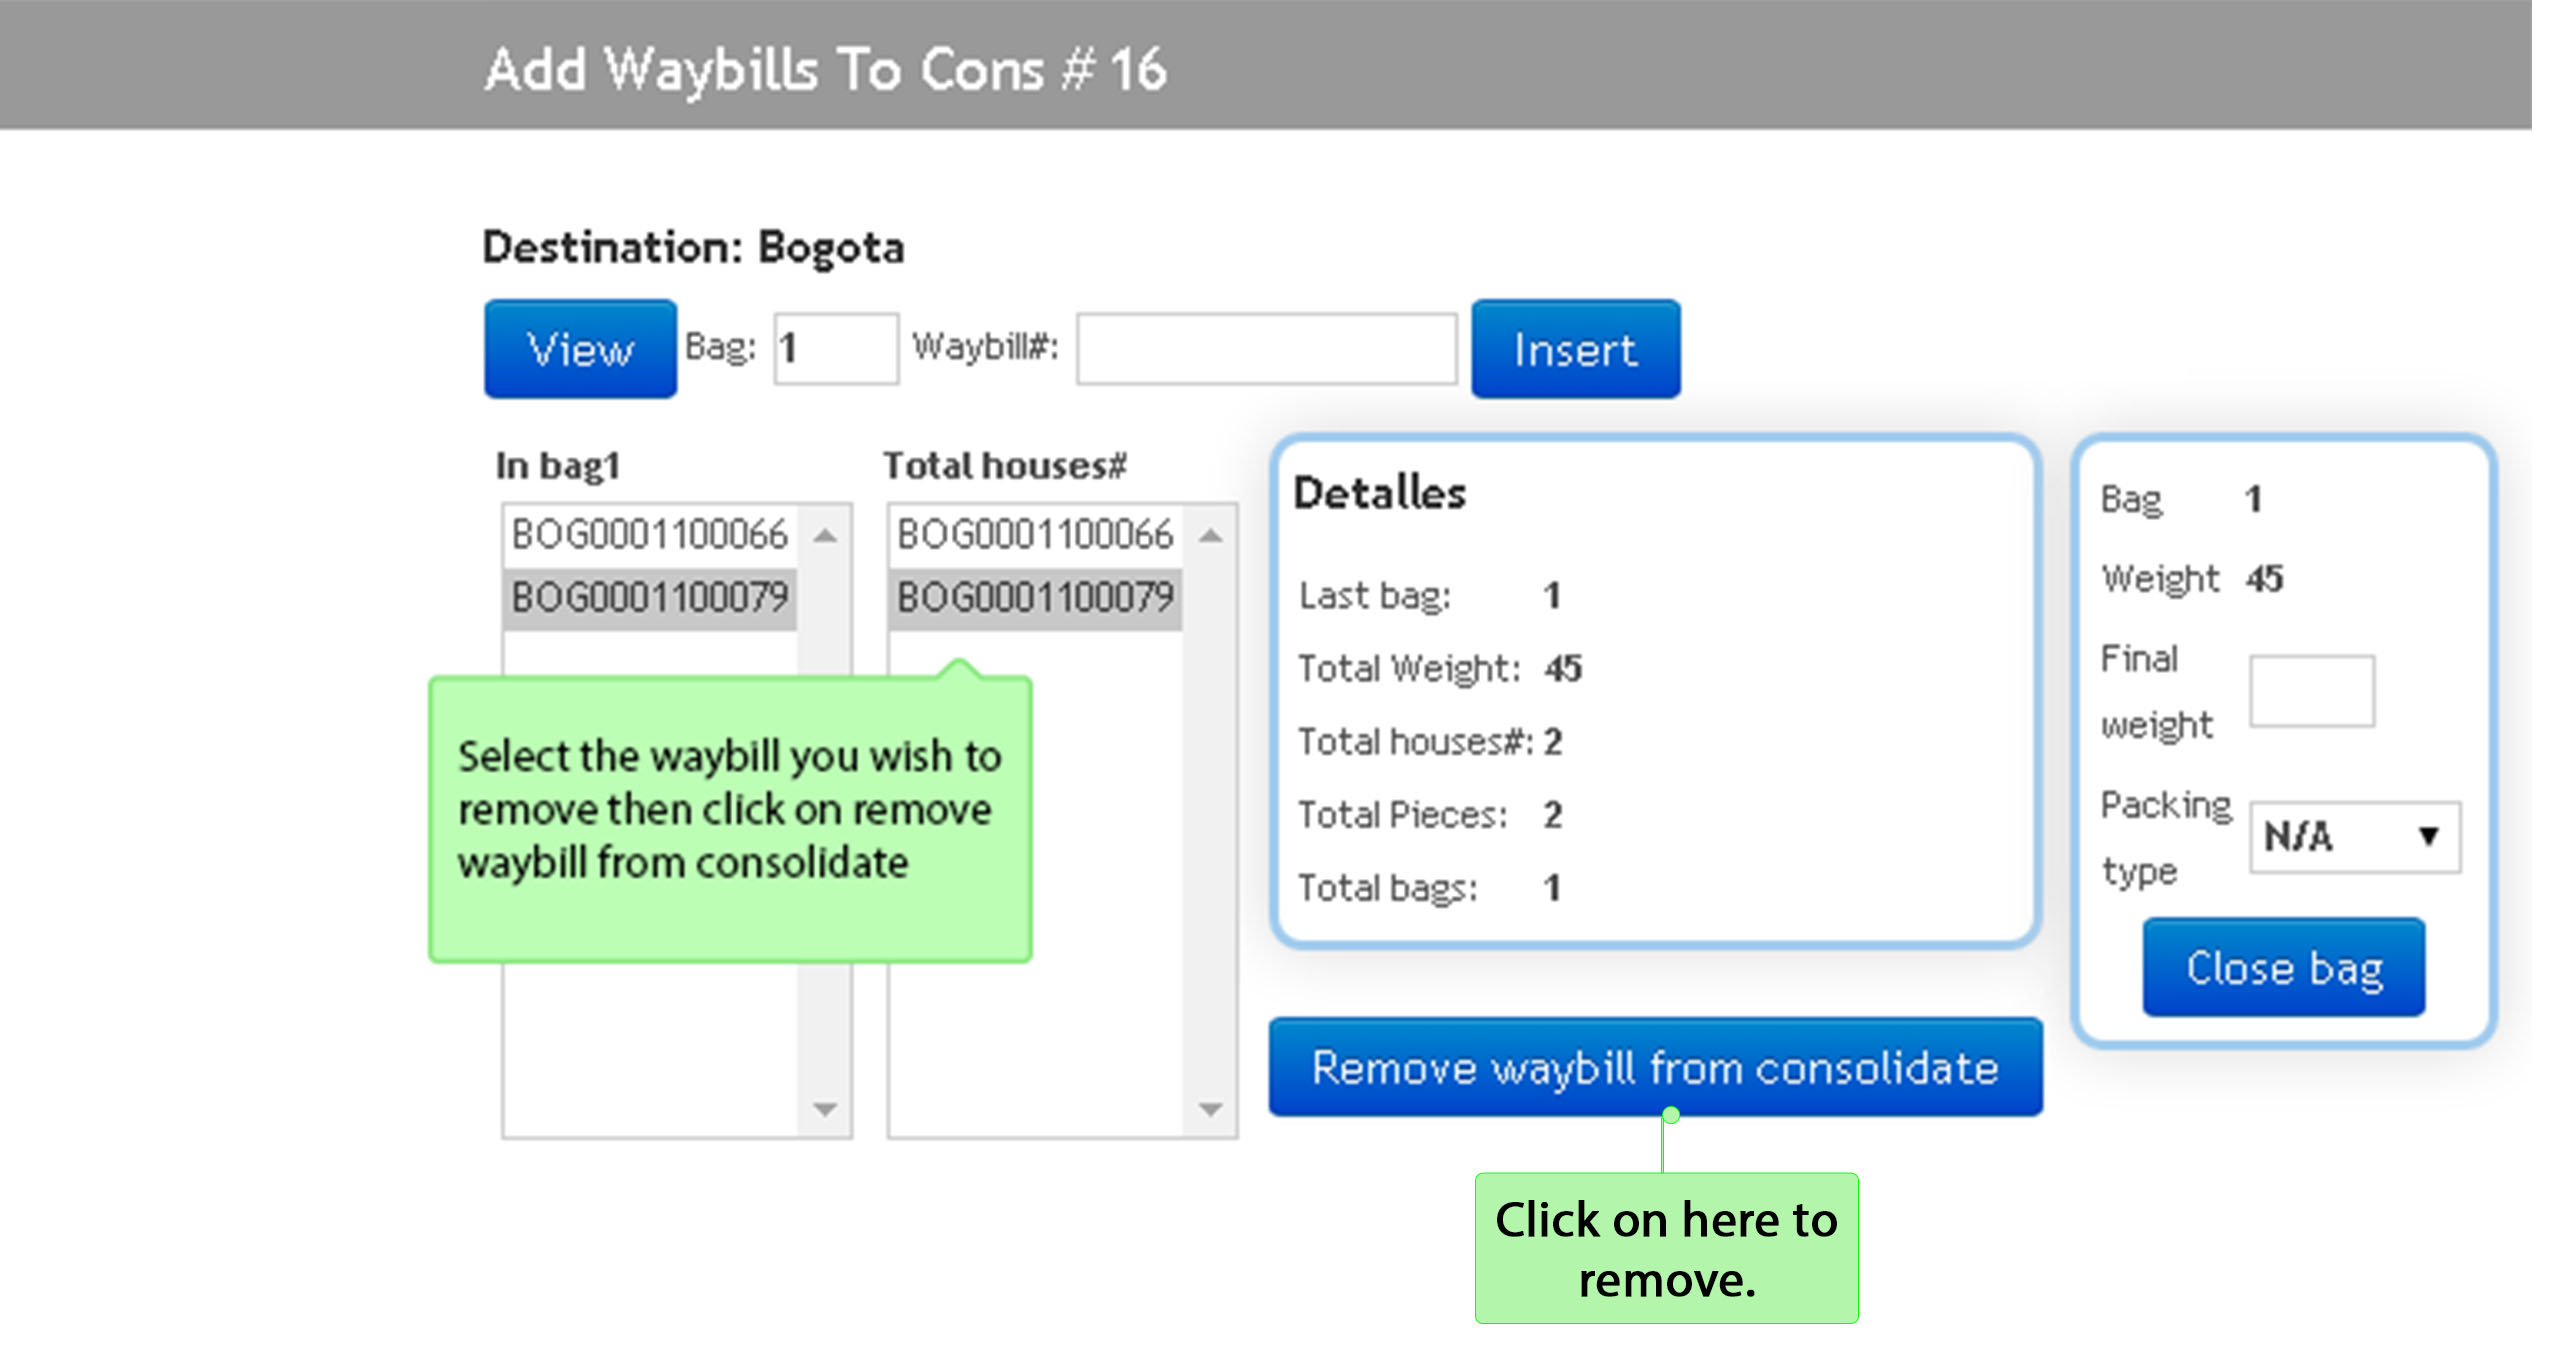
⇒ In case you want to remove a waybill from consolidate, simply select the waybill in the list Total Houses#, once selected click on Remove waybill from consolidate. This waybill will be removed immediately from the consolidate and from the totals that can be seen on the page.
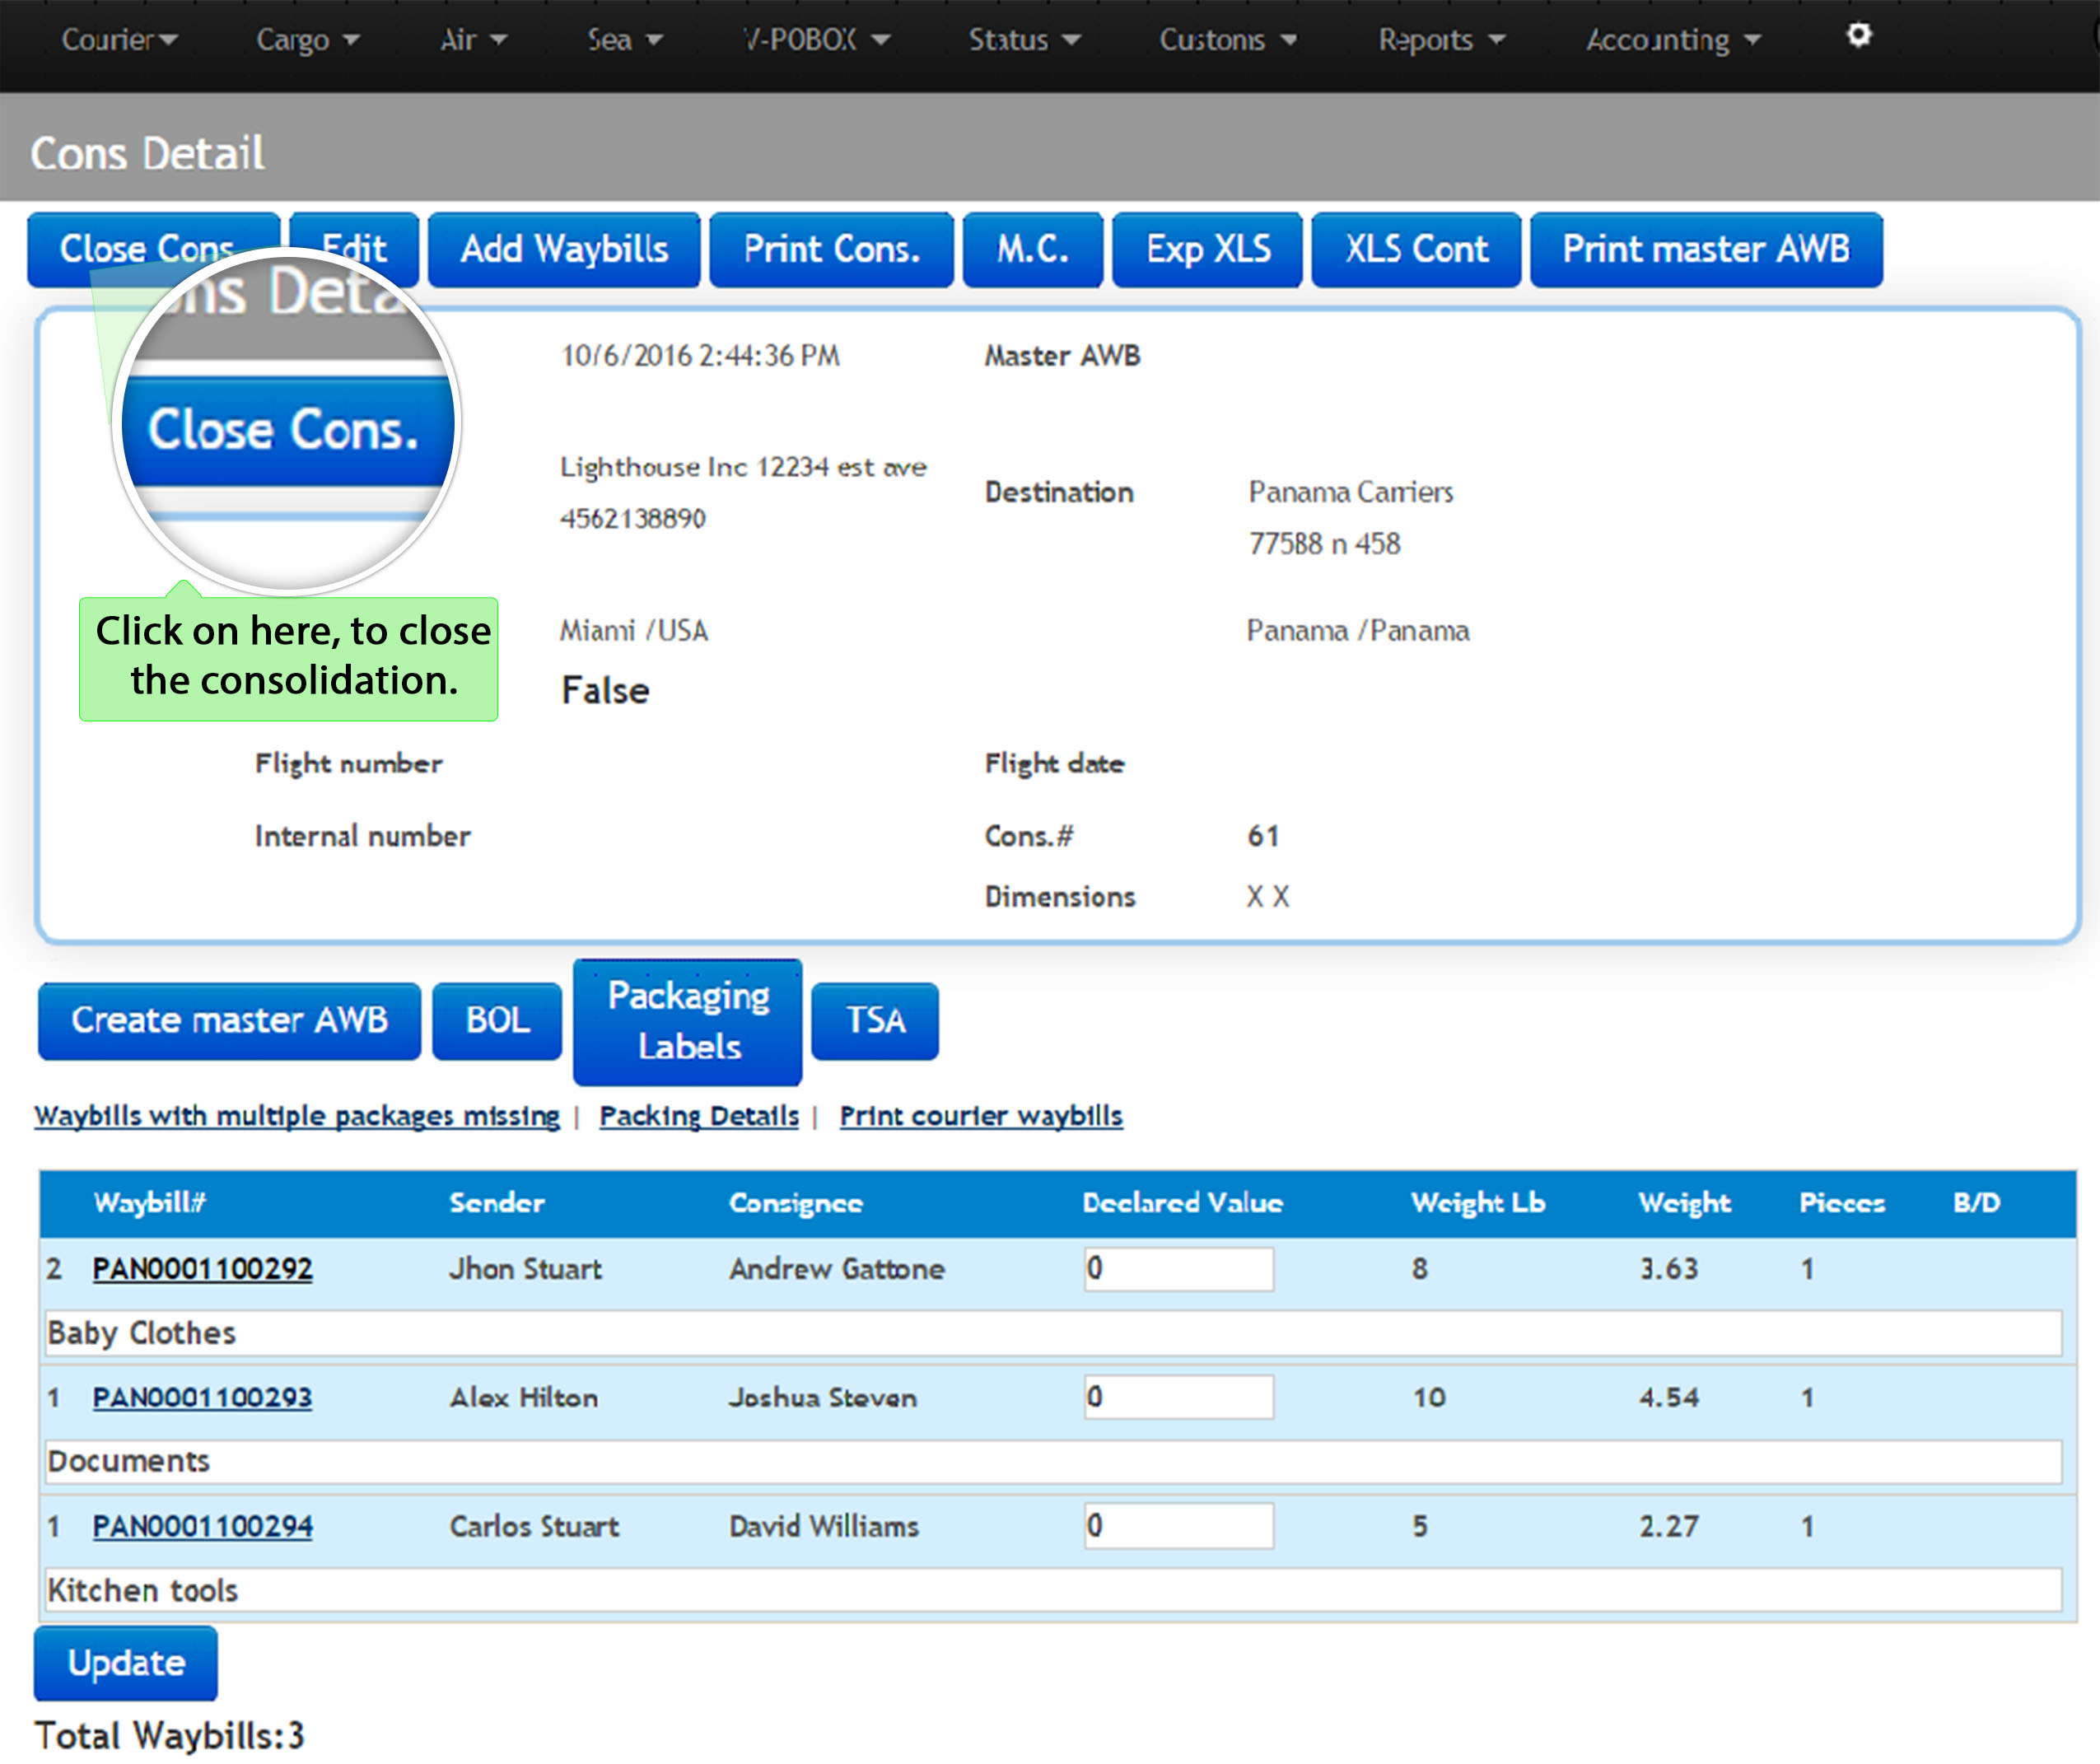
6.5 After adding and closing all the bags, it is time to close the consolidation. Once you close the consolidation you can open it back if you need it. The following image shows how to close it, and every time you search the consolidation instead of finding the option Close you will find the option Open
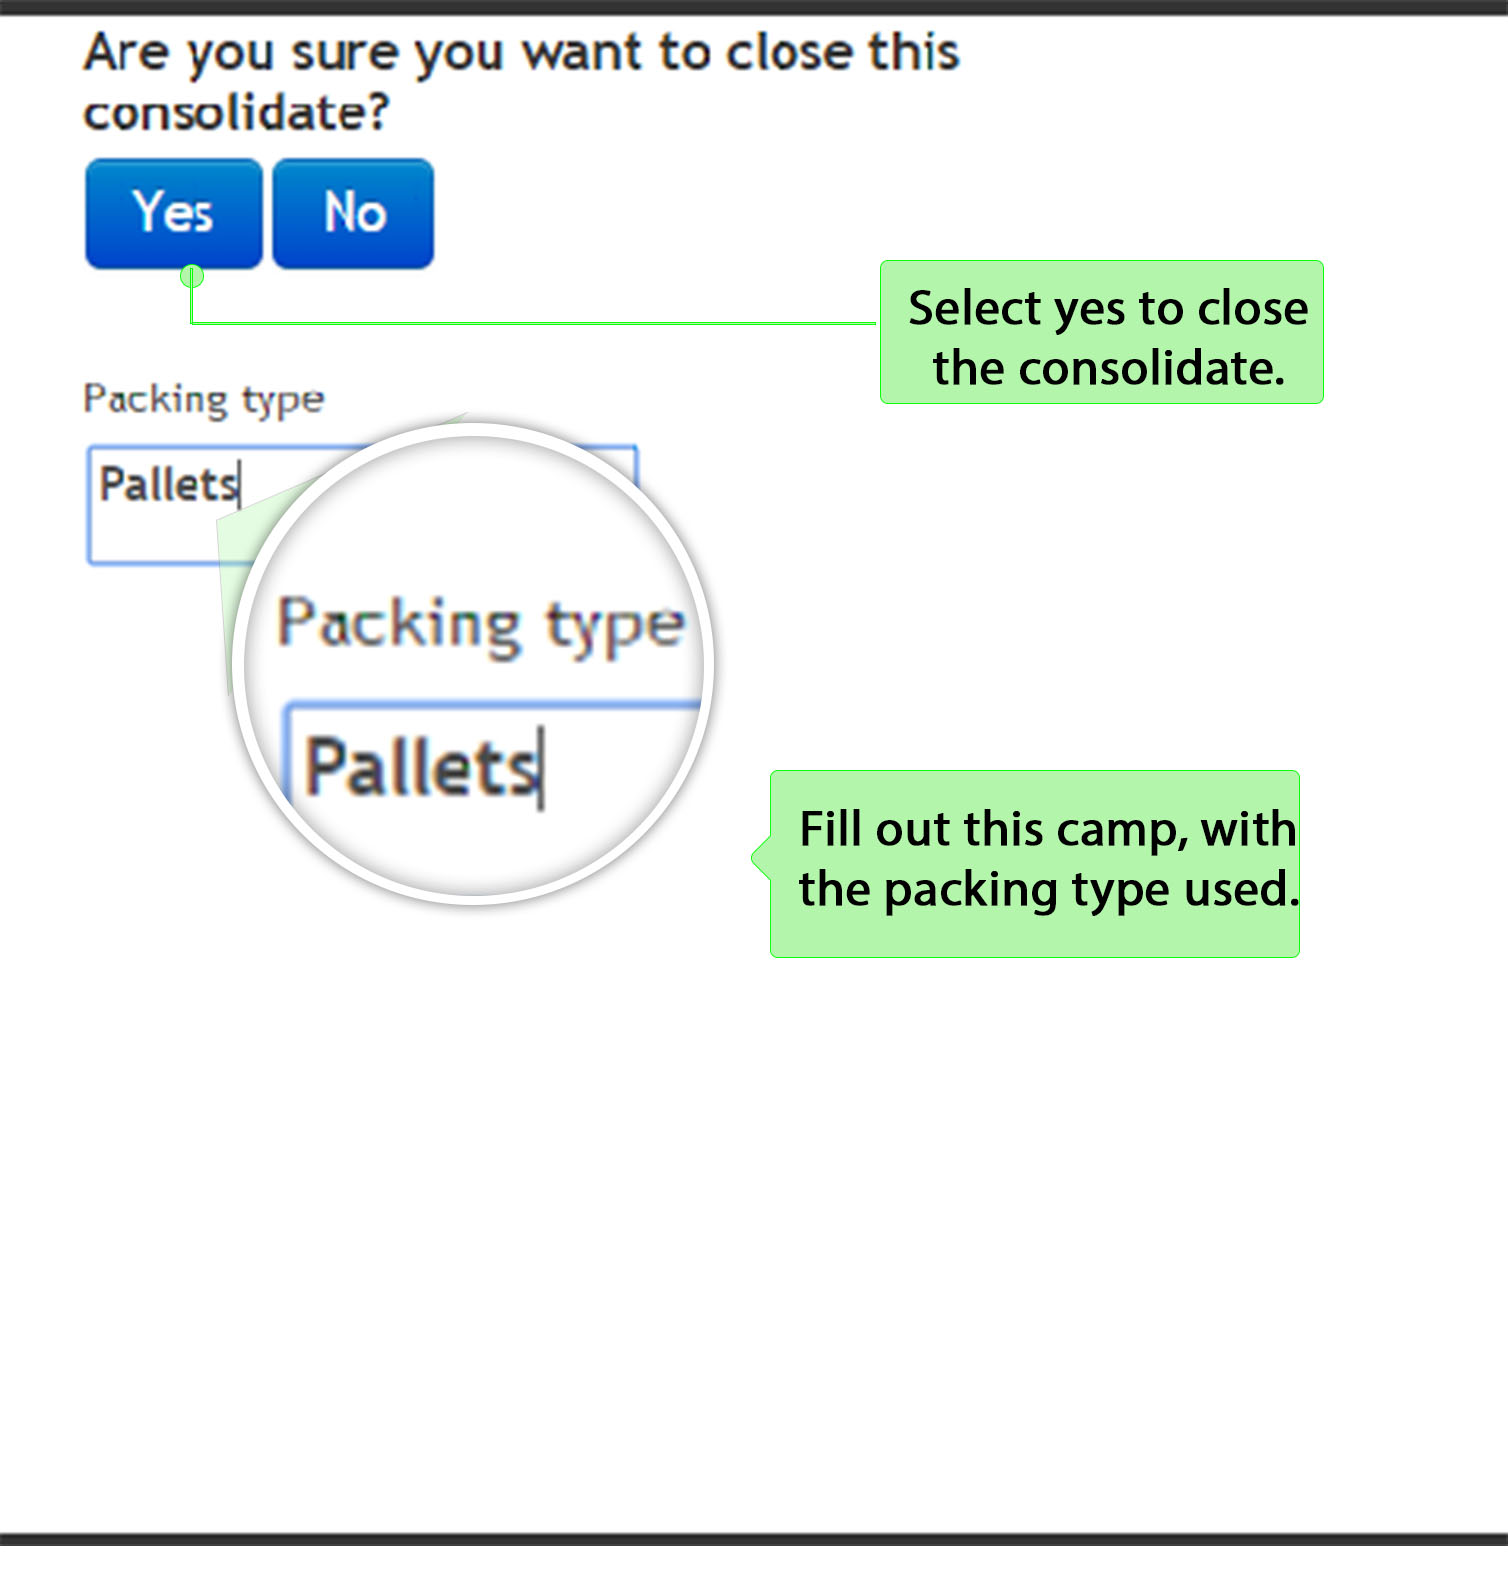
⇒ Next, the browser will display a window with the following question to make sure that you want to close the consolidated. Also fill out the packing type as shown bellow:
6.6 Once the consolidated is ready and you go back to the consolidate's detail, at the bottom of the page you will find the courier waybills added before, each one has two text boxes that you can edit and the bag number will be in the left side . To continue follow the next instructions as follows:
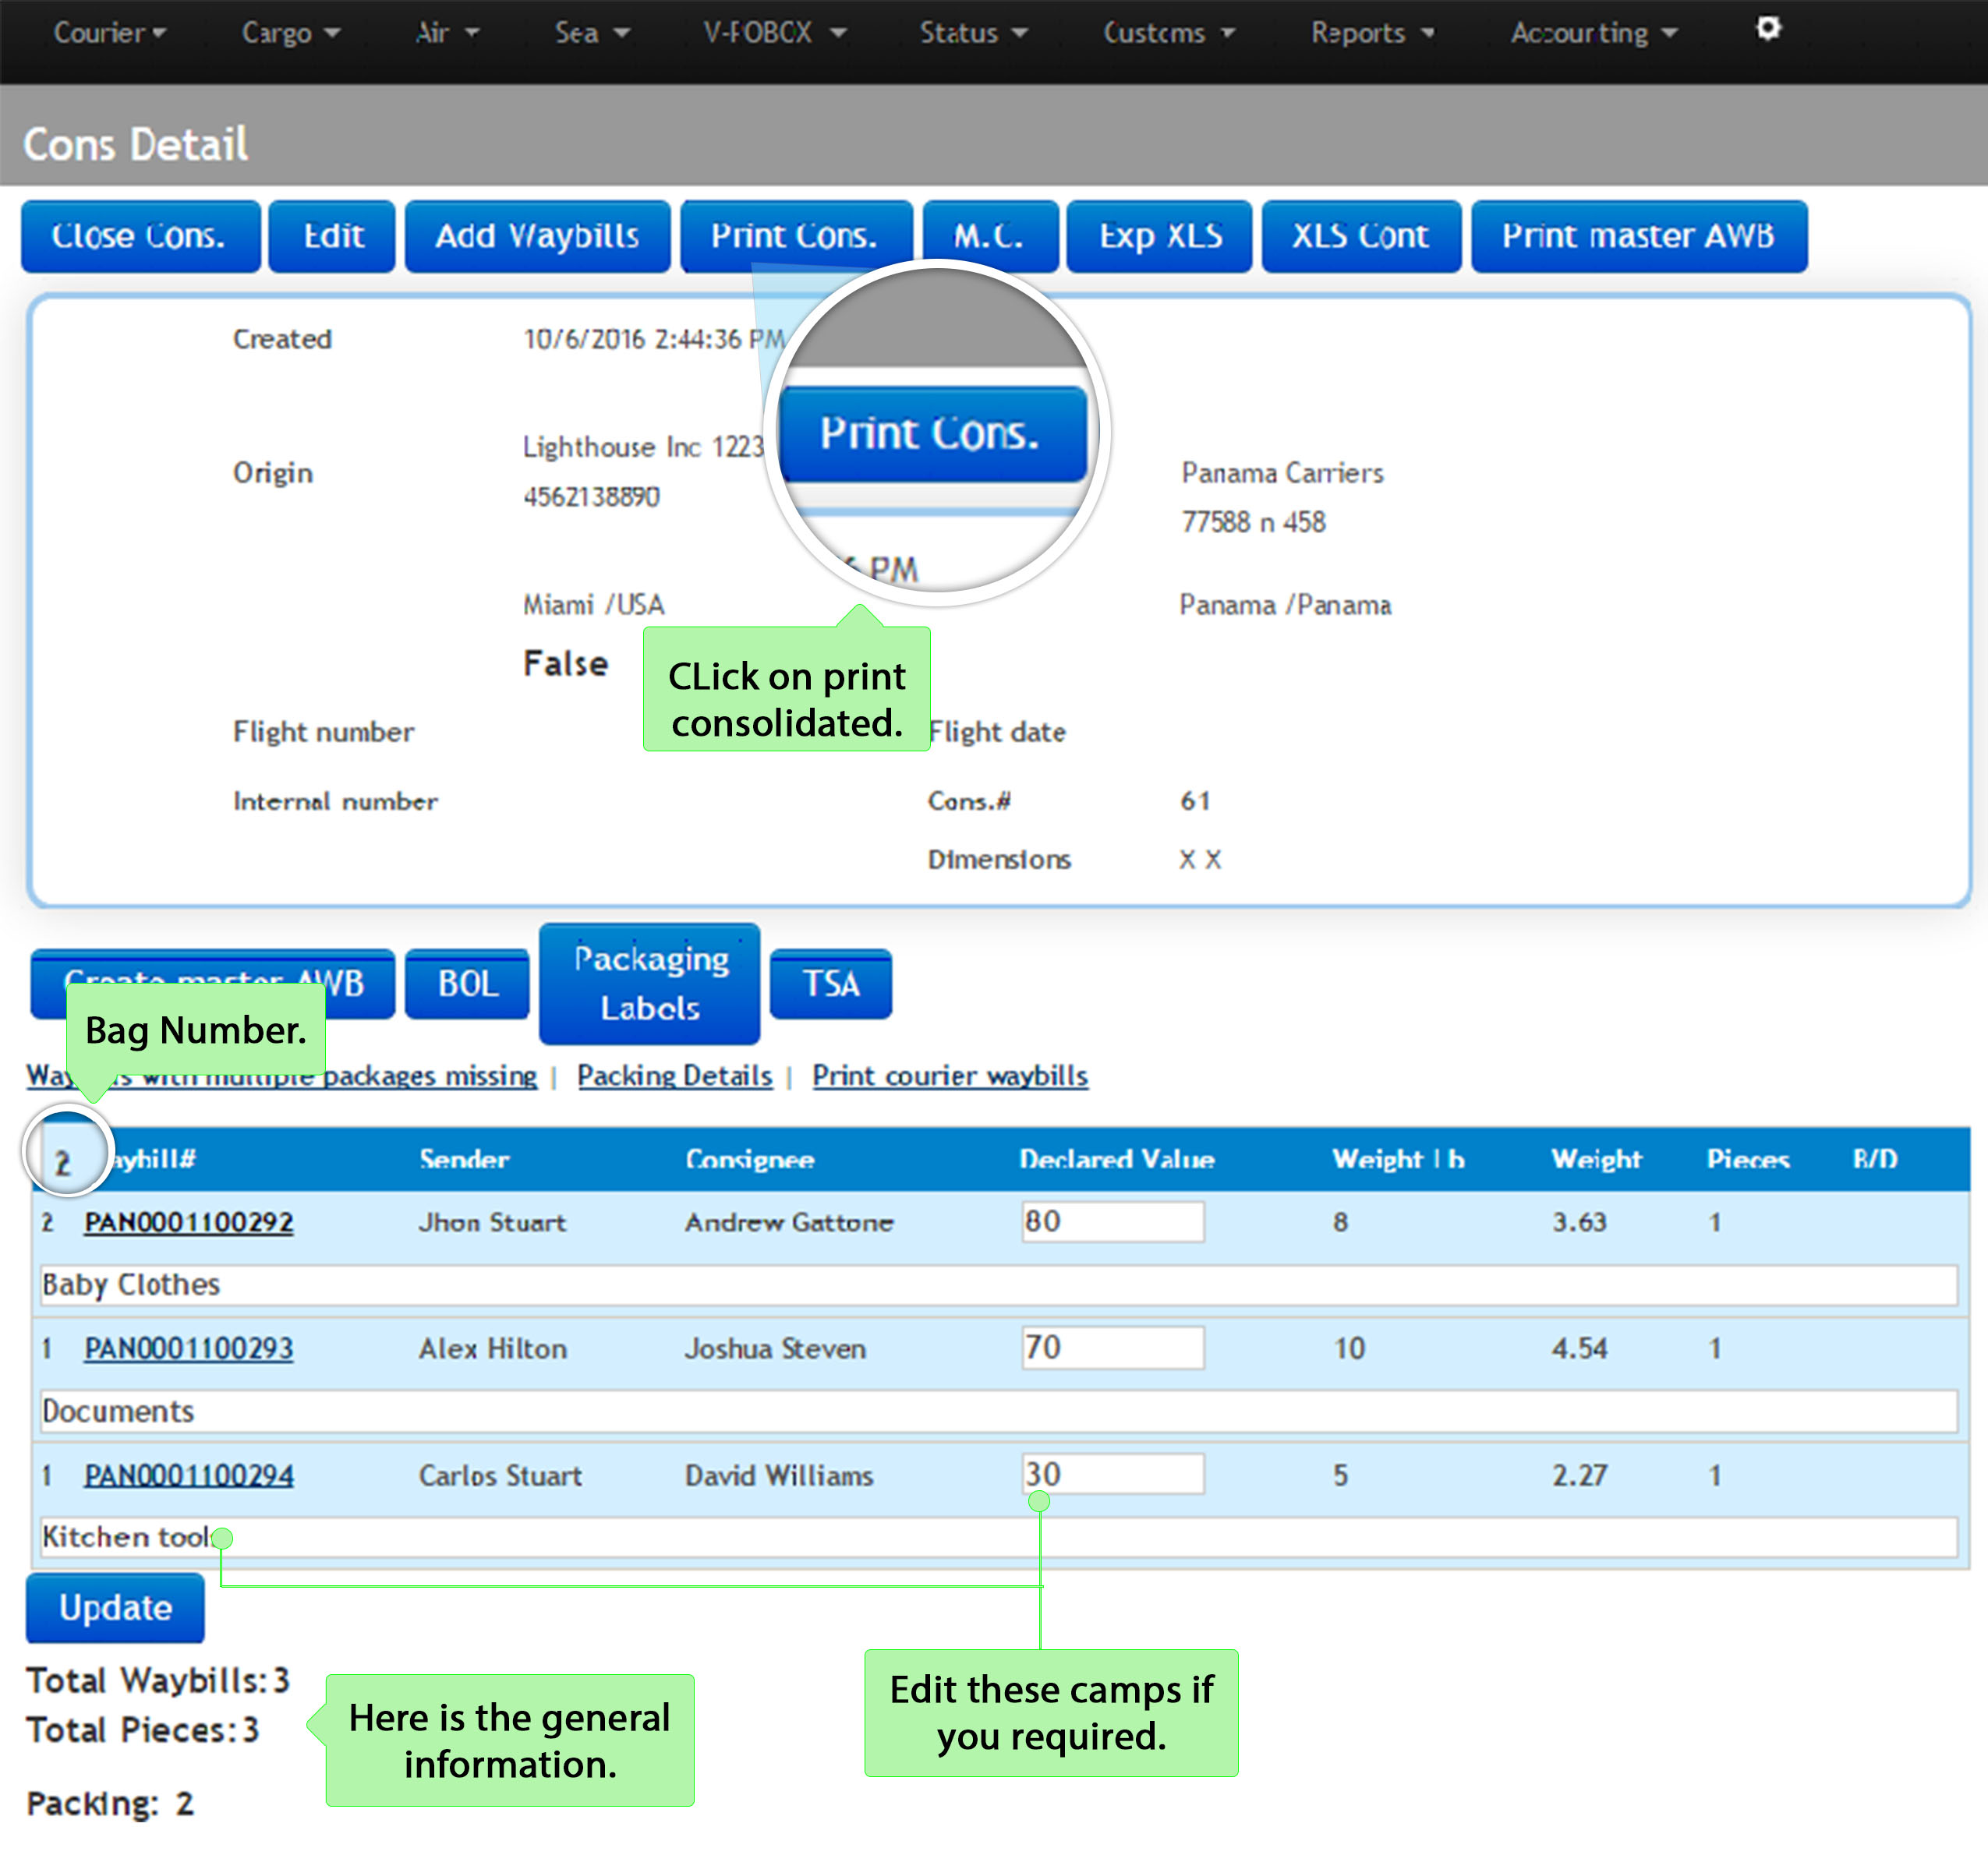
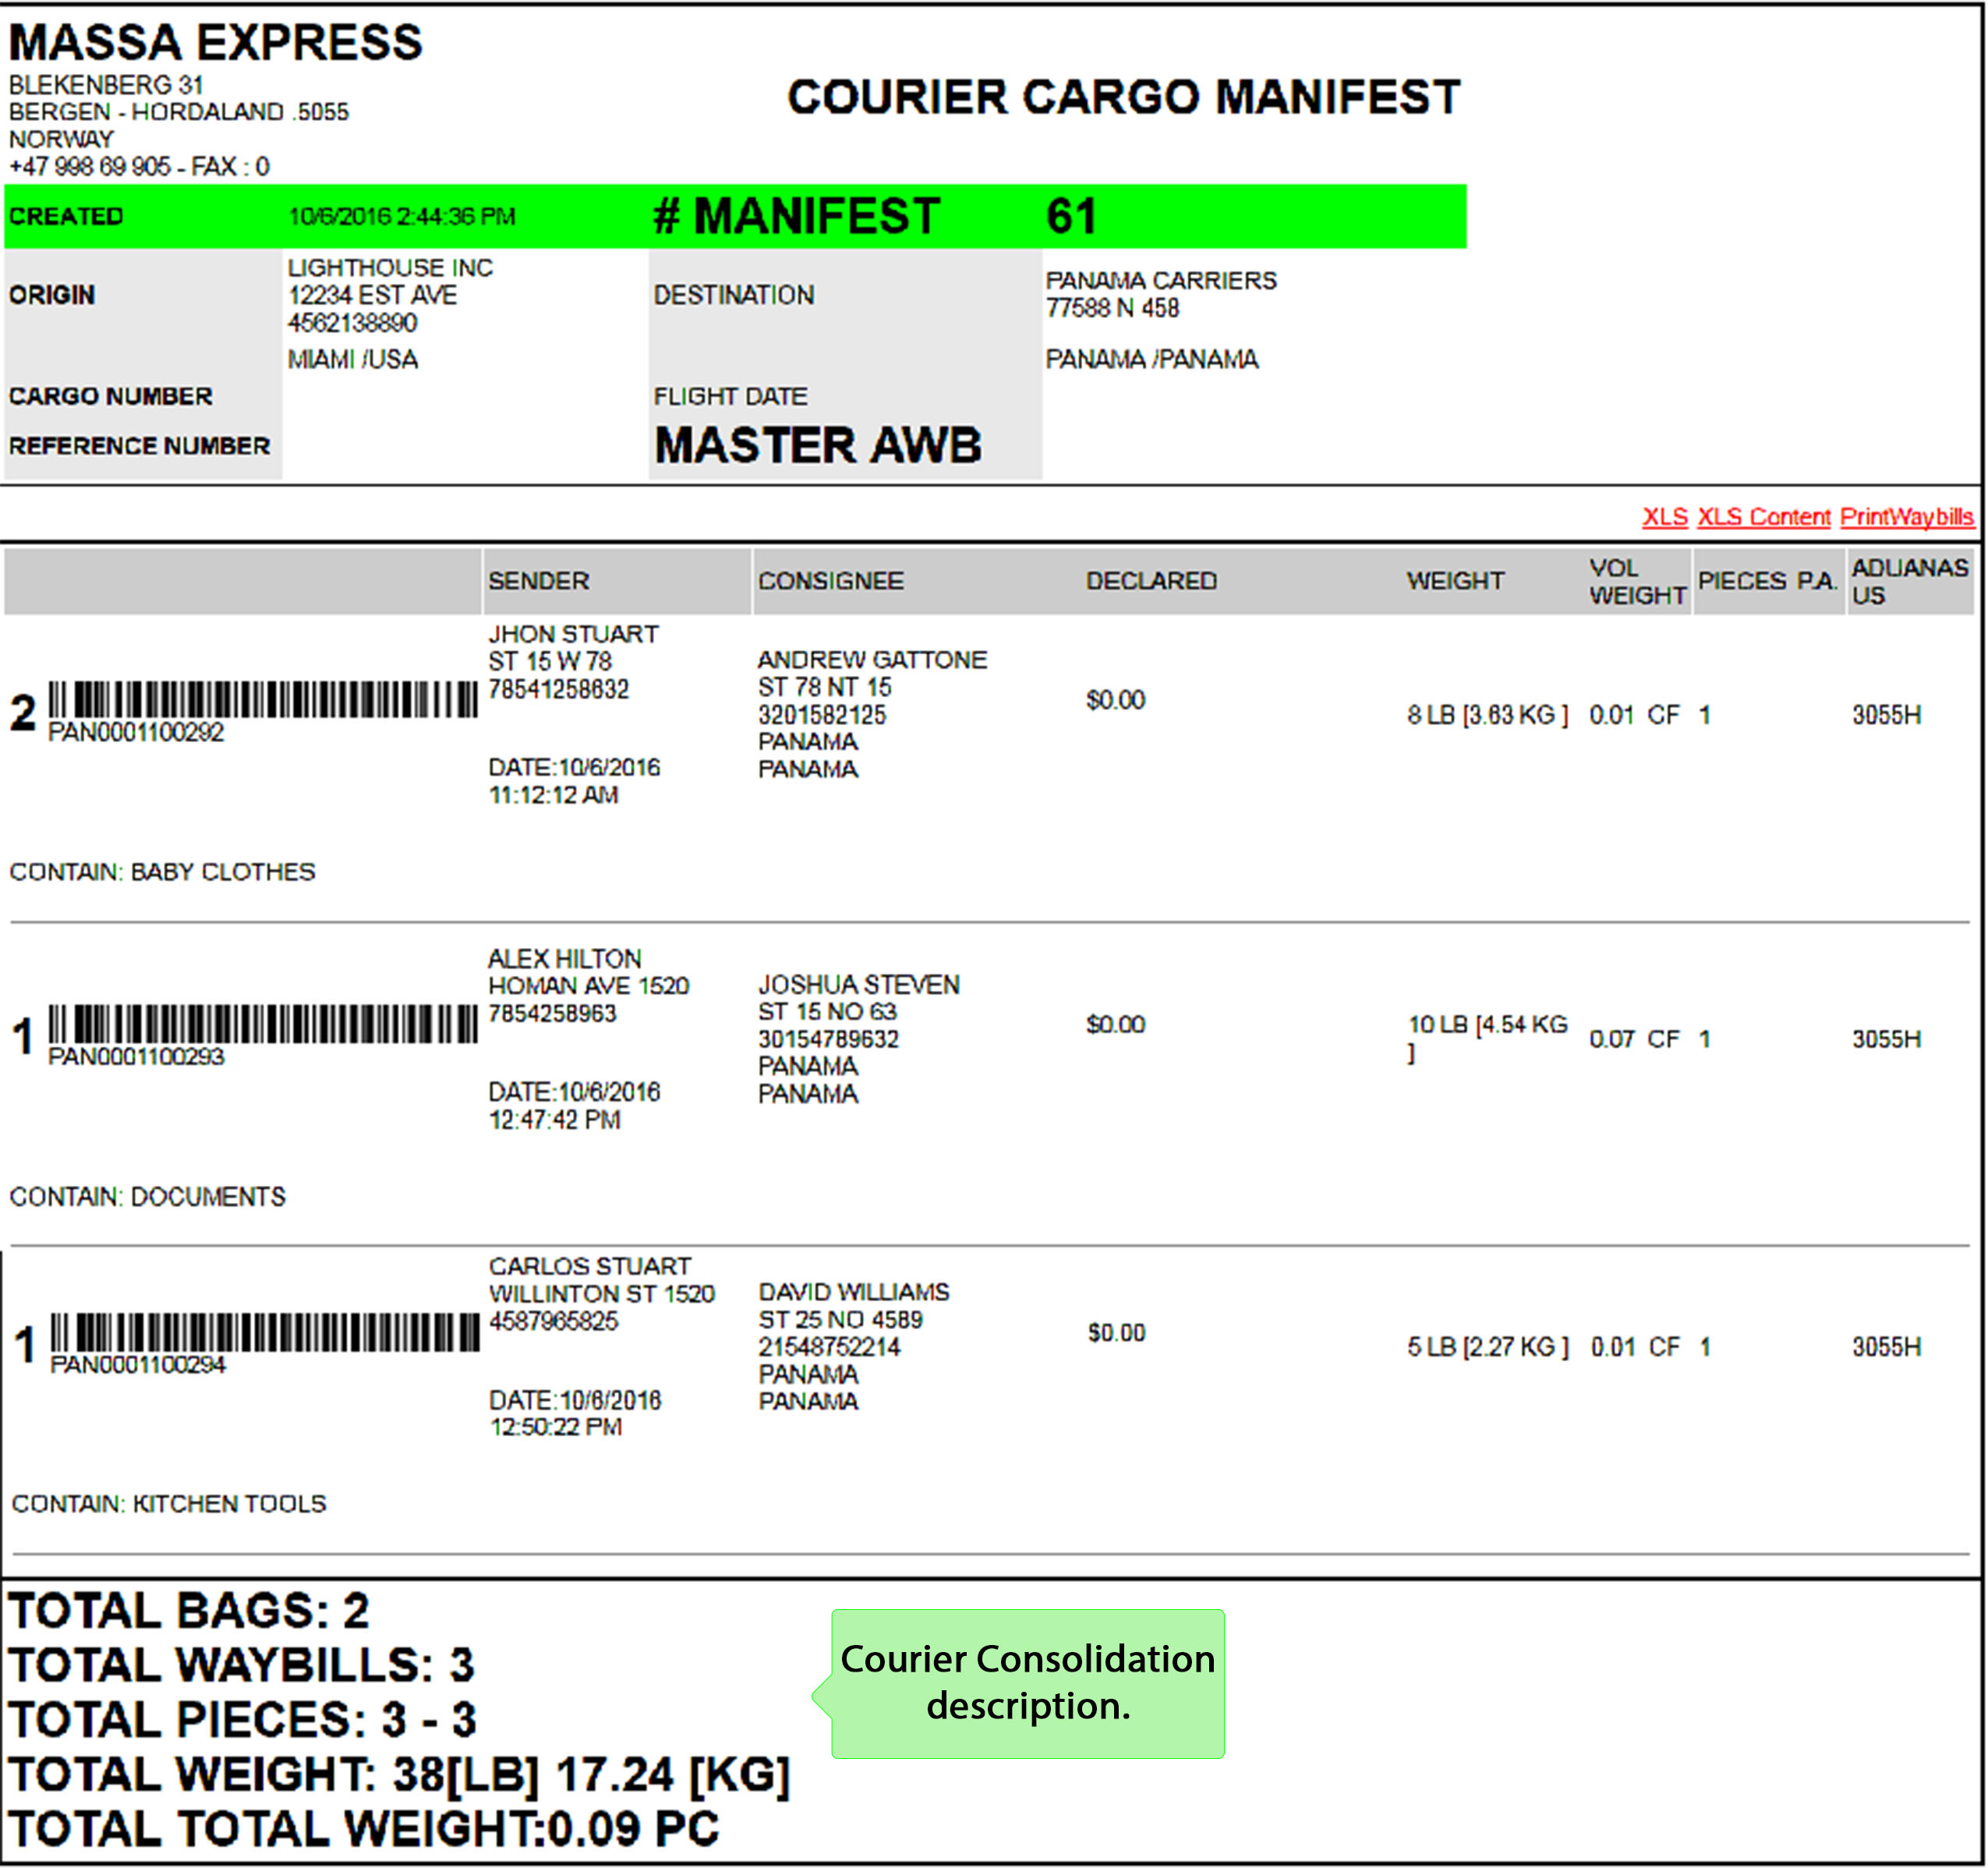
⇒ Now you will be ready to print the consolidated. Once you click on Print Cons. a new window will open with the Courier Cargo Manifest details. This section will allow you to export to file excel and print the waybills by clicking on the options marked in red.
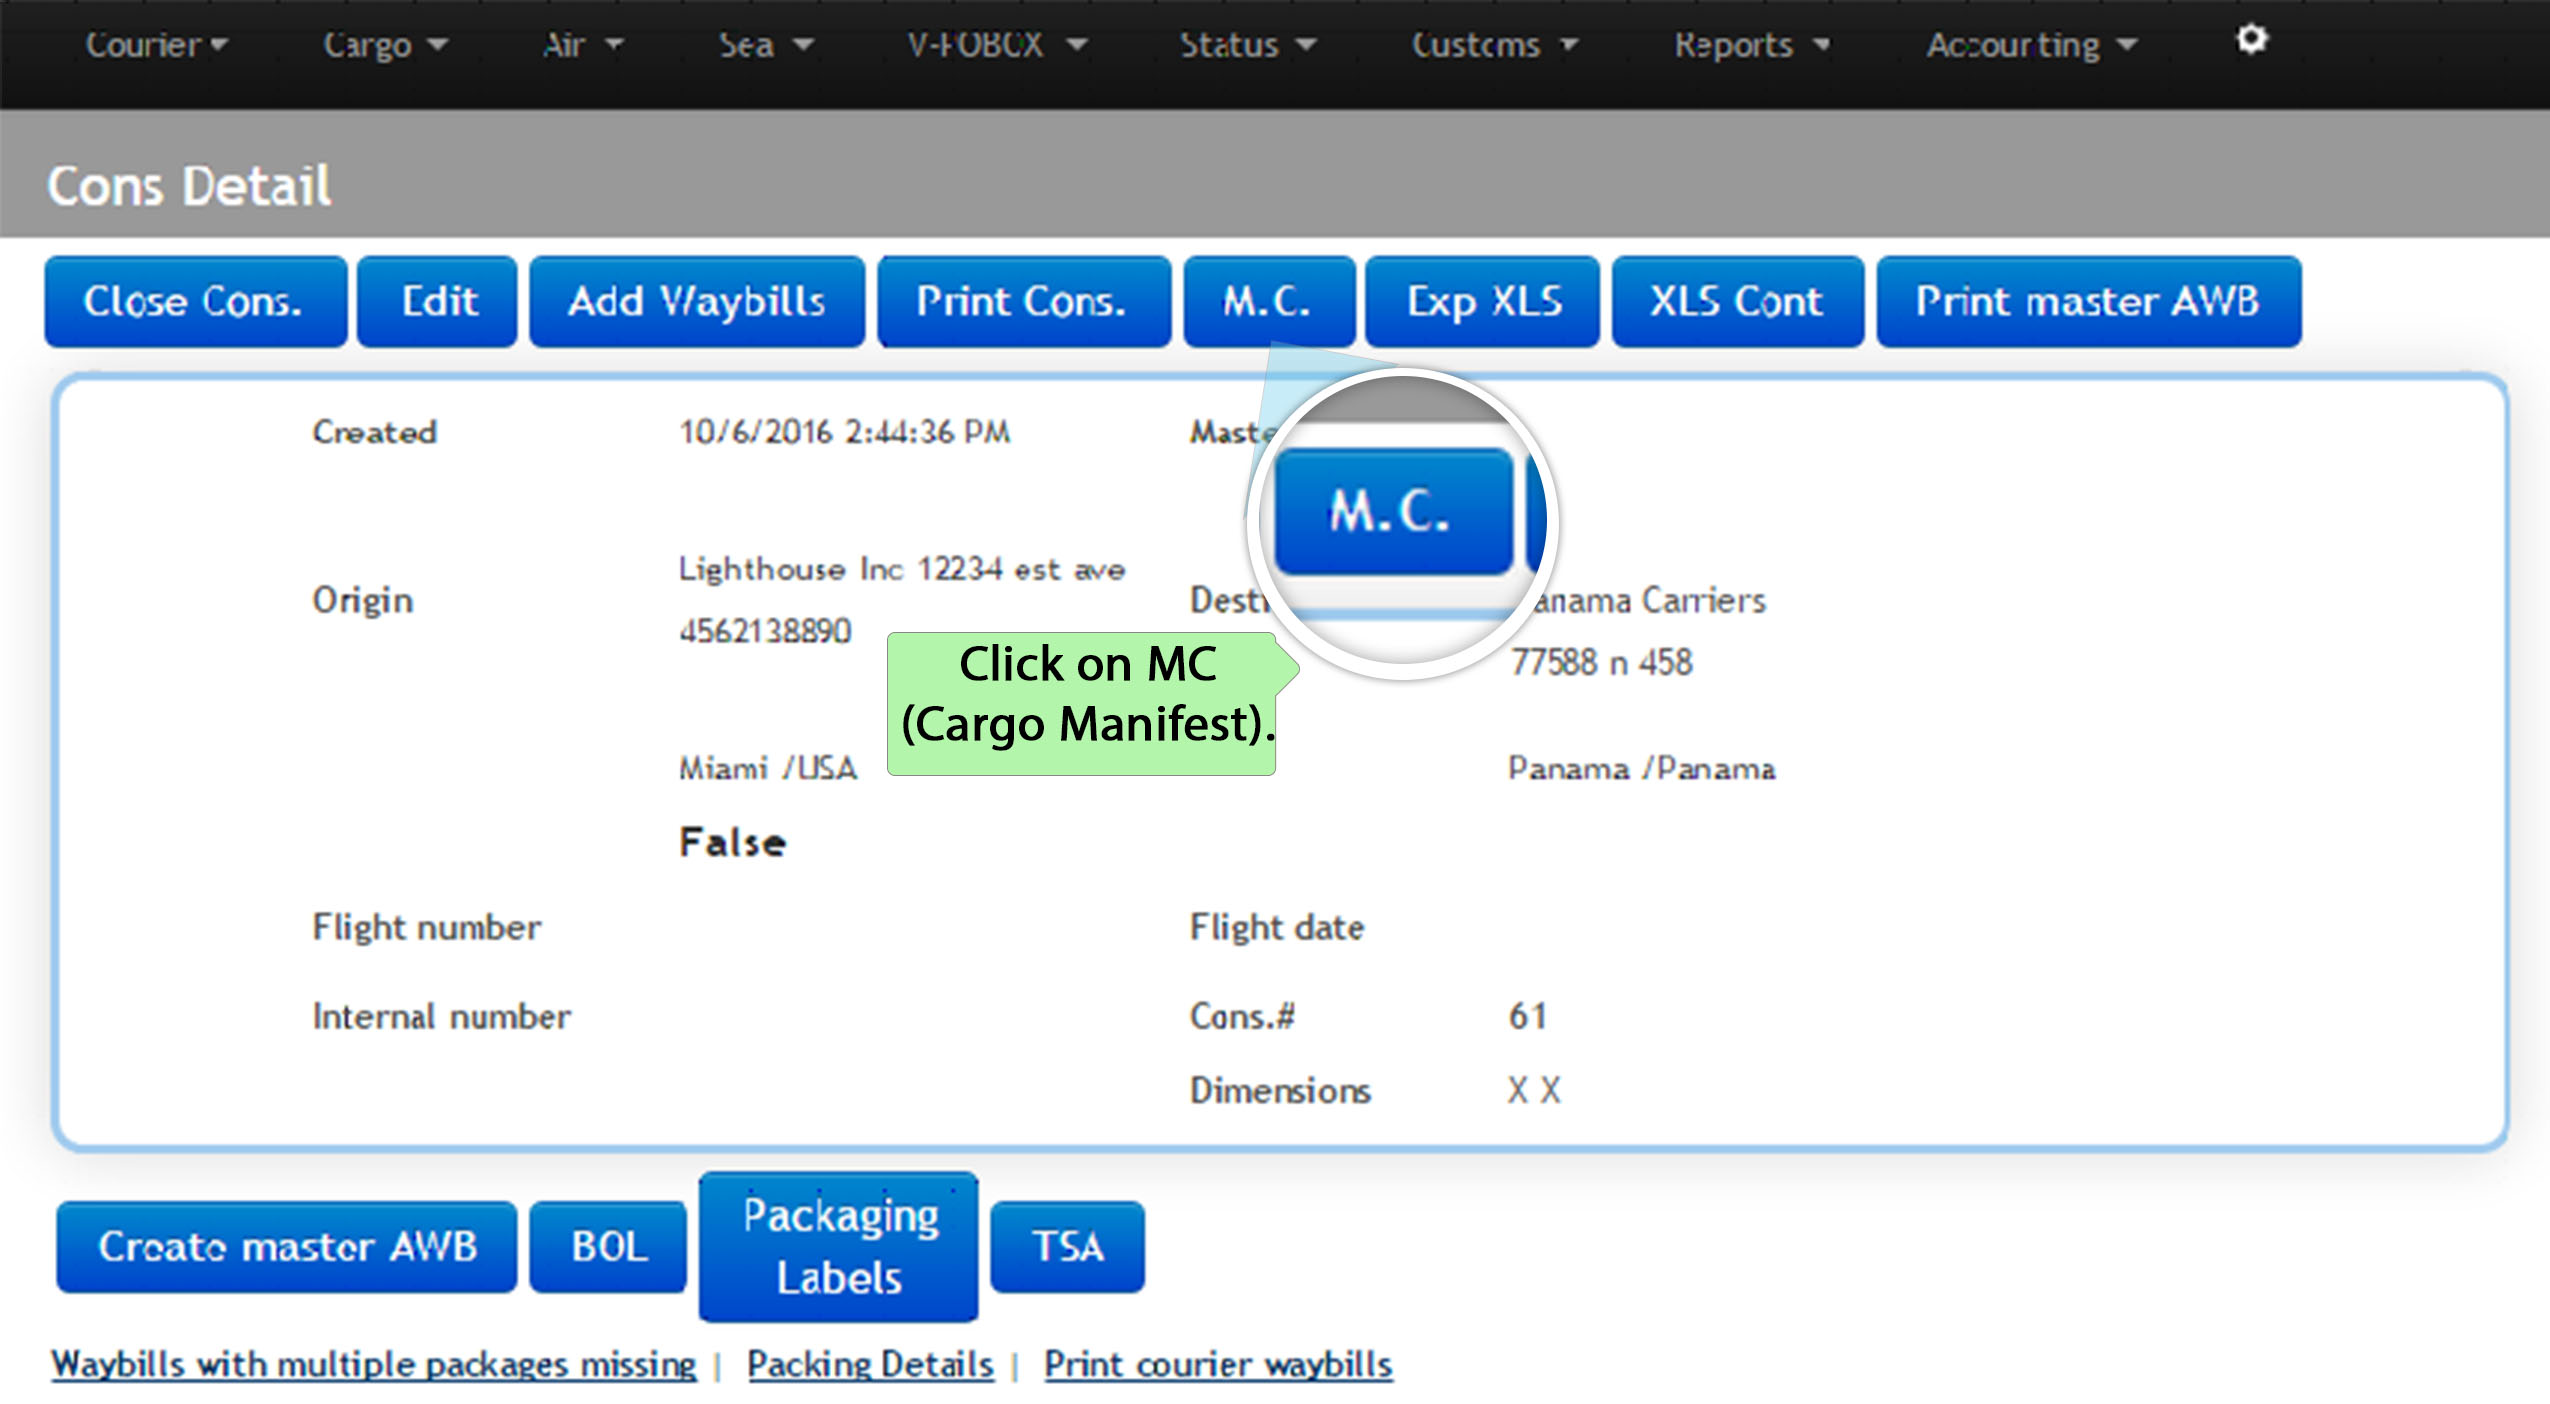
6.7 When you click on the next option, MC, you can also print the Cargo Manifest, the difference is that this option will allow you to edit some information in the document according to your needs. Follow the instructions as shown bellow:
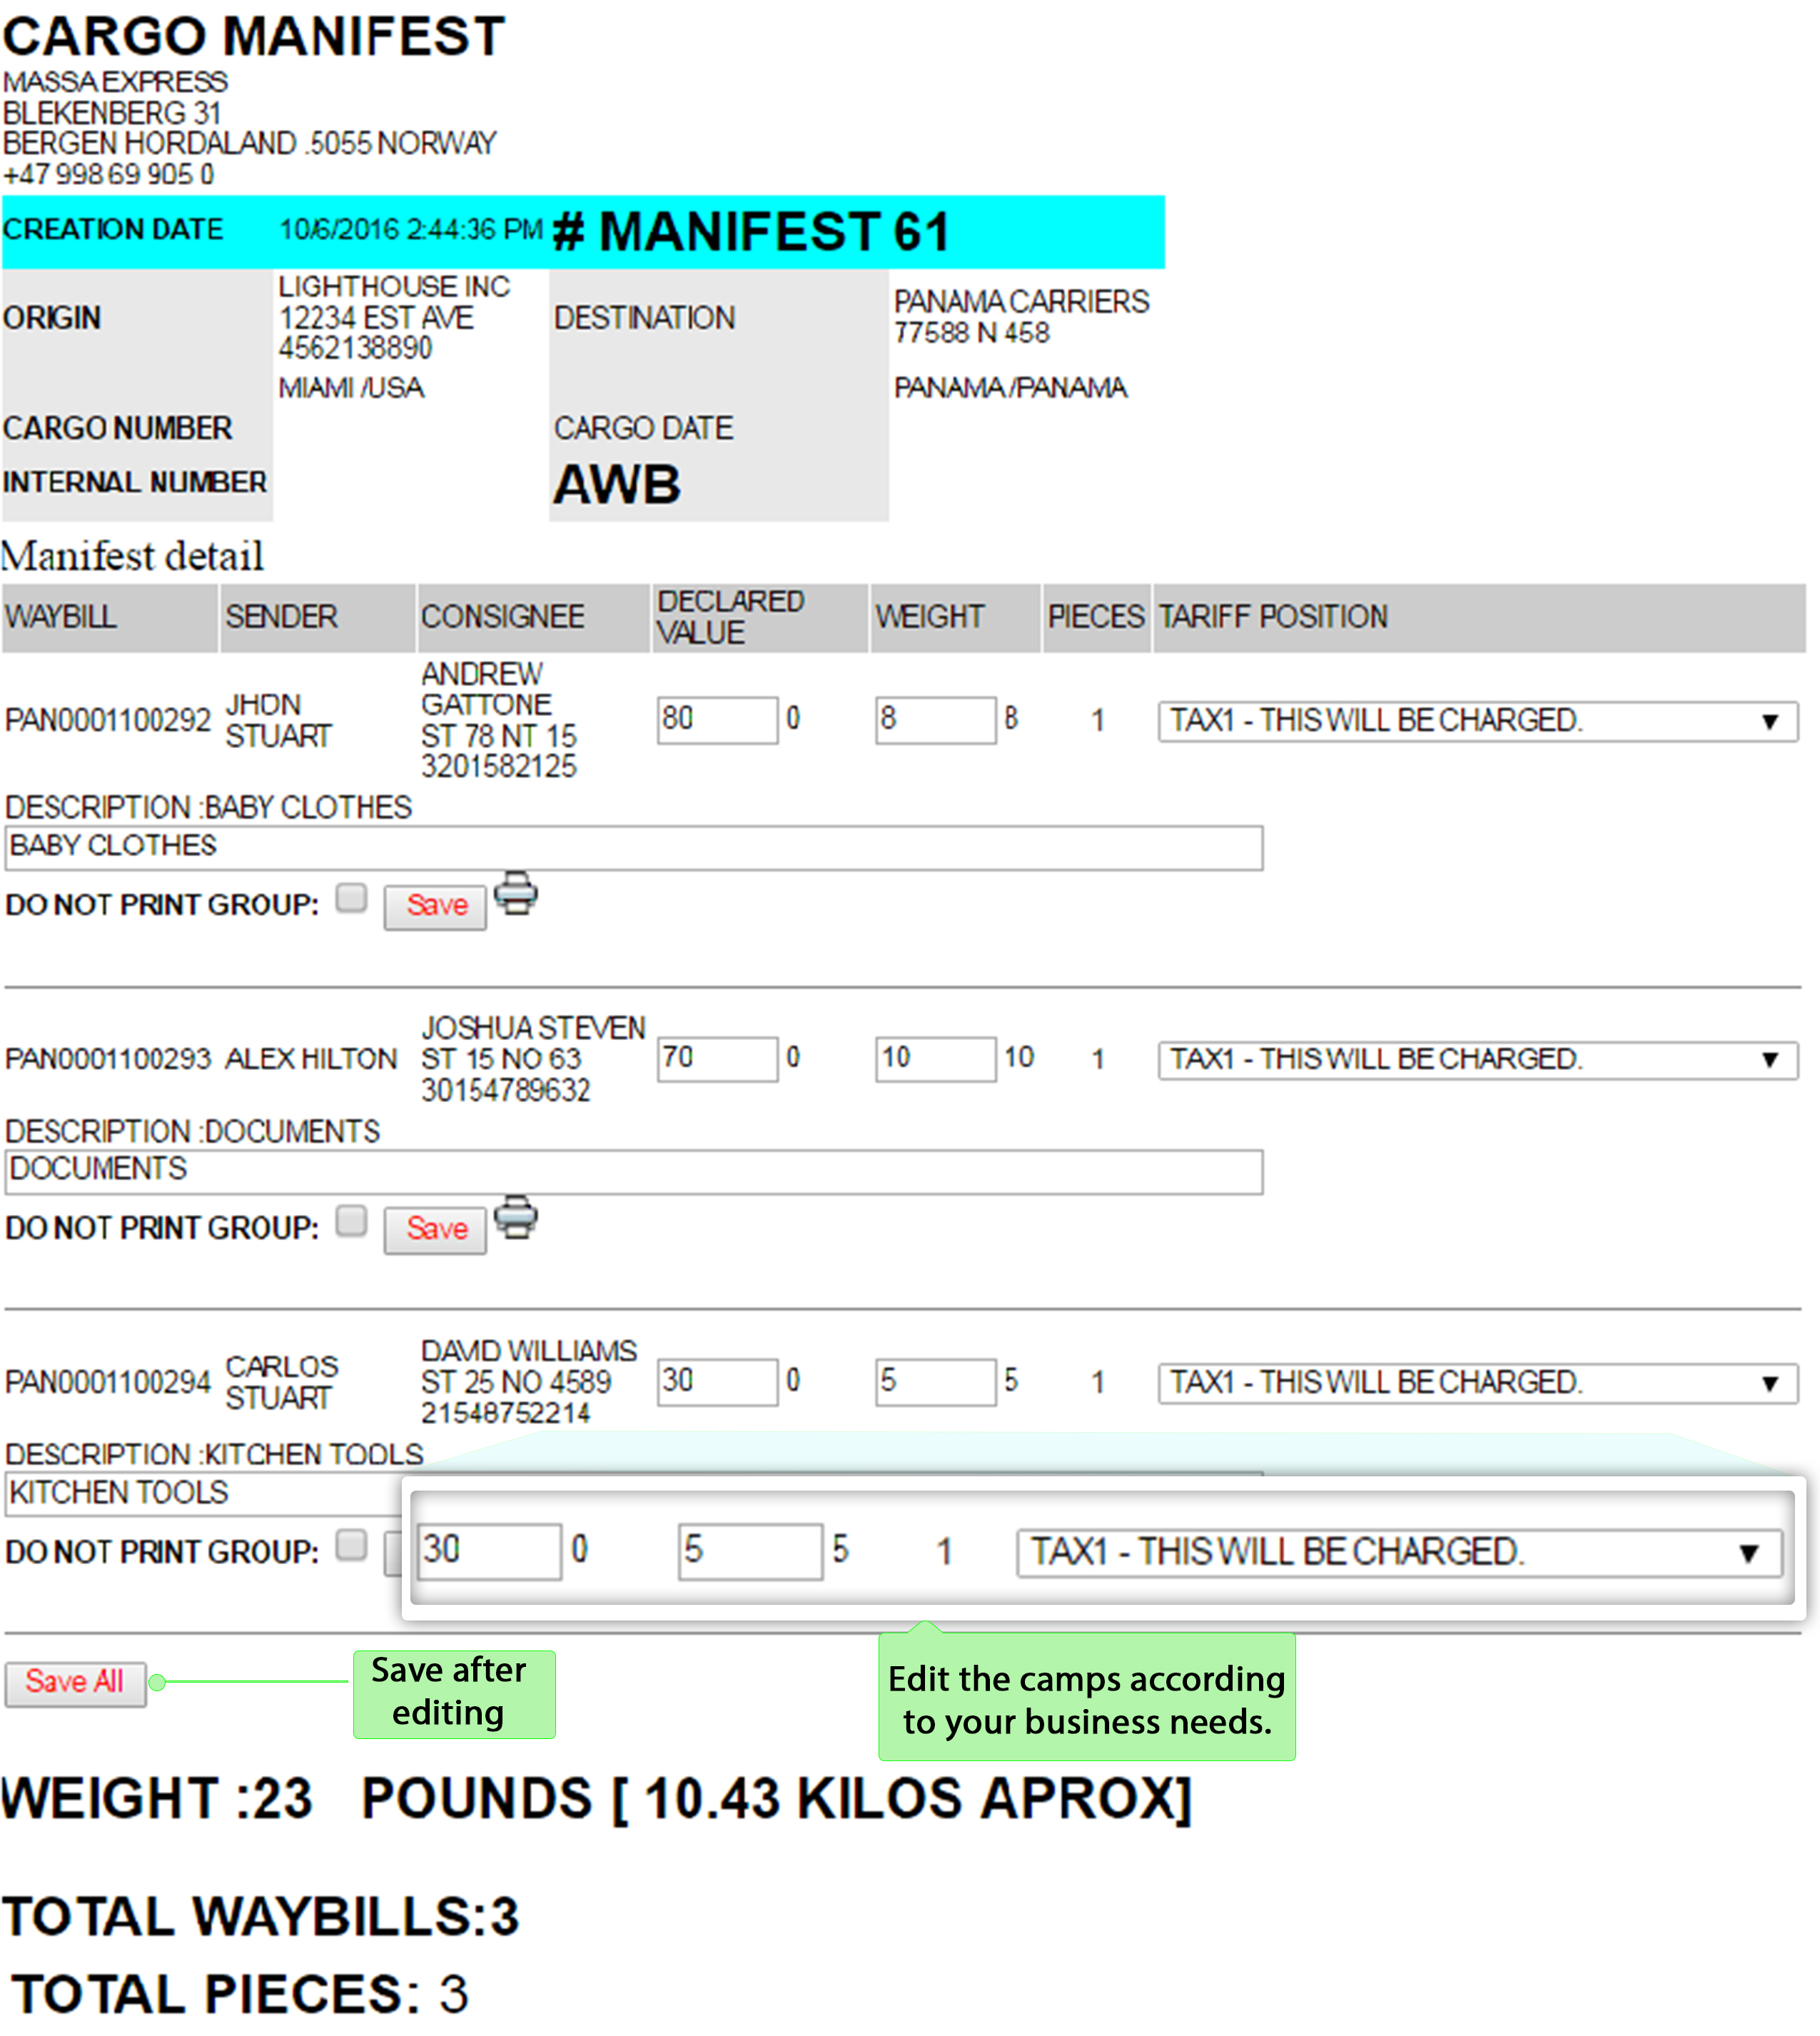
⇒ The declared value, weight and tariff position are editable fields, when you finish click on Save to update all the new information as follows:
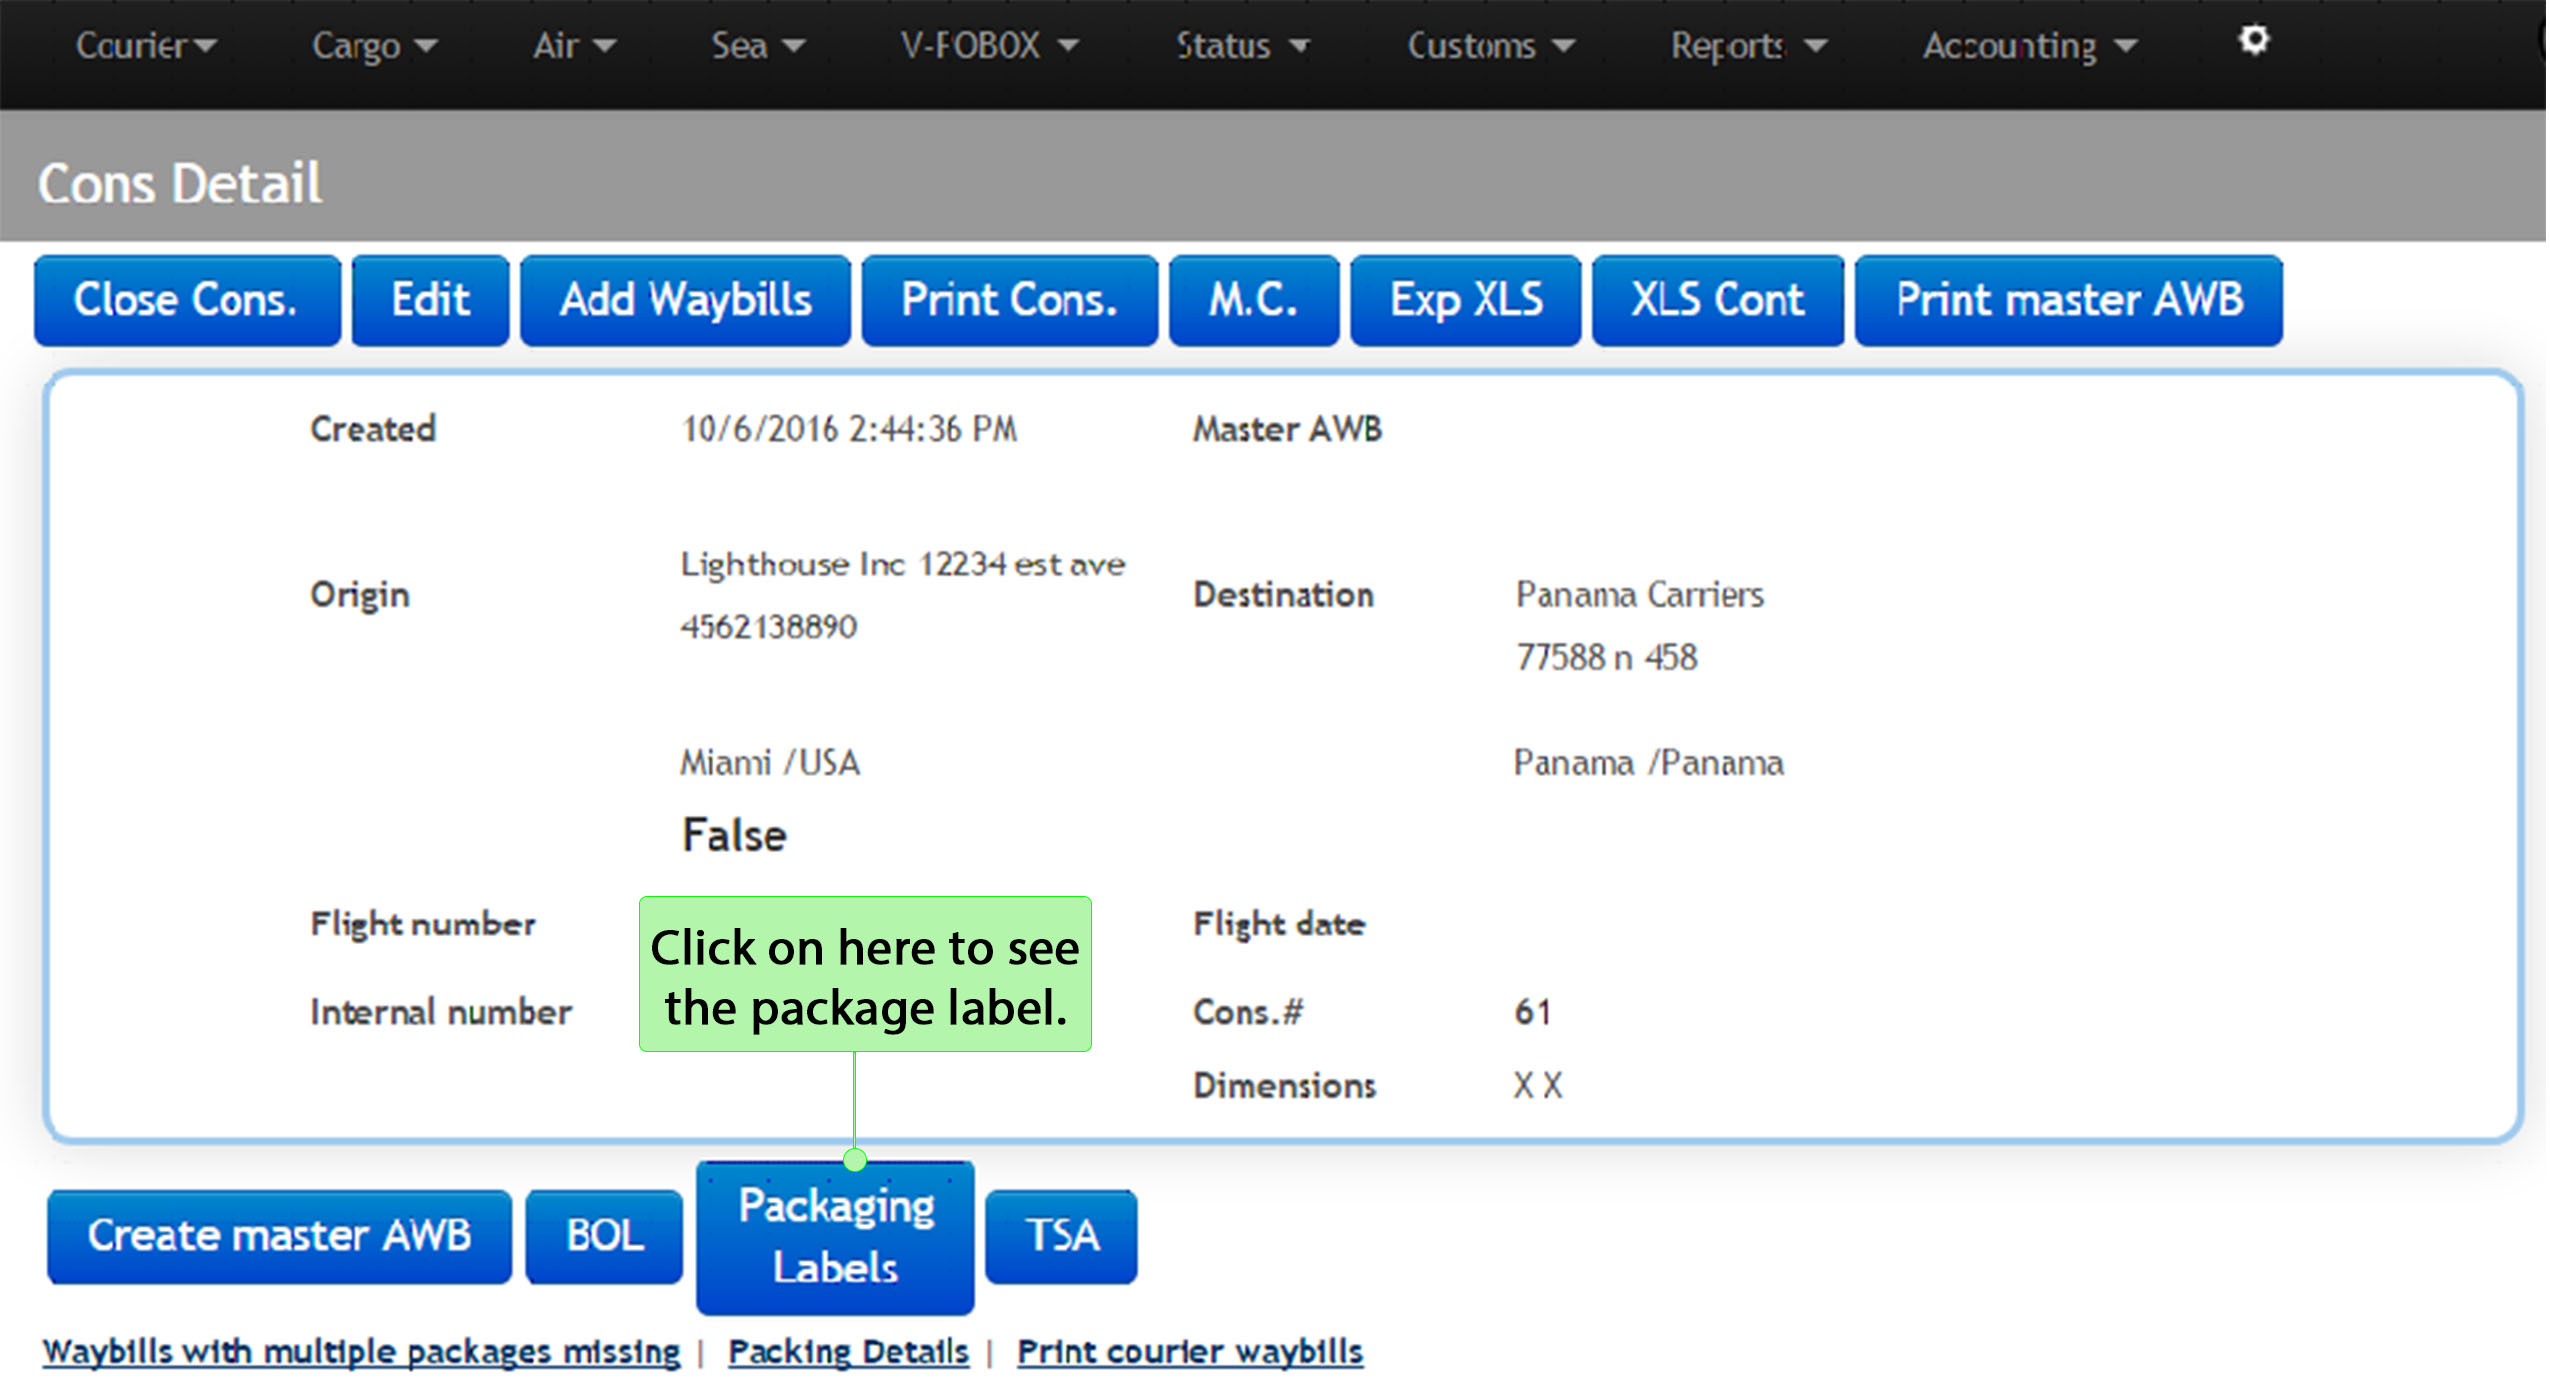
6.8 You will find a special label for the bags, pallets or any packaging edited in the consolidated, to see it you may click on Packaging Labels as shown bellow:
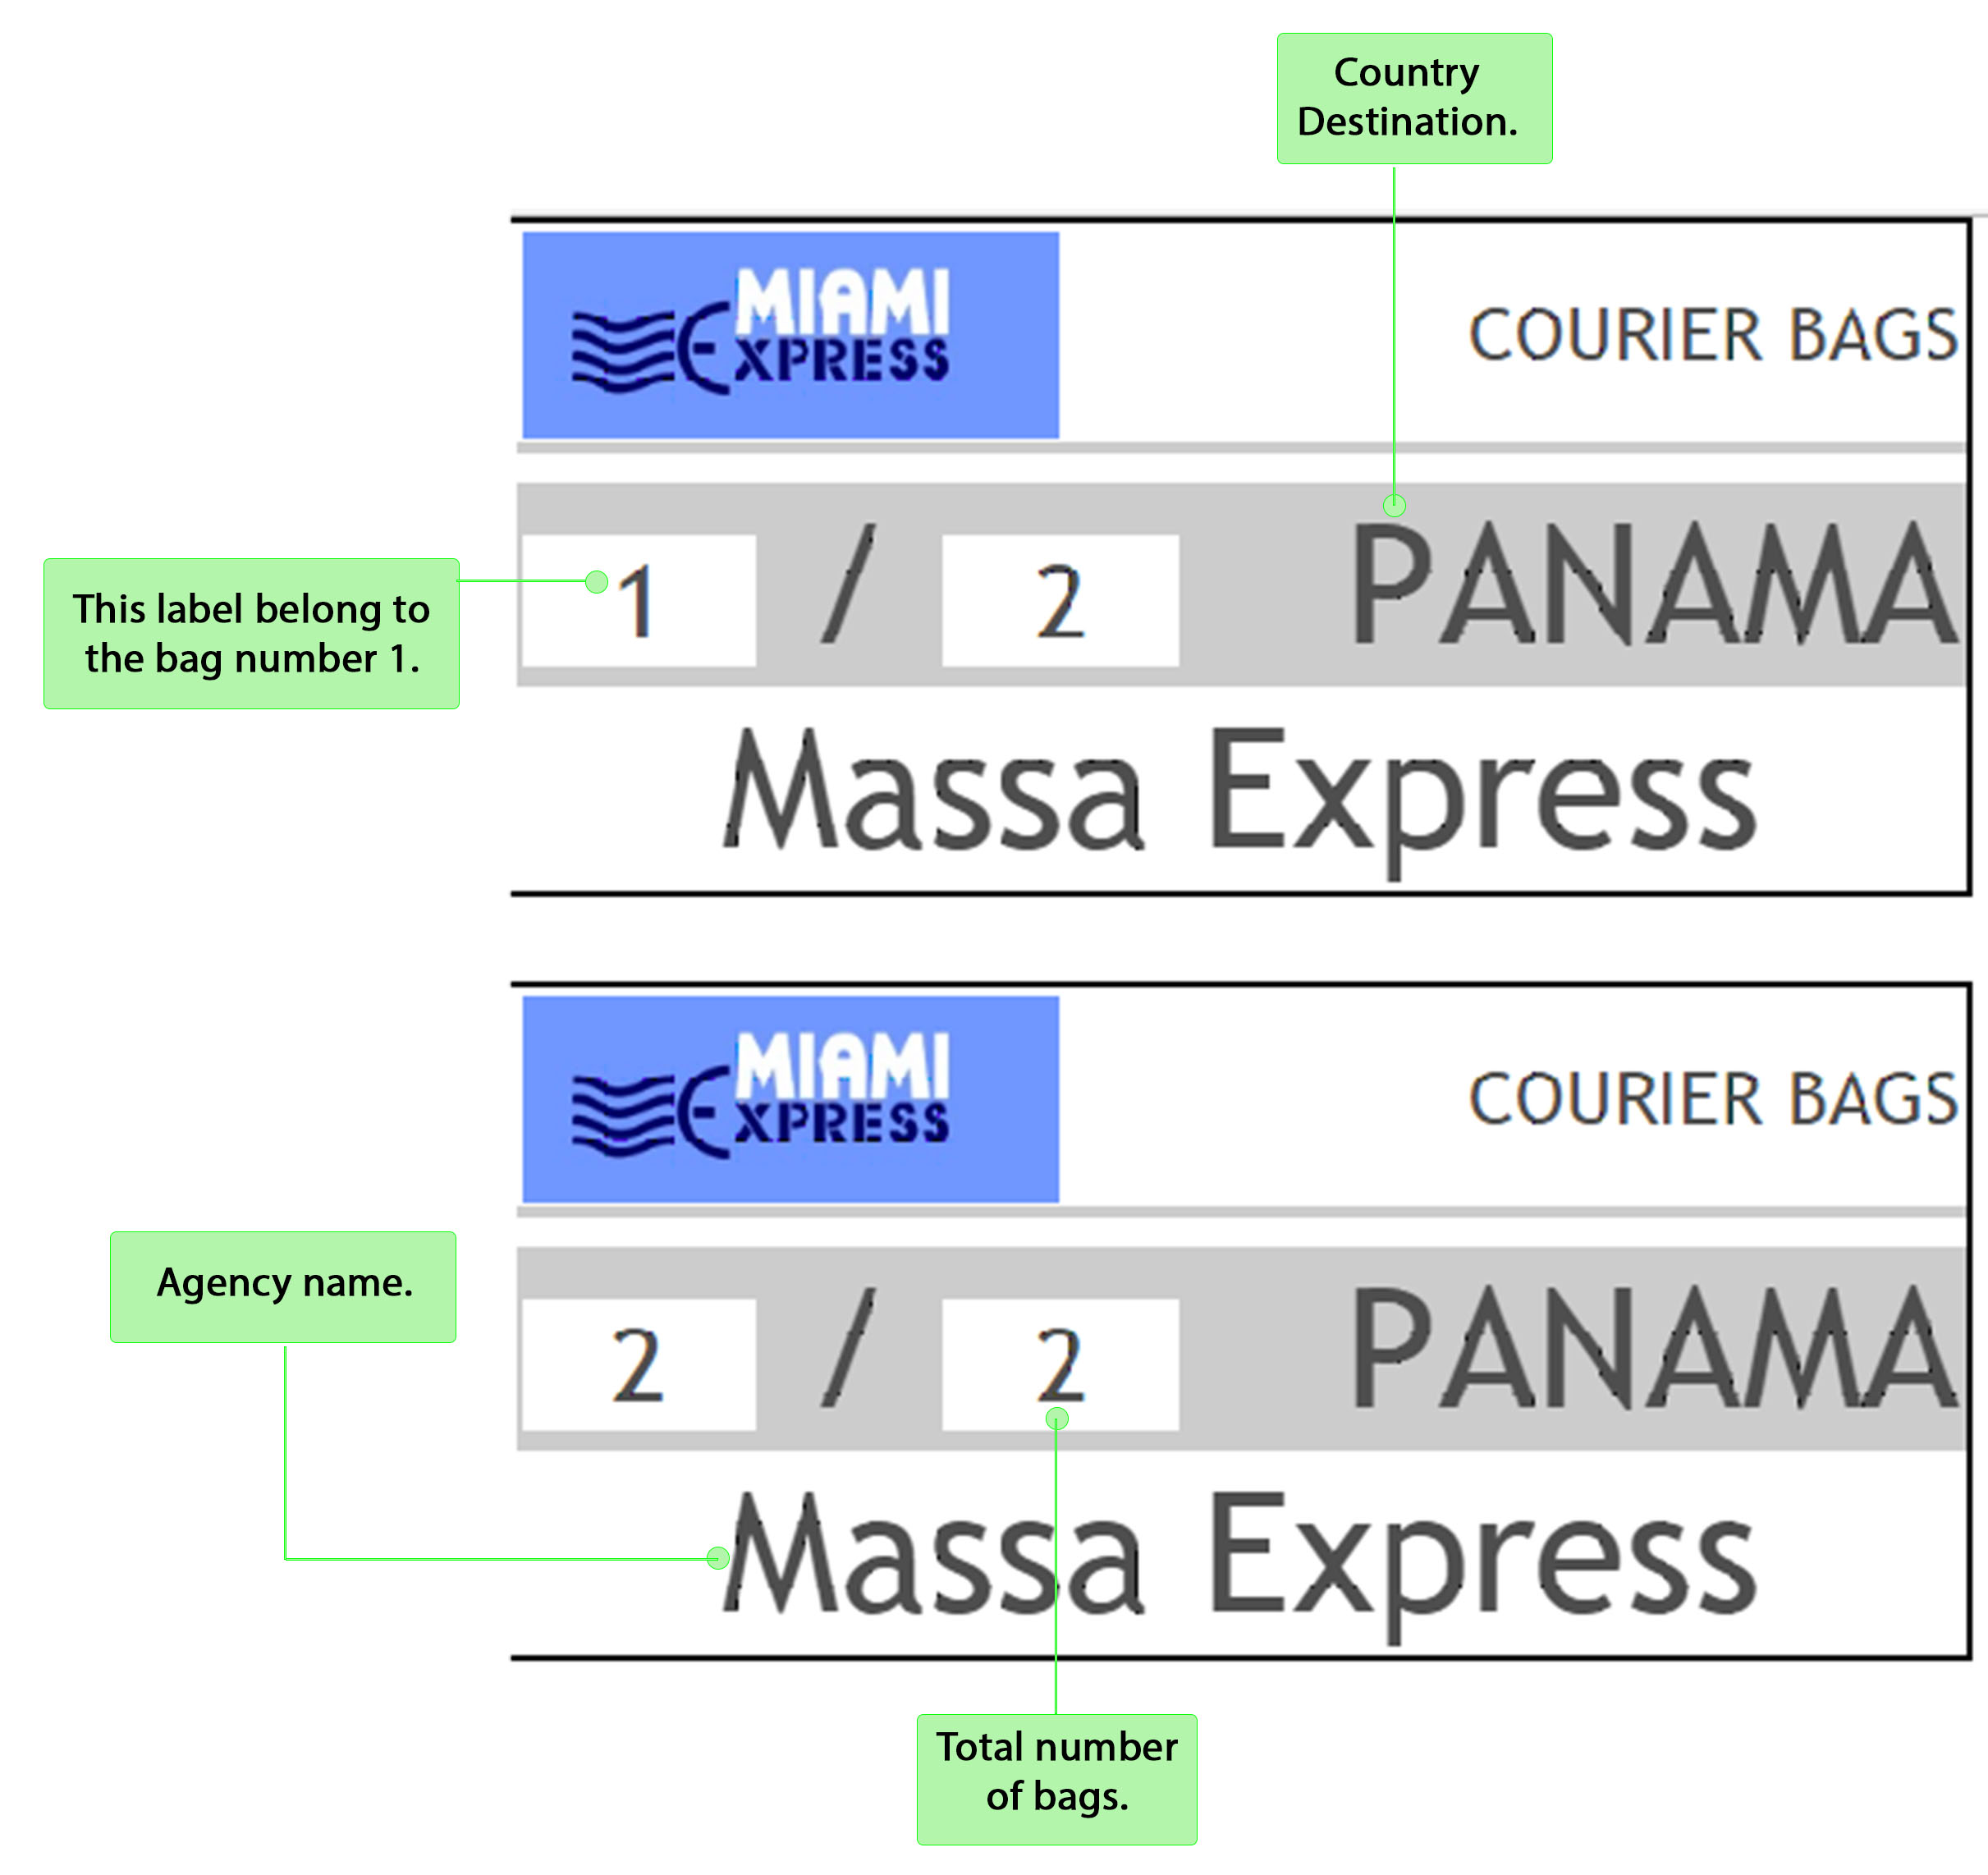
⇒ After clicking on it, a new window will open with the labels to add according to the package selected in the consolidated. The following image shows an example of packaging label:
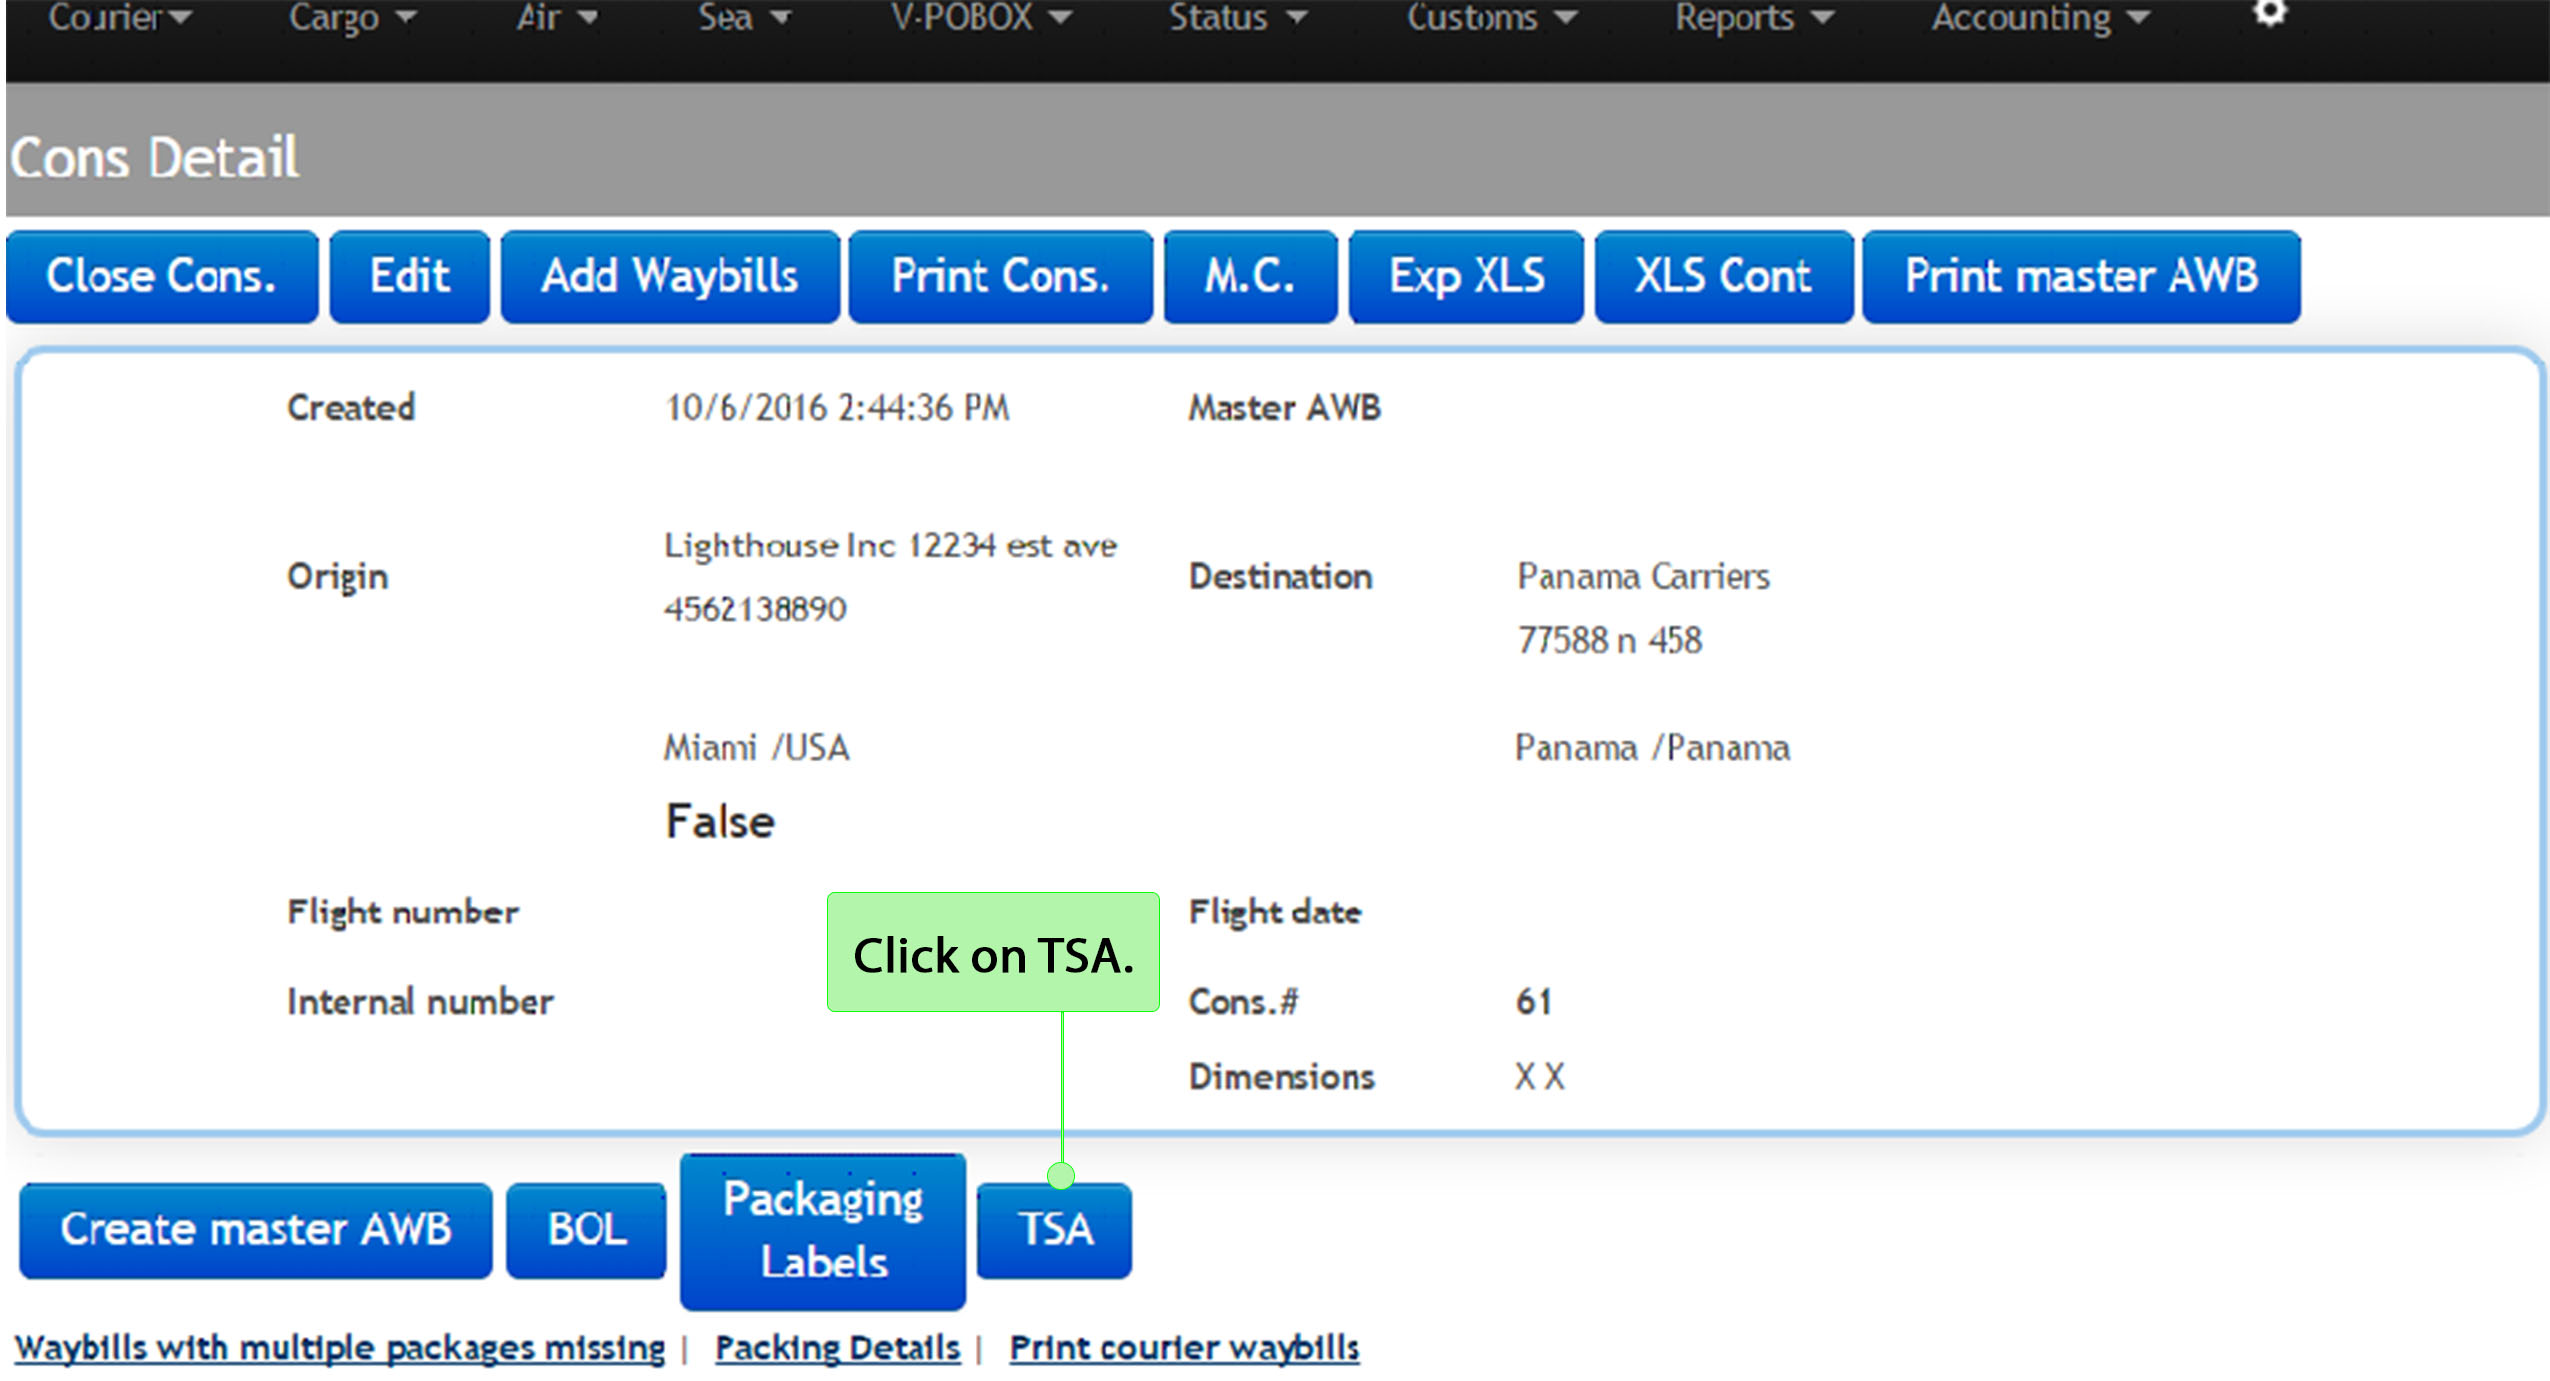
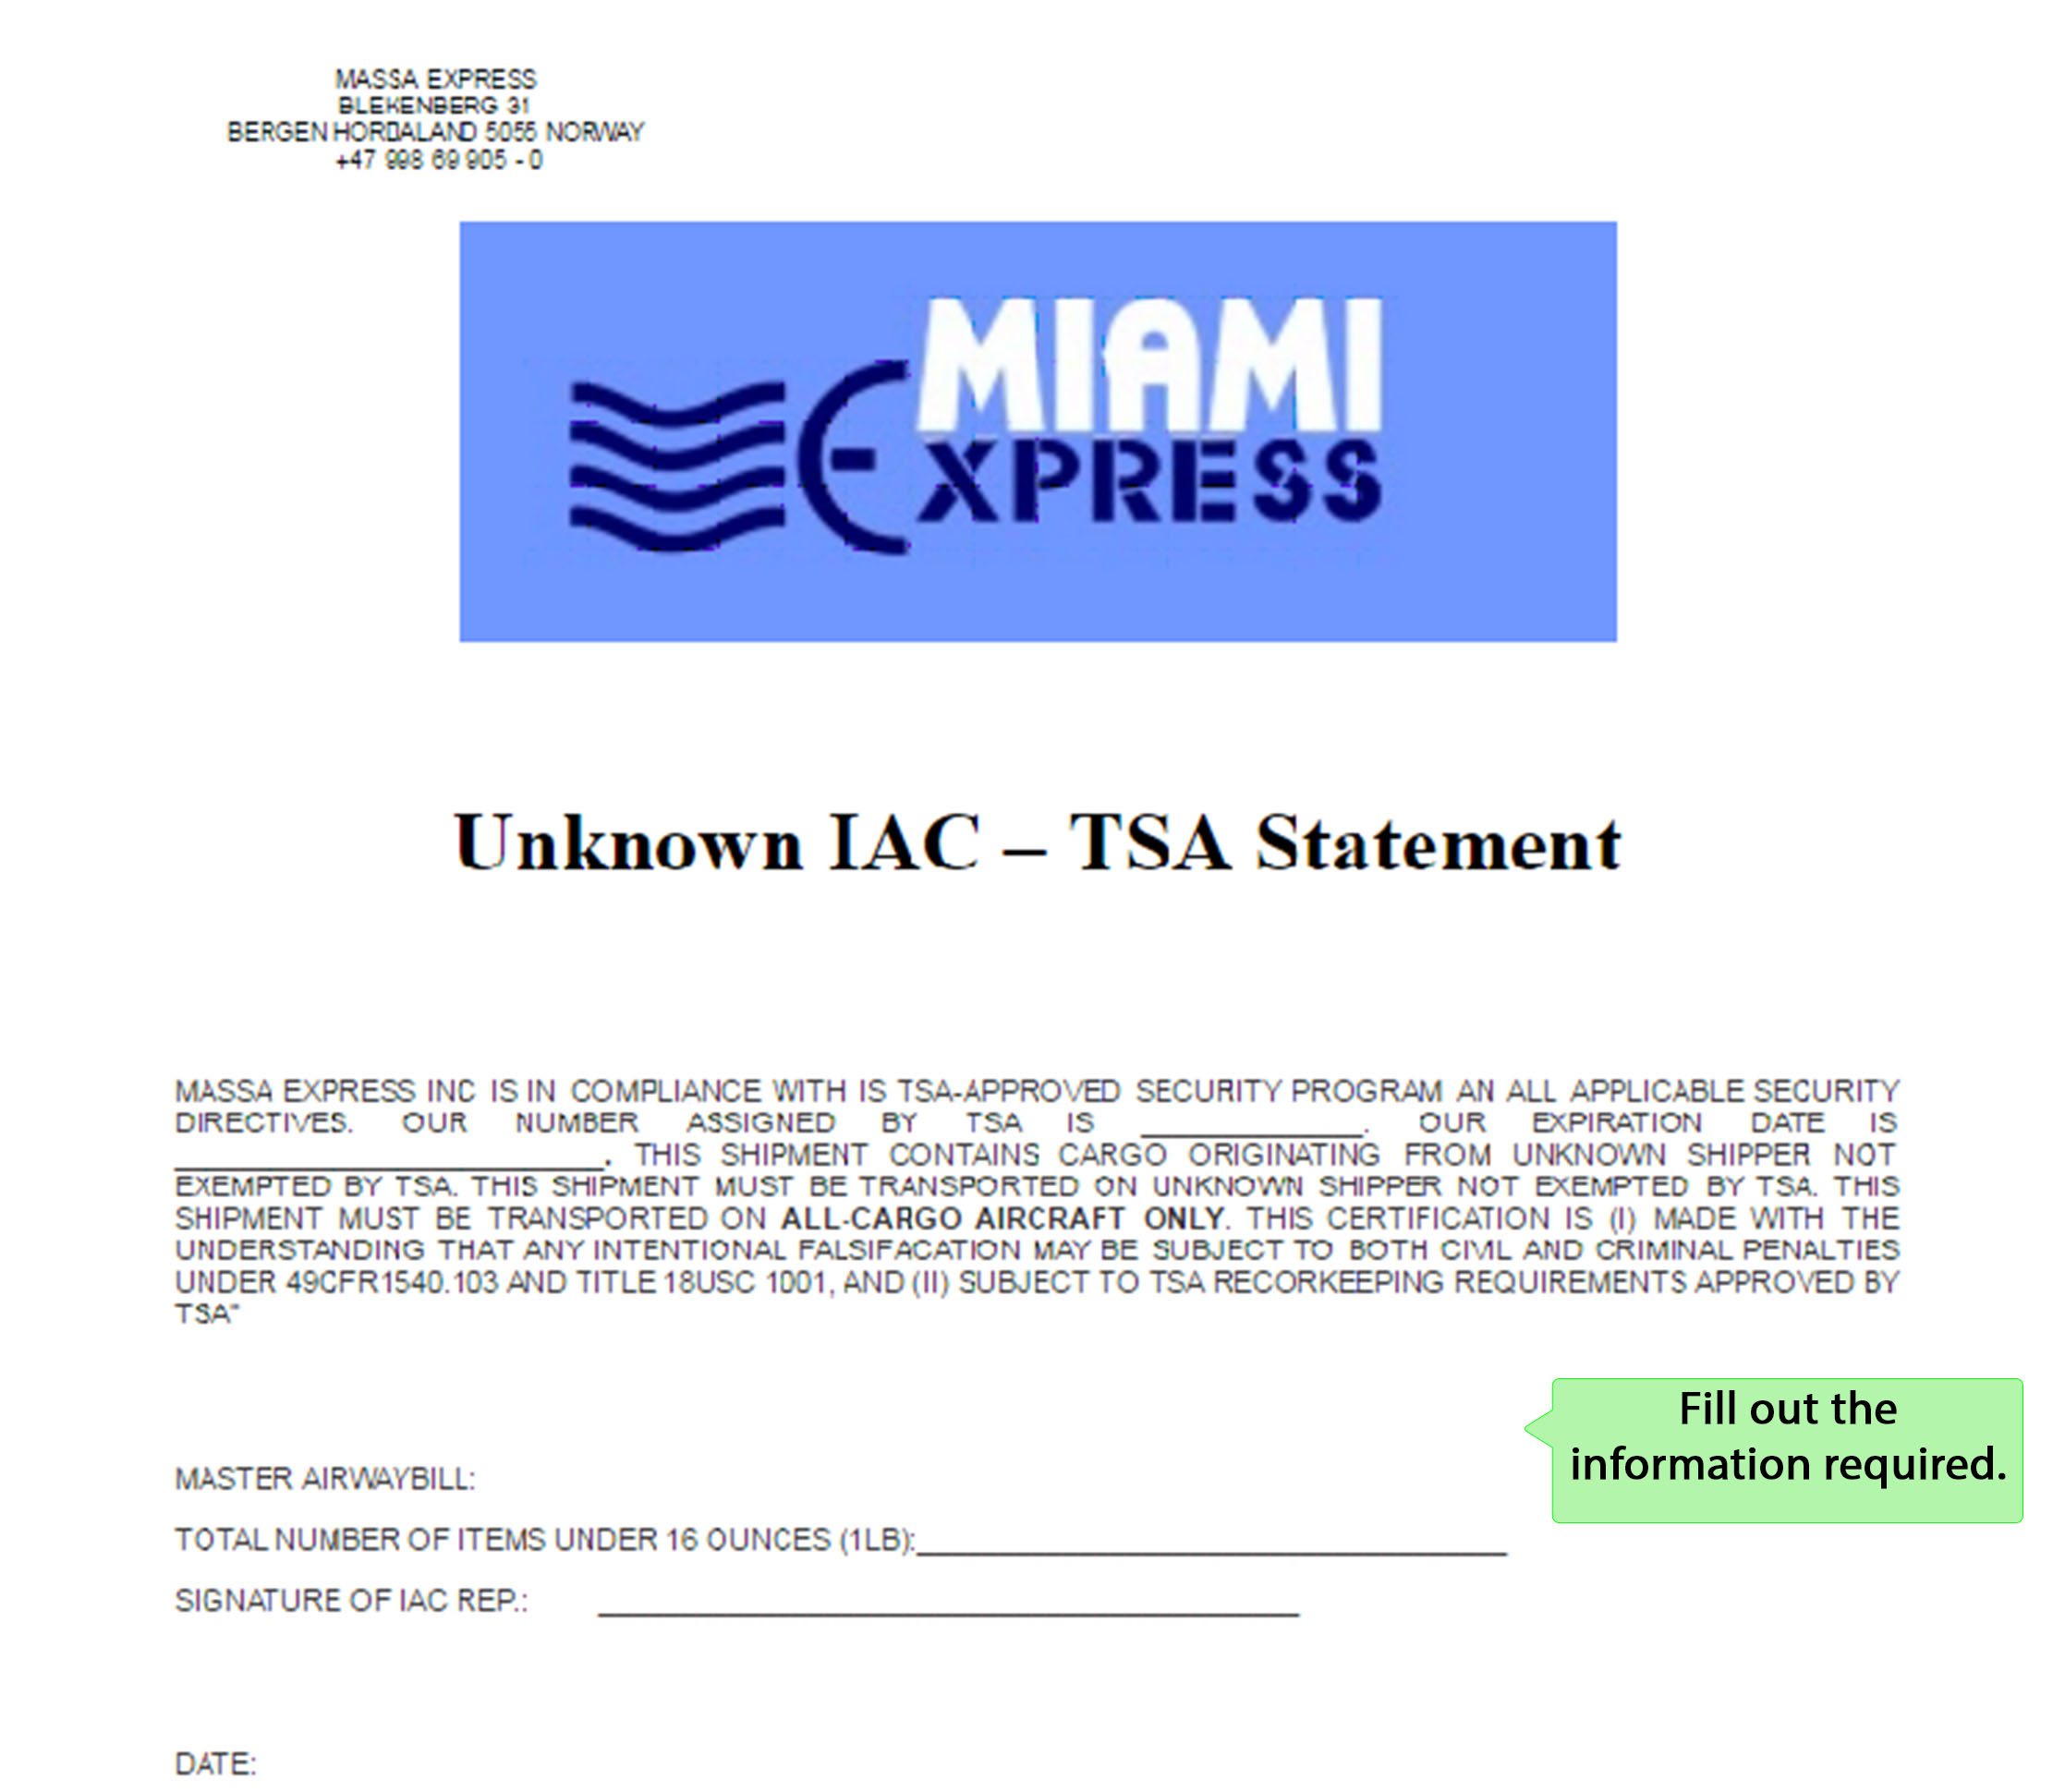
6.9 TSA: In this option you can print the Unkown IAC - TSA Statement, after printing out you must fill the information required. Follow the instructions as shown in the image below:
⇒ This is an example of Unkown IAC - TSA Statement:
6.10 Once you have added waybills you can create an air waybill directly from detailed consolidated, it is necessary to click on Create a Master AWB to start, as shown the bellow:
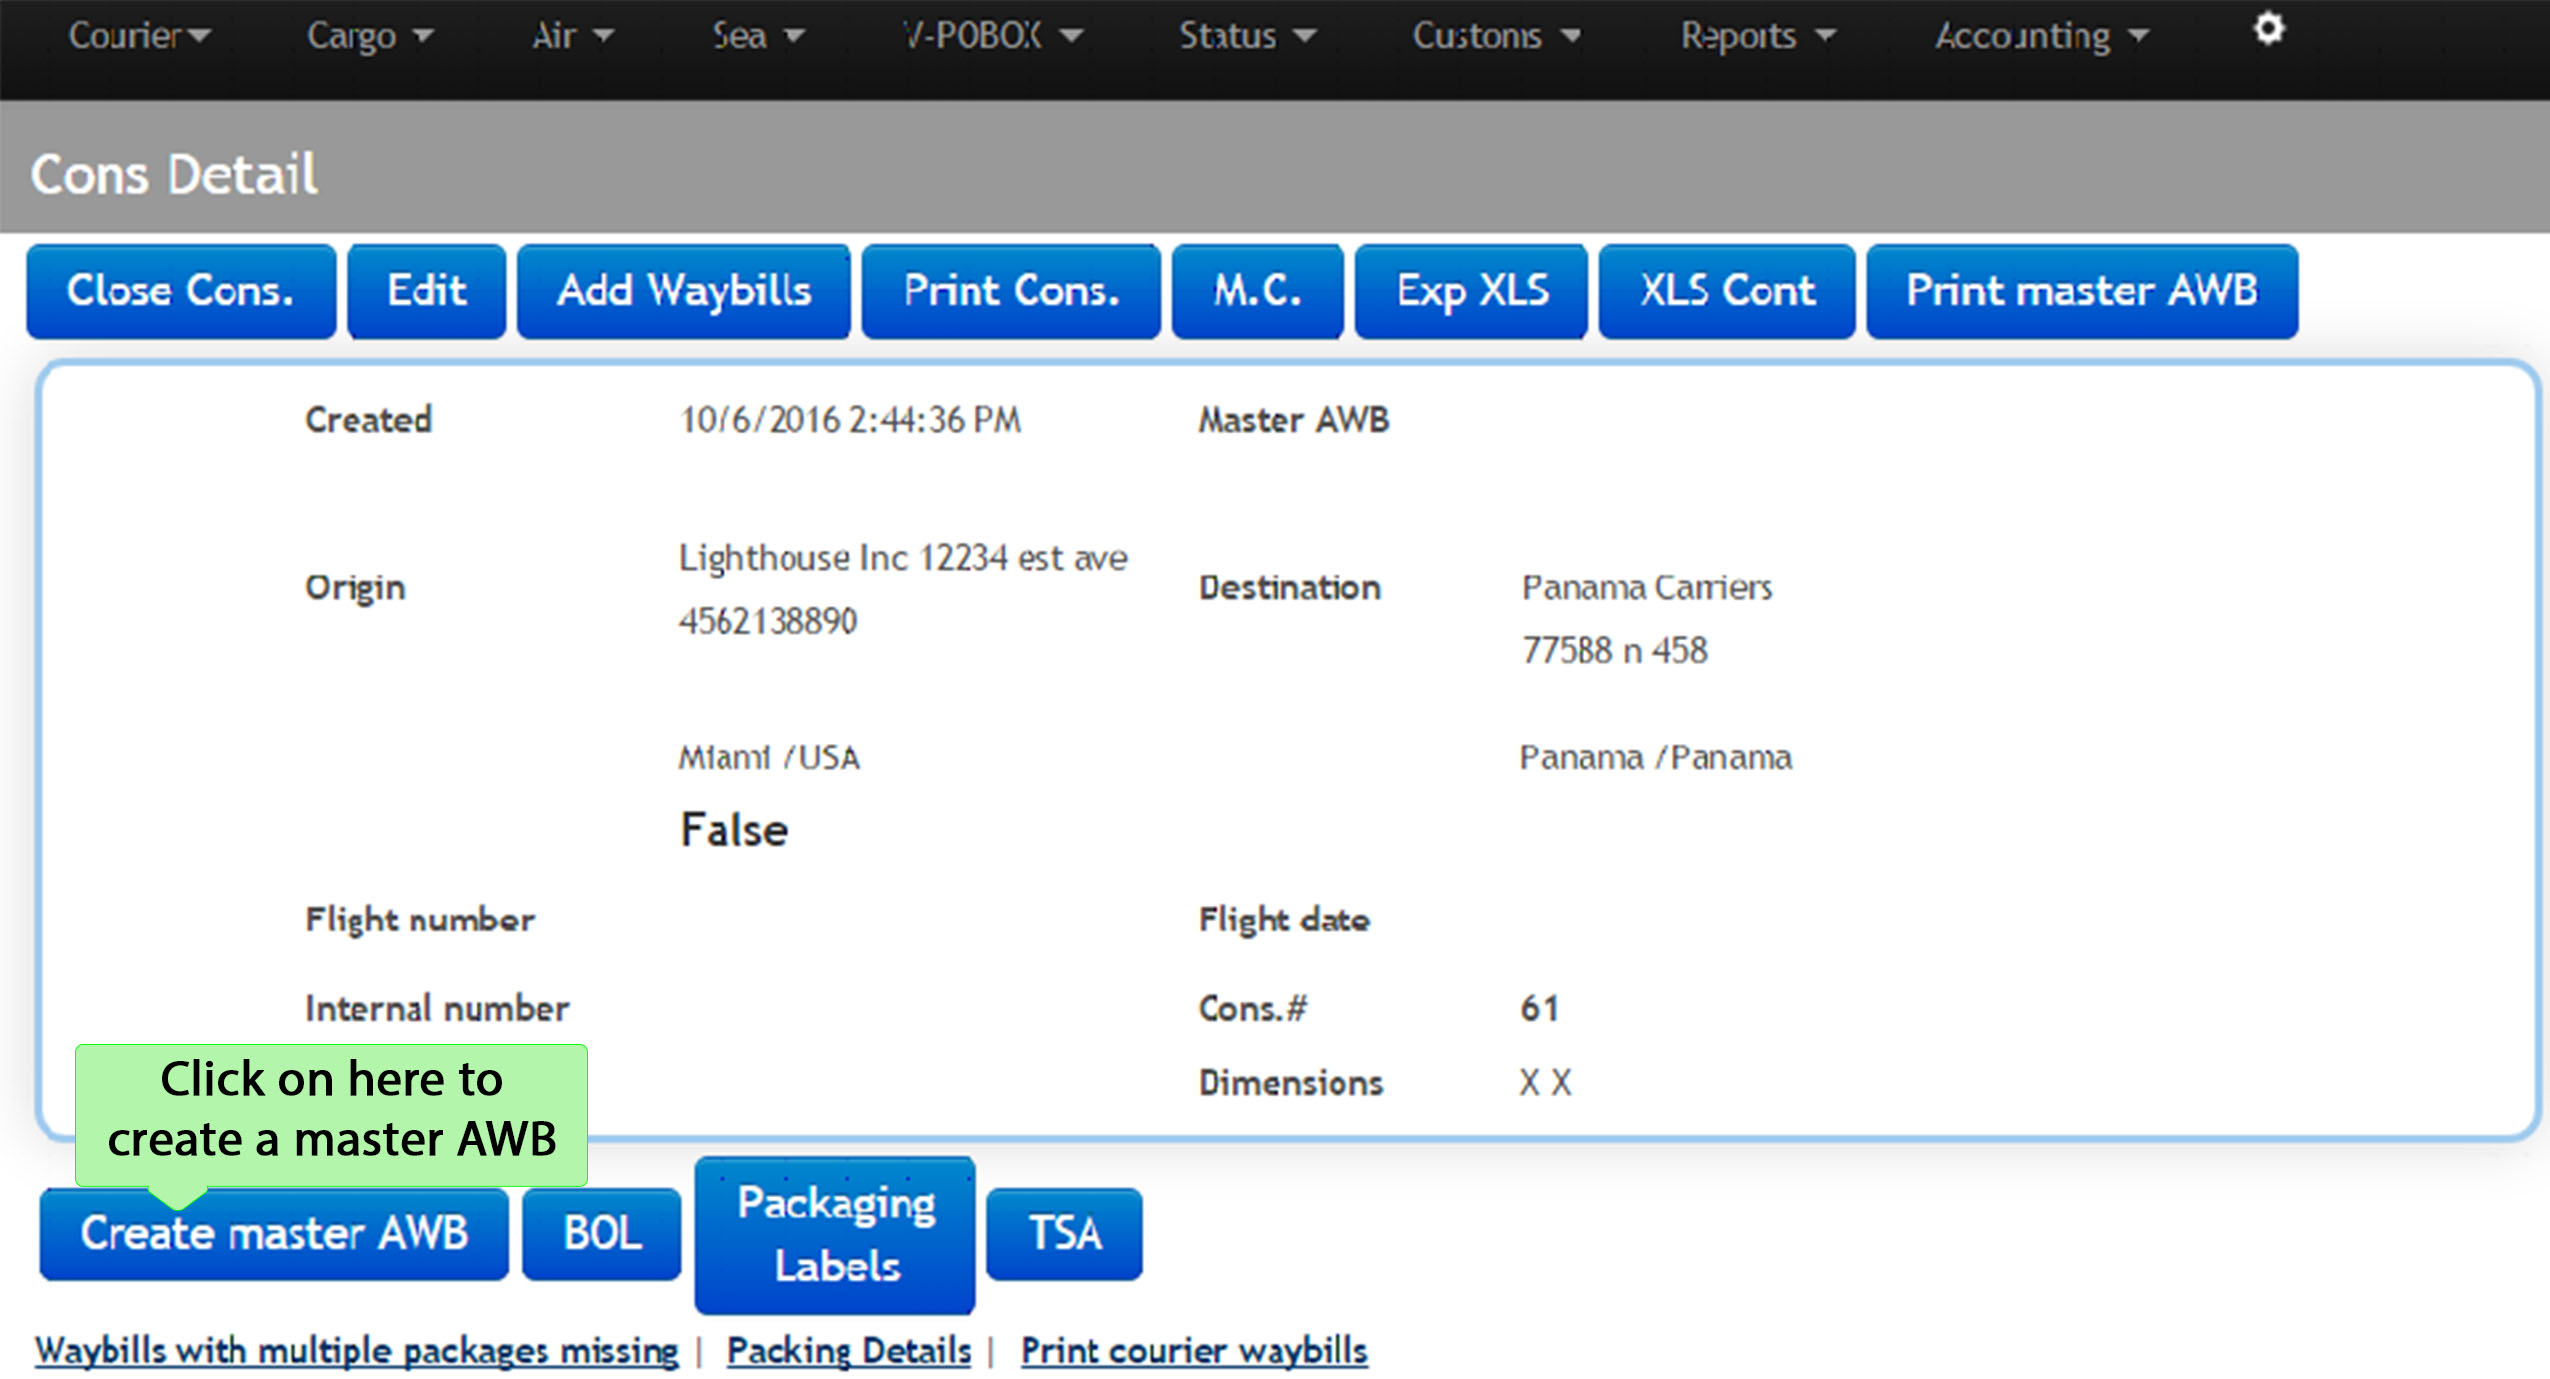
6.11 In this option you will learn how to create a Master Air Waybill (Master AWB). The air waybill works as a receipt to the sender.The AWB indicates that the carrier has accepted the goods contained in the list and undertakes to carry the consignment to the destination airport, in accordance with the conditions listed on the reverse of the original waybill. In addition, the AWB can be a document of evidence. Click on Create a master AWB and the image below will appear:
The camps required are explained below the image.
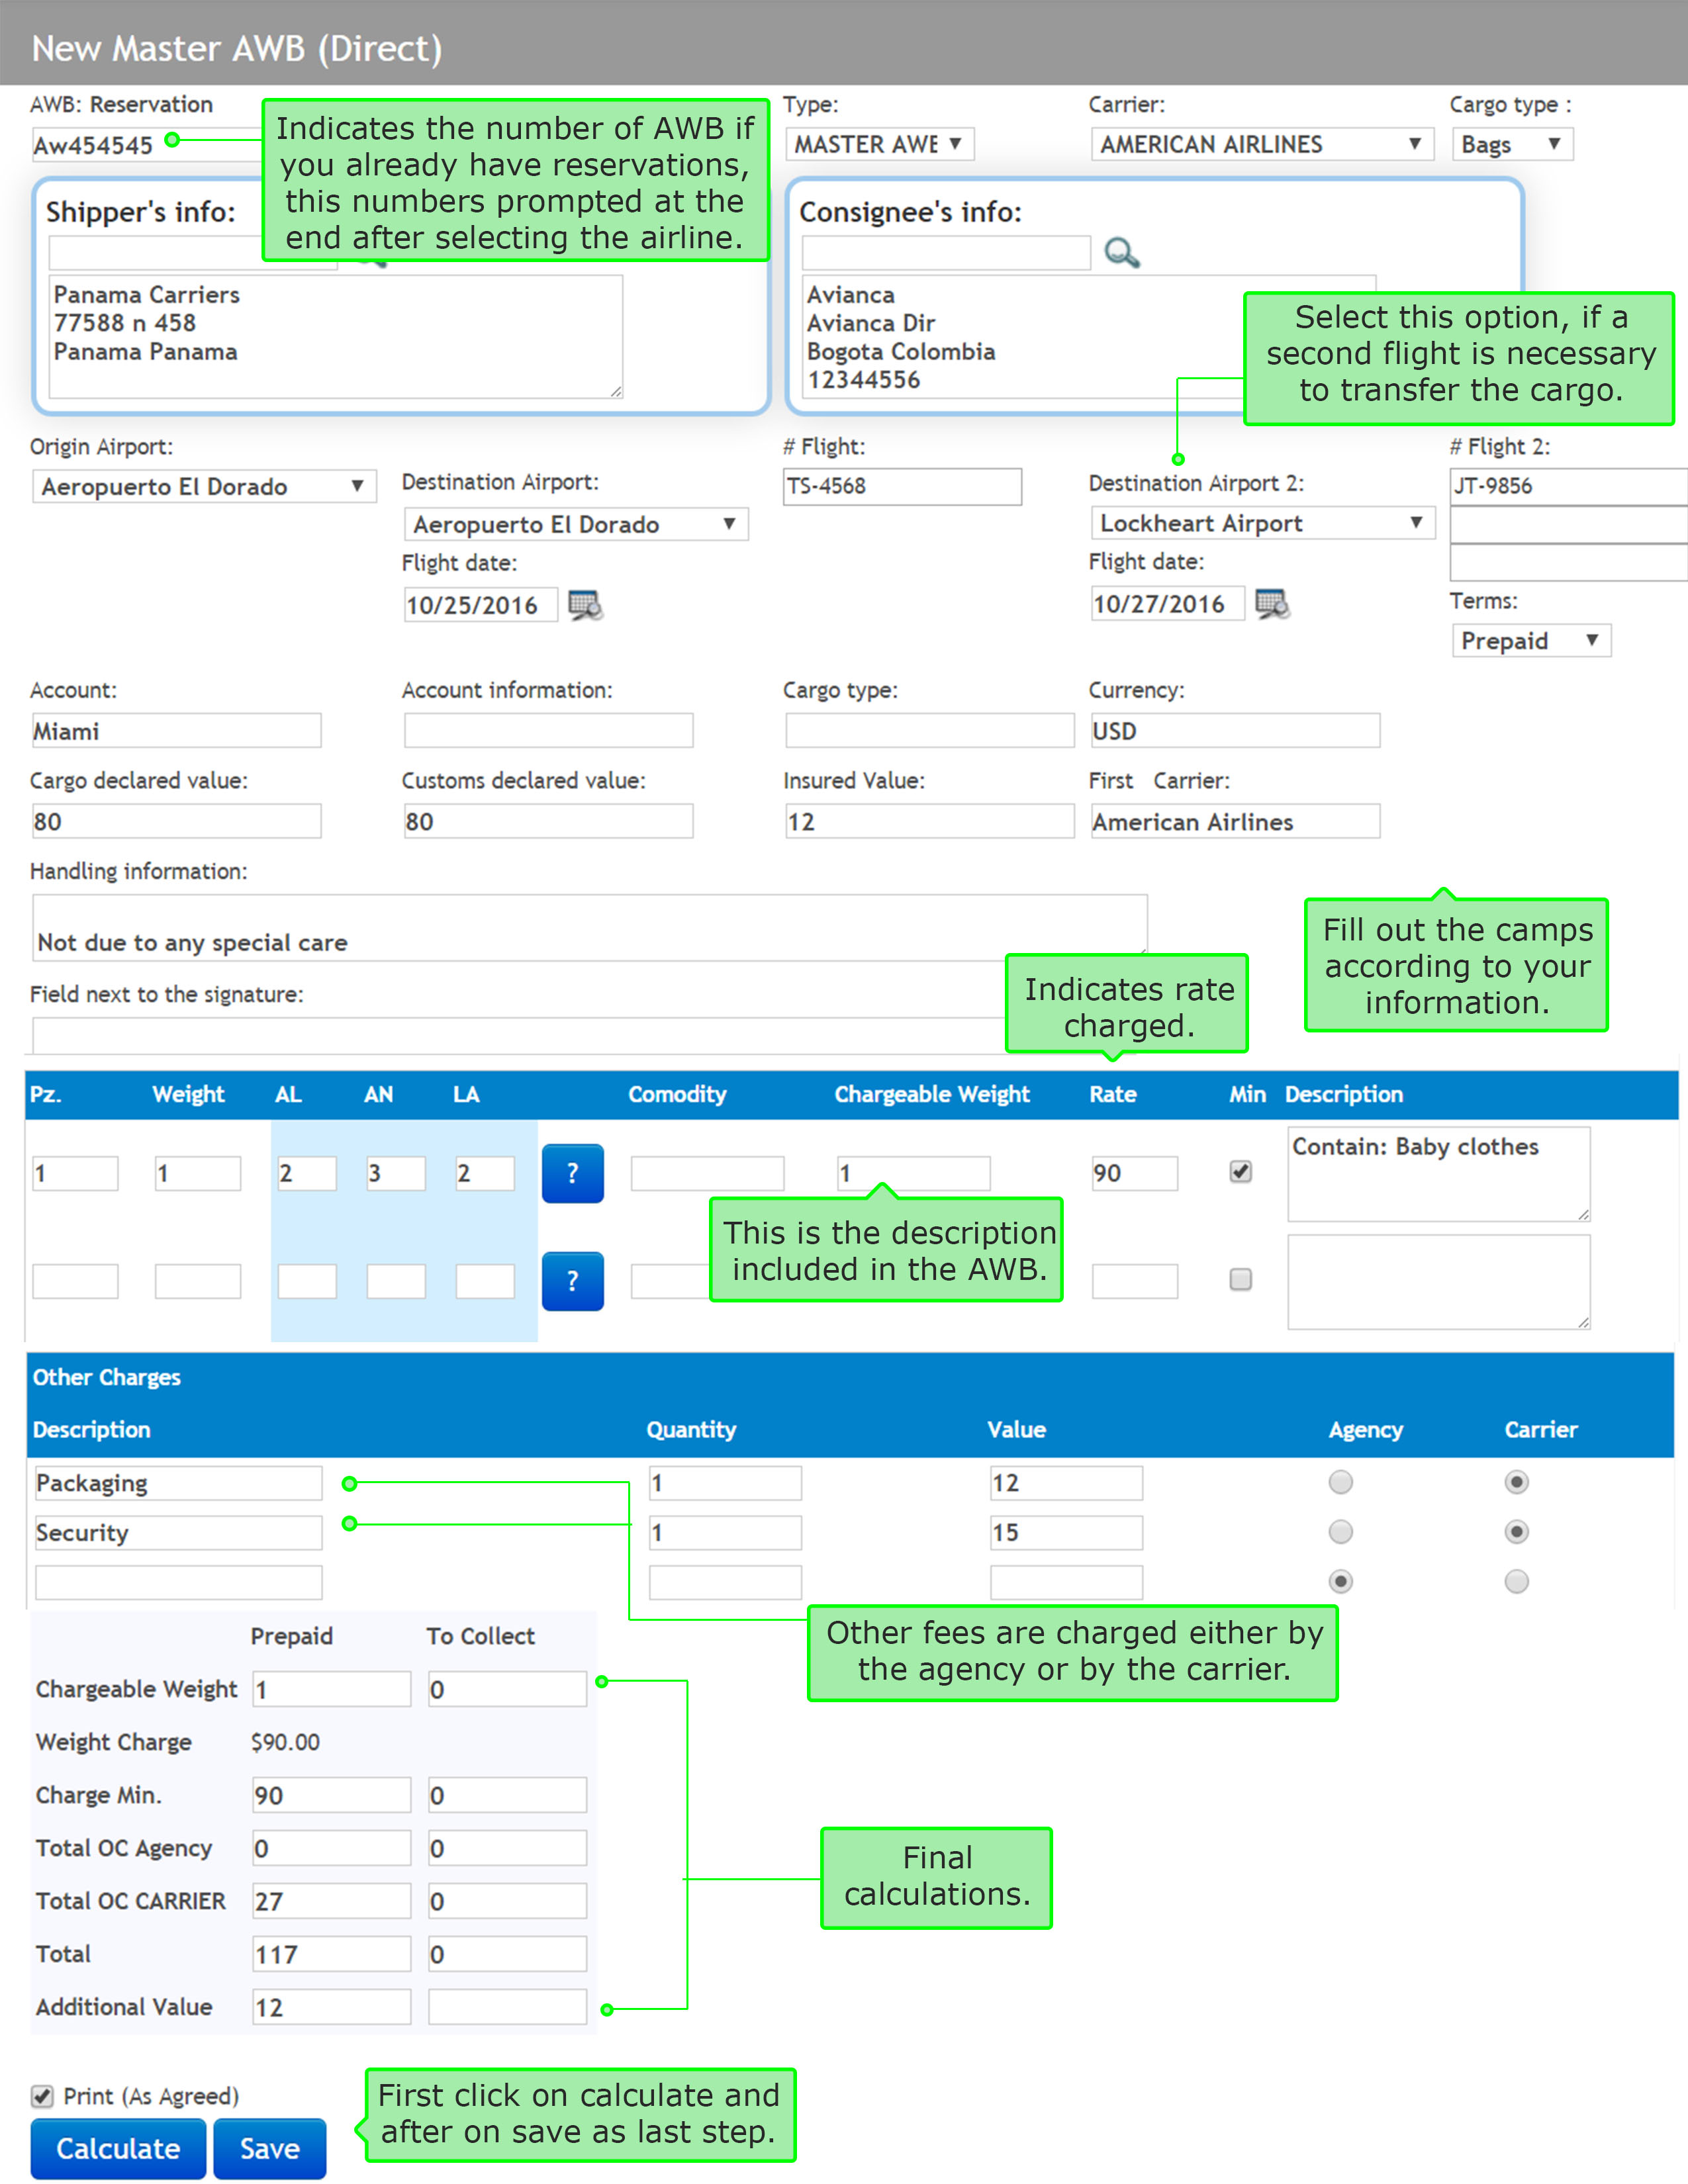
⇒ AWB: Booking: enter the reservation number of the master AWB if you have not configured it is by air, if you have then the program saves and assigns an available waybill
⇒ Type: Select the type of document you are creating
⇒ Transporter: refers to the main airline flying responsible for loading
⇒ Load Type: Select the type of loading stated in the waybill
⇒ Airports: Configure origin, intermediate, and destination airports
⇒ Flight#: select the number of flights and dates sent to perform
⇒ Terms: select the type of agreement you have to pay
⇒ Account: if you have an account with the airline gives the option to select
⇒ Load Type: Additional description of the type of load, to be placed on top
⇒ Currency: type of currency used to express values
⇒ Declared cargo value: Allows to specify the declared value of the cargo
⇒ Declared value to customs: Allows to specify the value declared by customs in the waybill
⇒ Insured value: Declasred insured value that was paid for
⇒ First carrier: assigns the waybill the first carrier
⇒ Handling information: information on how the contents were handeld through the process
⇒ PZ.:Shows the number of pieces or allowed to enter the number of pieces
⇒ Weight: weight in kilos of the cargo
⇒ L, W, H: dimensions of the package
⇒ Article:Type of article transported ex. boxes
⇒ Charged weight: the final weight value charged, can be volumetric weight or actual weight
⇒ Price: value per kilo charged by the airline for freight
⇒ Min.: if selected the value entered in the fare box is not multiplied by the amount of weight gained kilos in box, if not selected multiply the value of the fee charged by the weight.
⇒ Description: Detailed description of goods transported
⇒ Other charges: additional concepts can include other charges
⇒ Other charges (Description): Name of the additional charge
⇒ Quantity: Number of units to charge
⇒ Value: value of cargo charged
⇒ Agency and Carrier: Allows to determine who assumes other charges
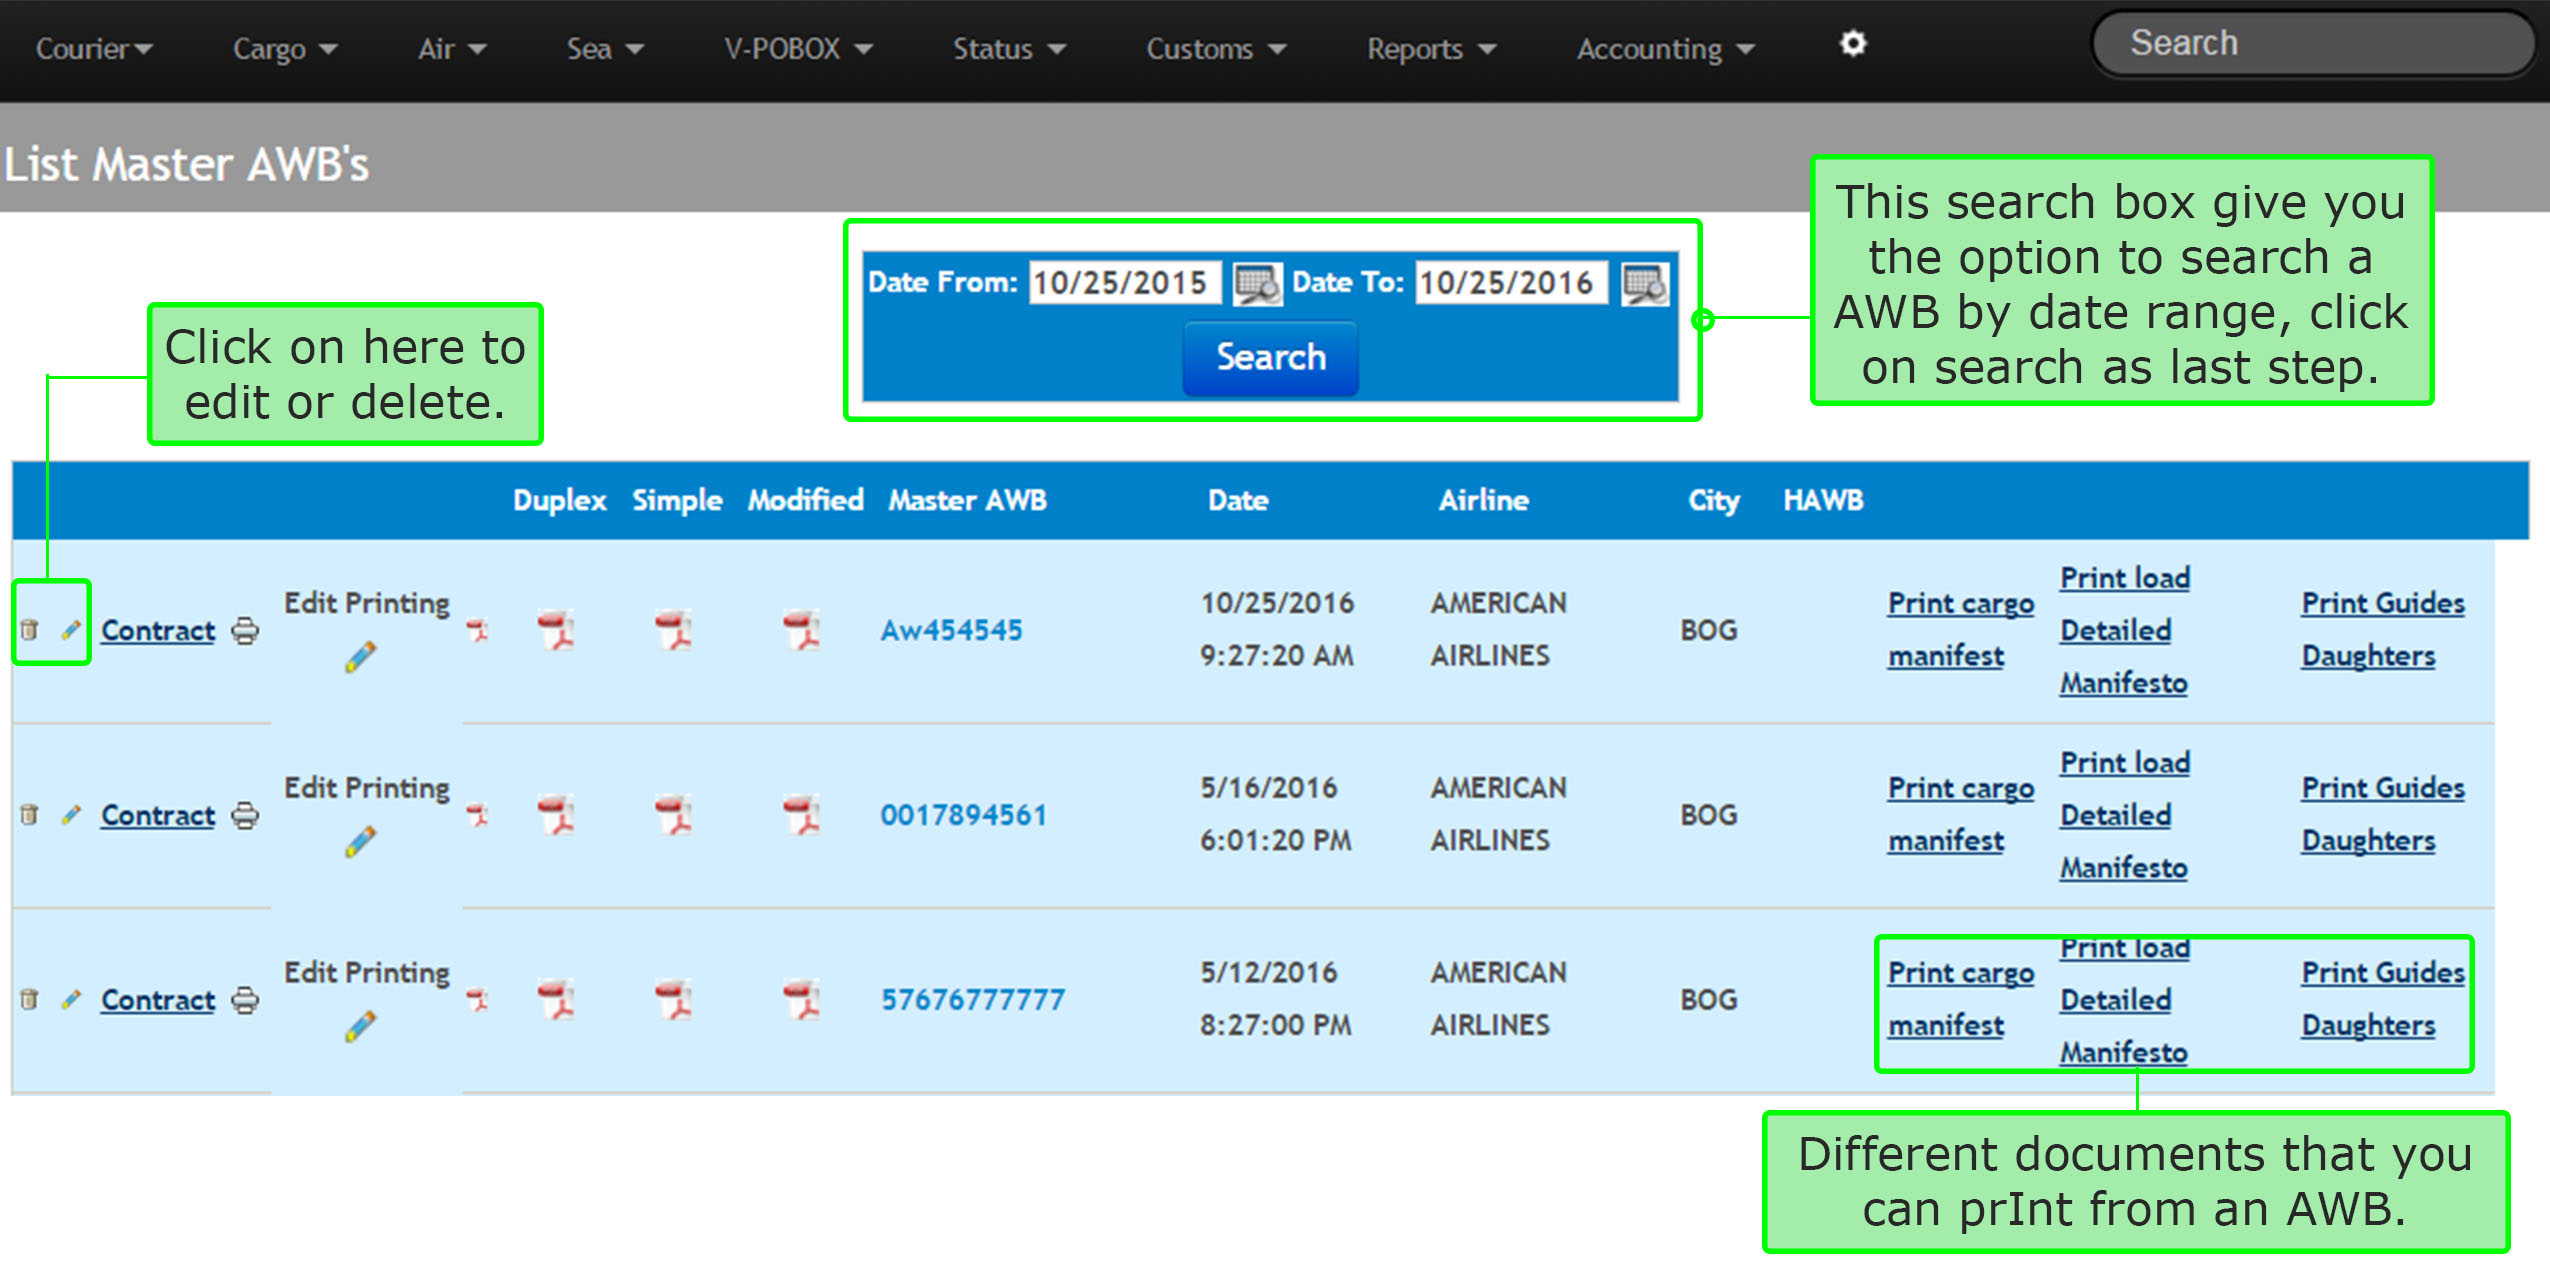
⇒ After saving the AWB, it will take you to the next screen where it displays the list of AWB created and you will be able to print it.
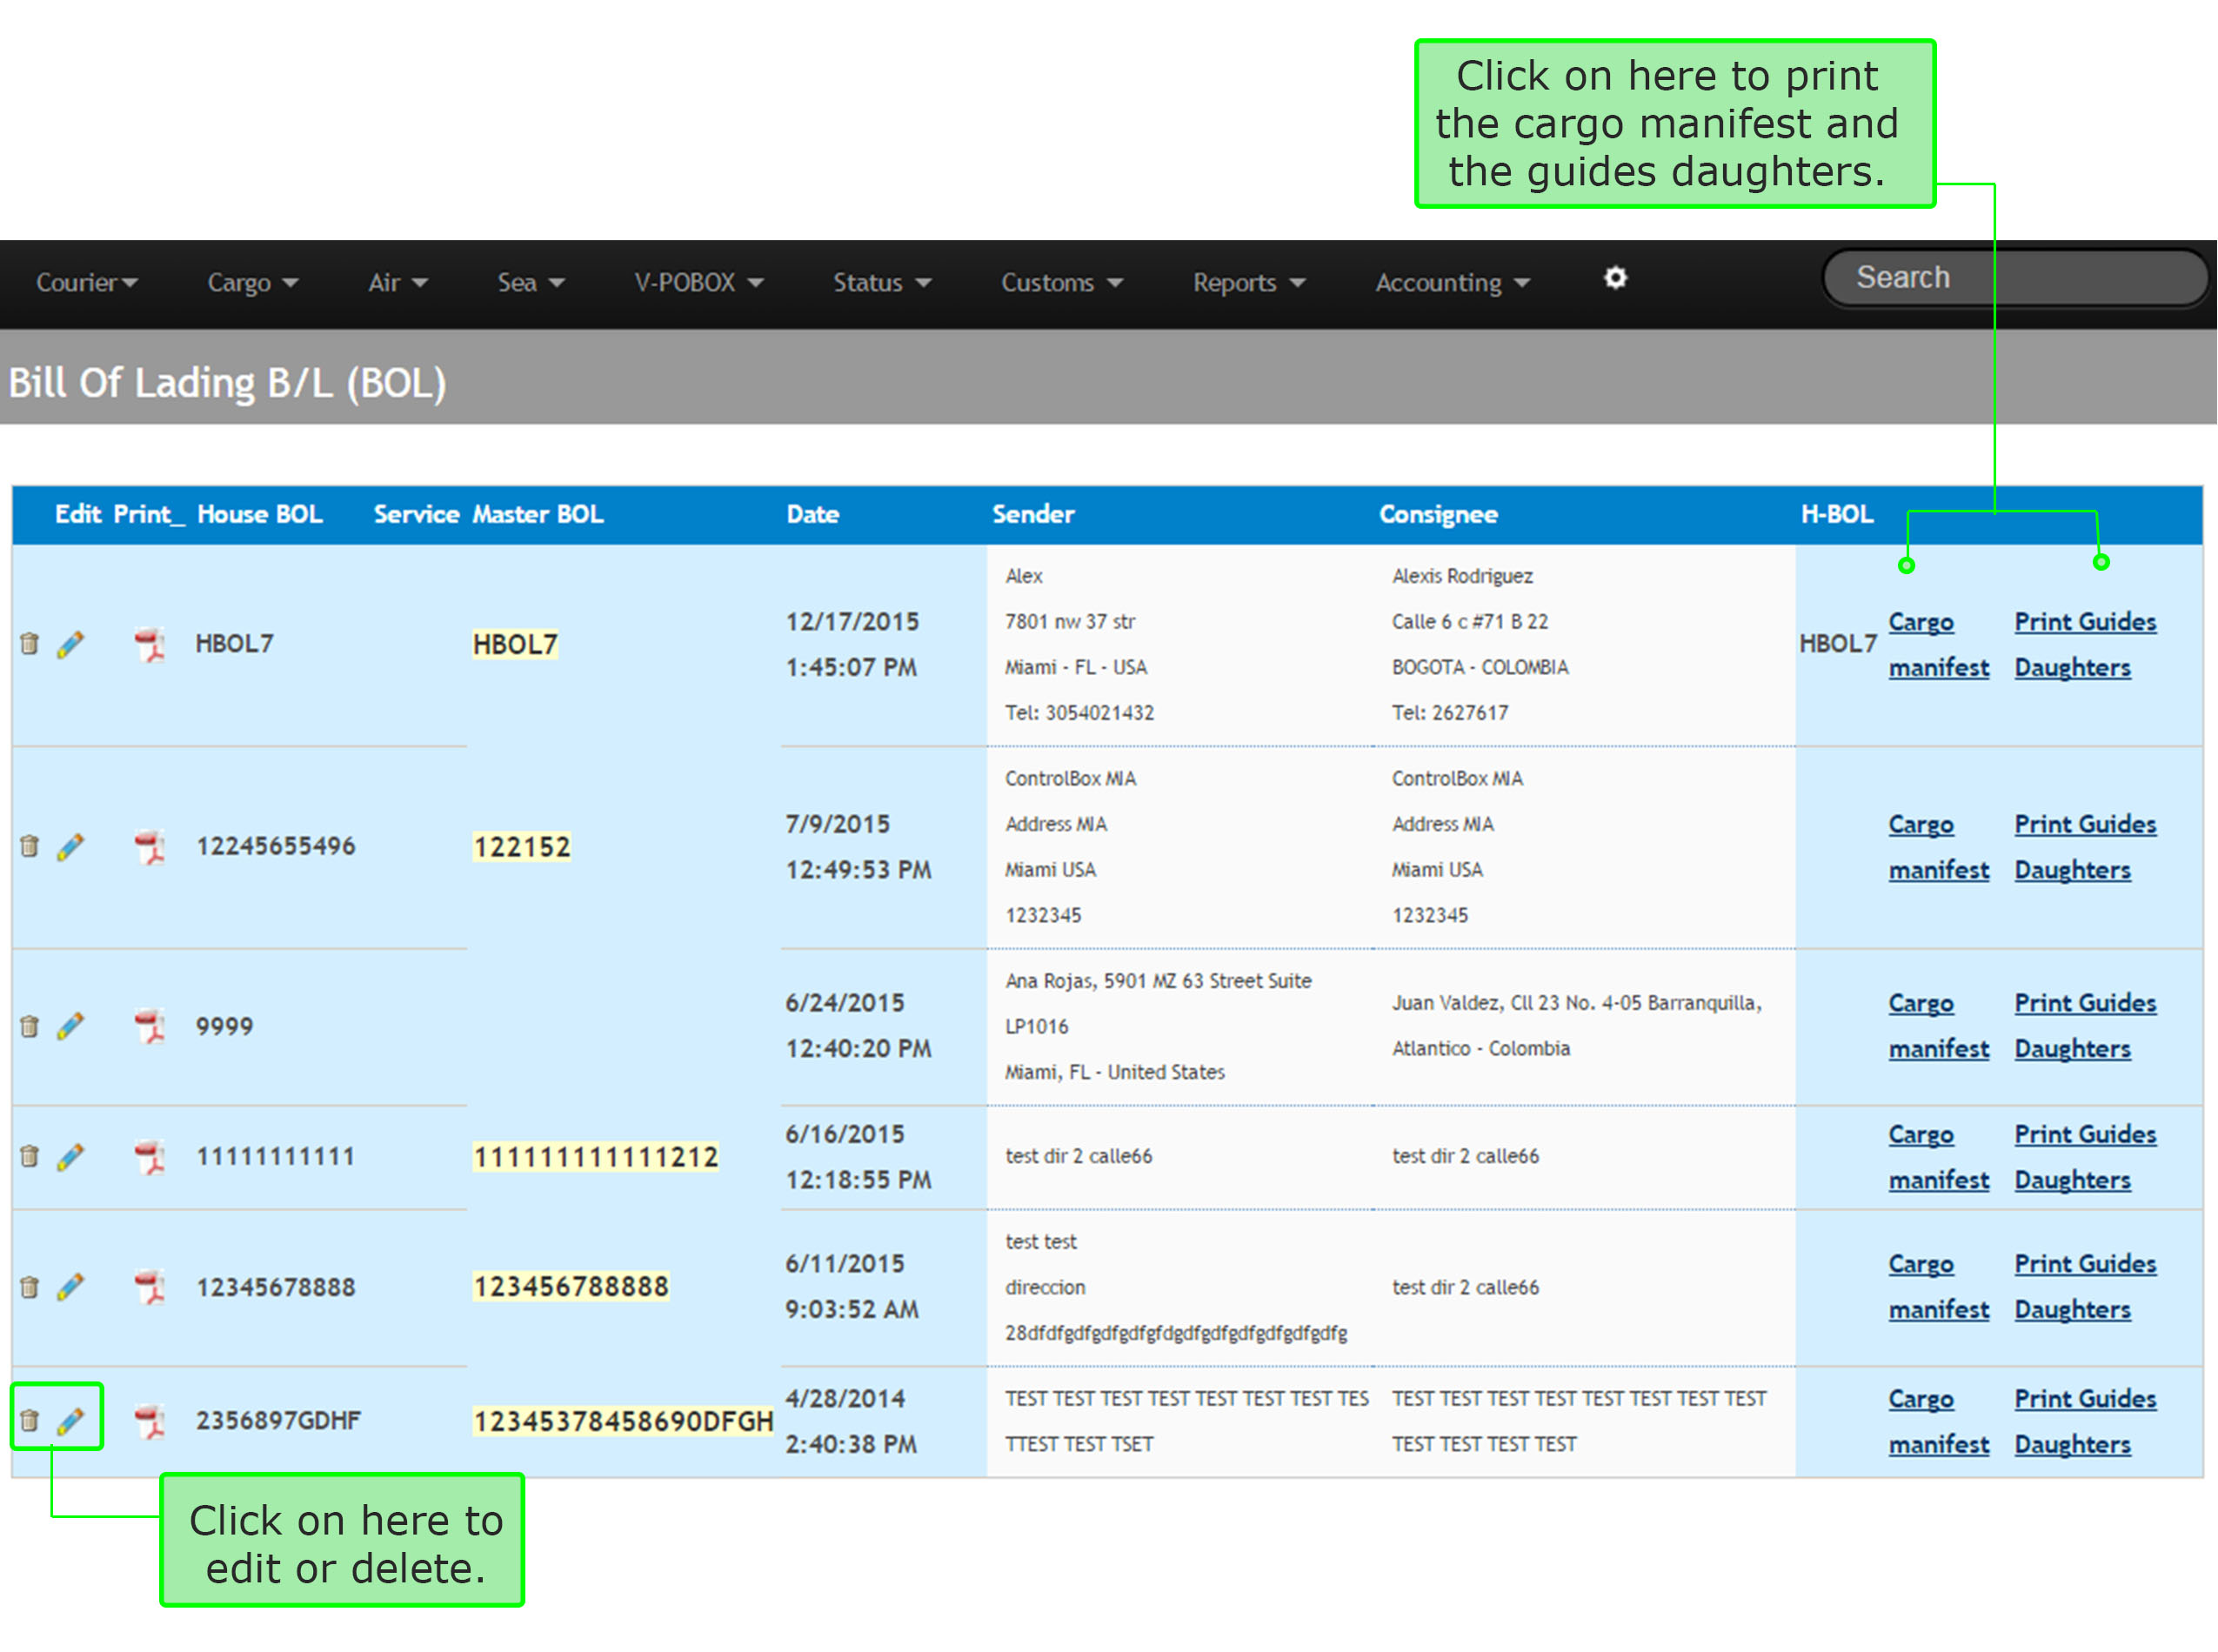
6.12 Going back to the 6.10 step, in this menu option, you can create a BOL (Bill Of Lading), click on BOL to start. Follow the instructions as shown the following image:
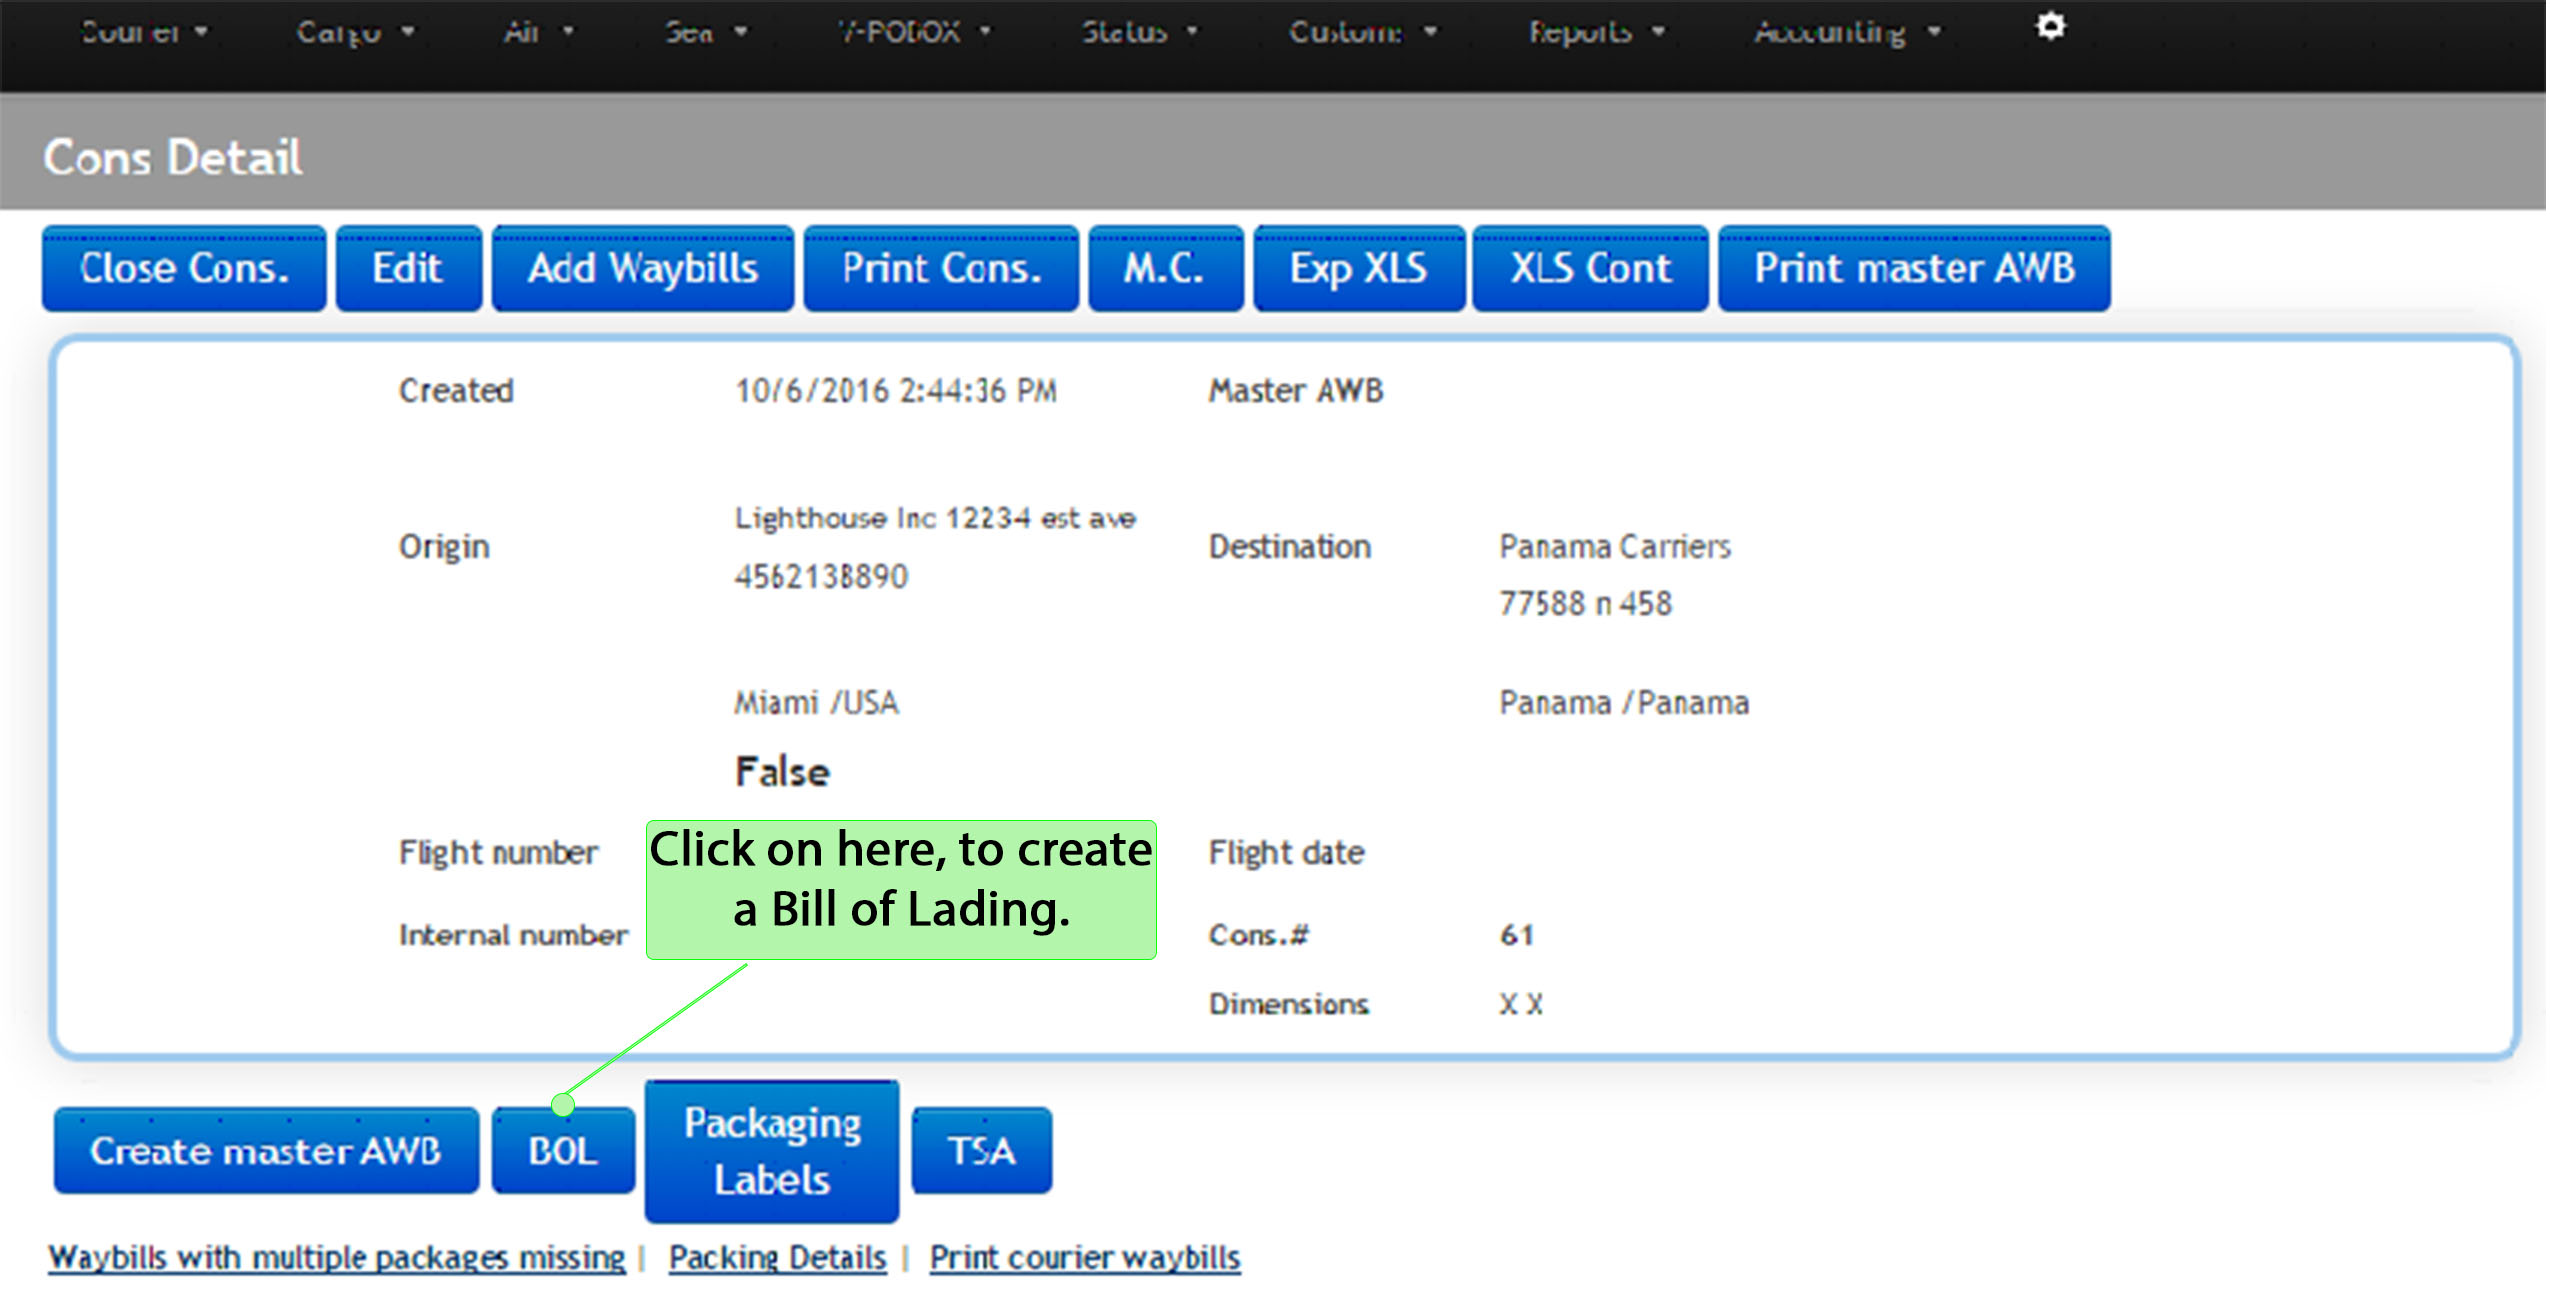
6.13 After clicking on the BOL option, the system will open a new window where you can create a Bill of Lading, as shown below:
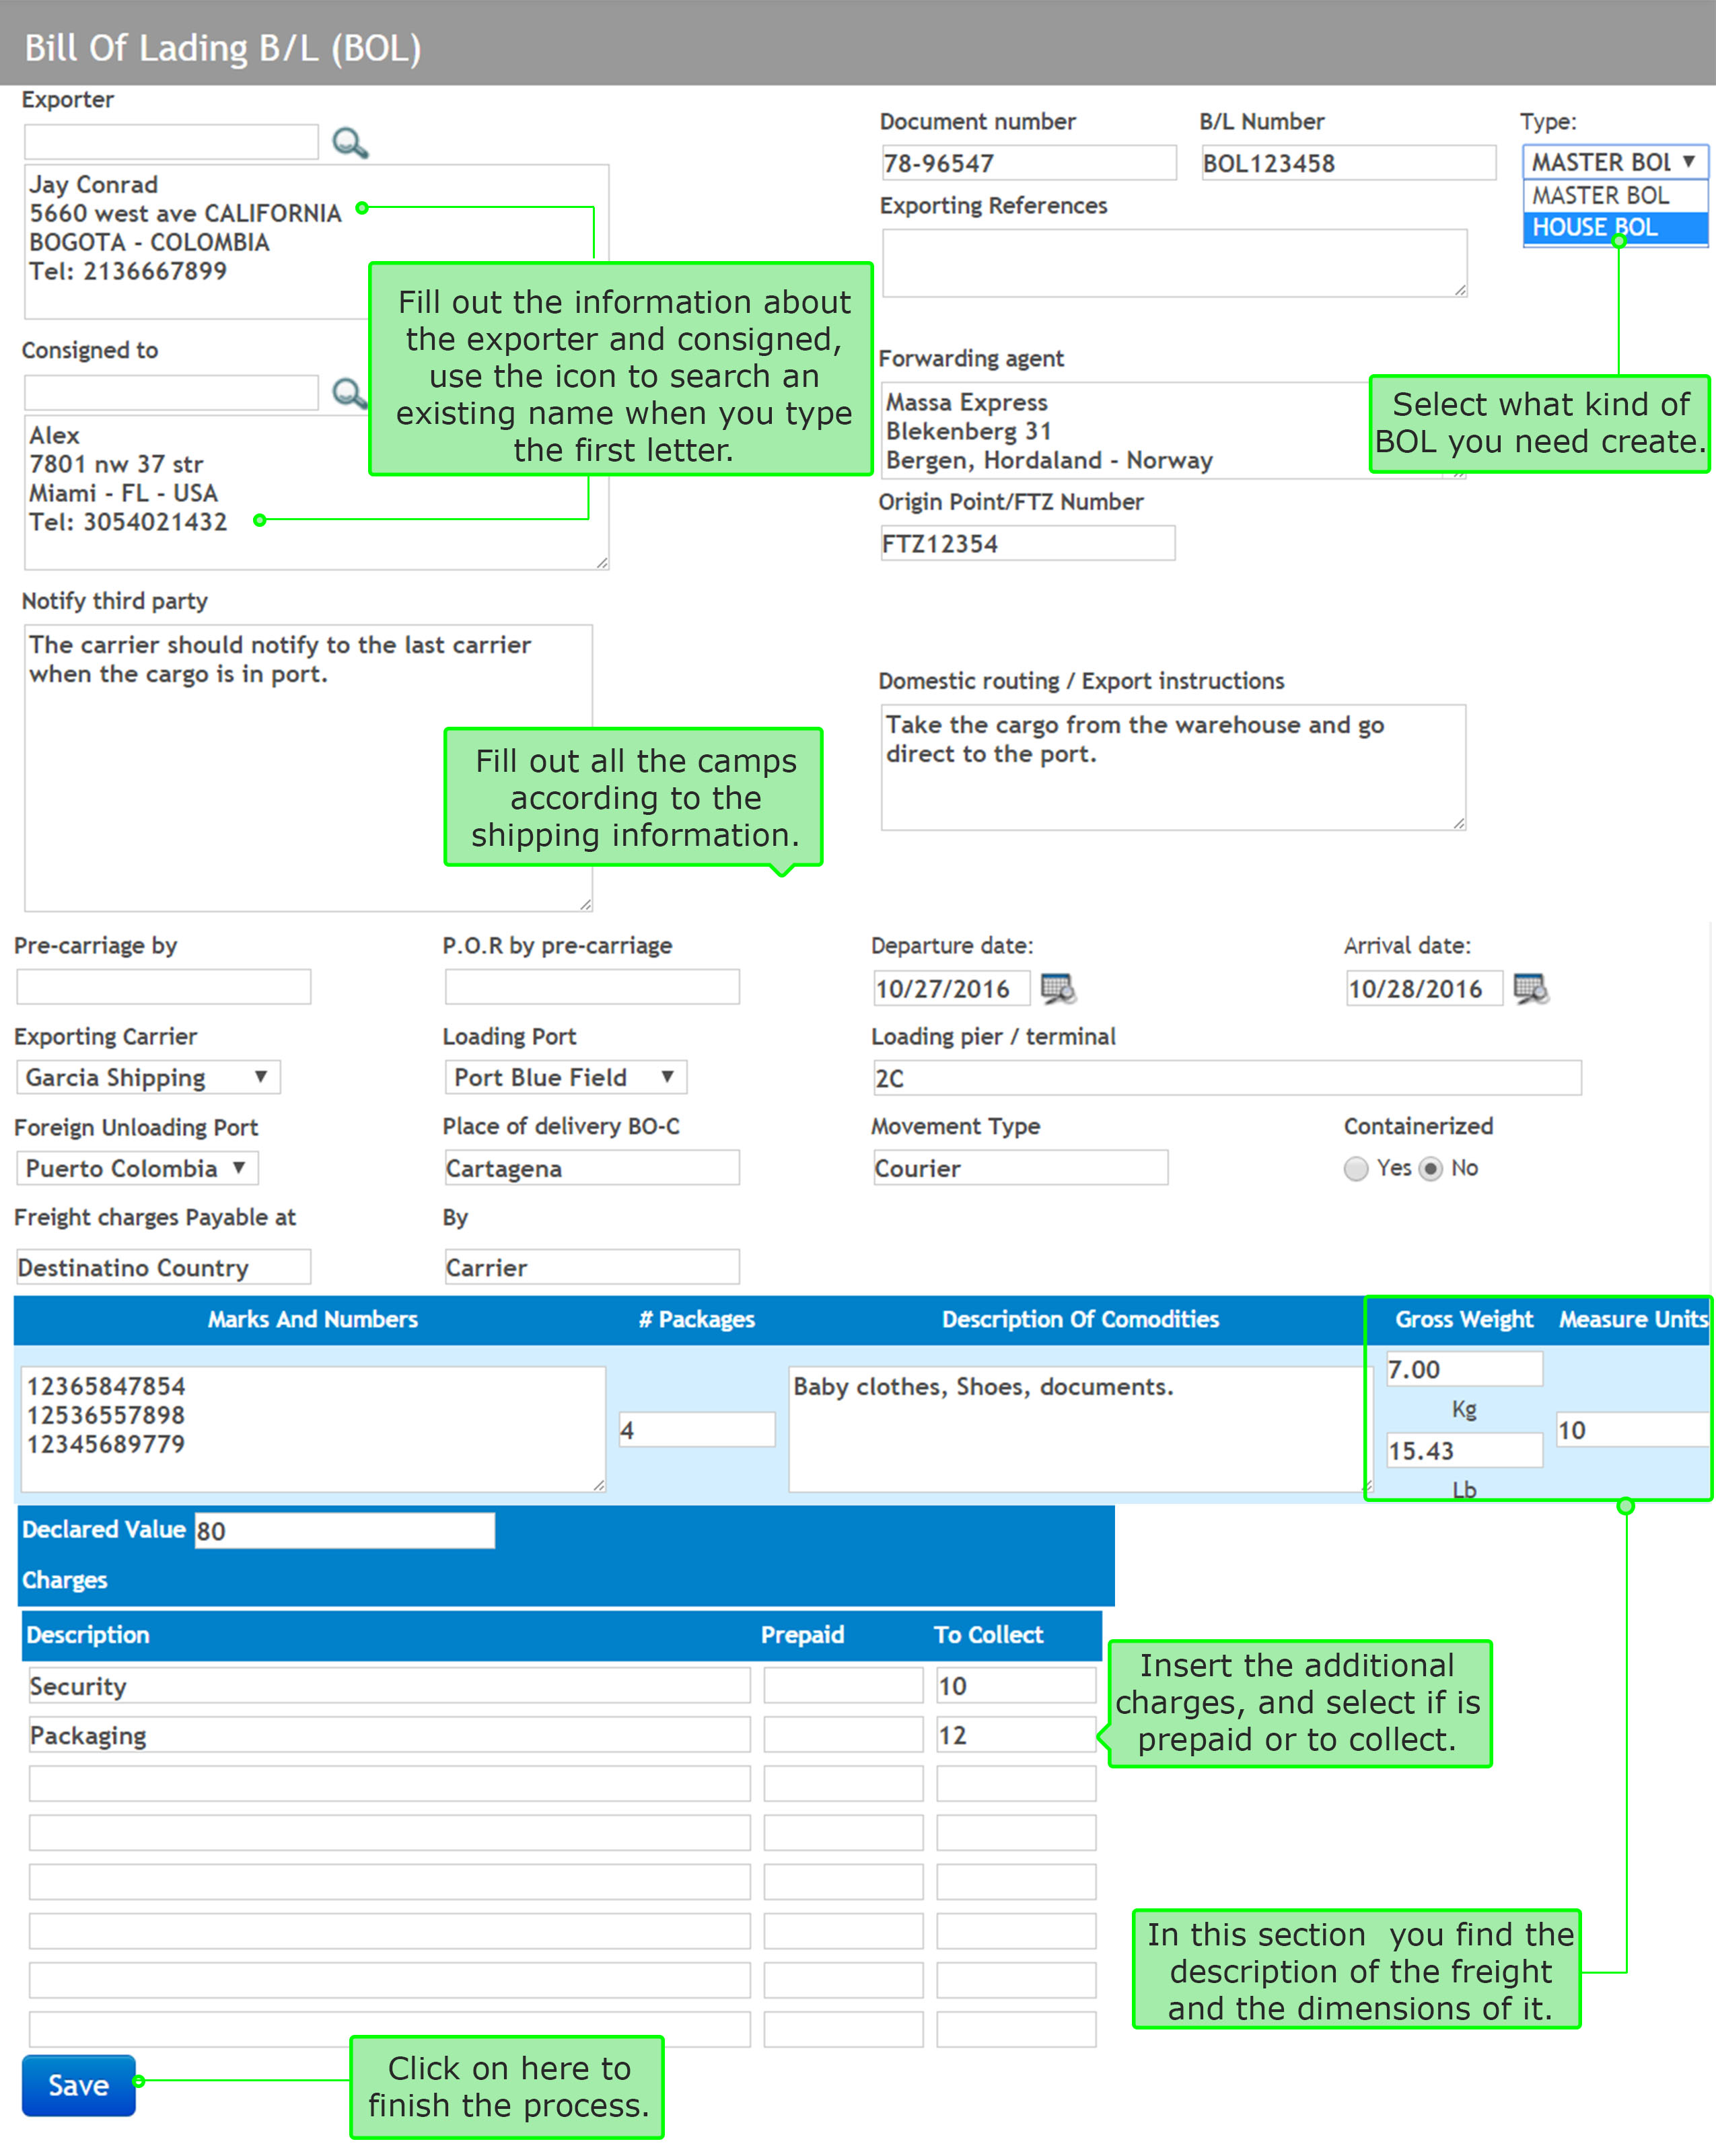
⇒ After saving the BOL, it will take you to the next screen where it displays the list of BOL created and will be able to print it out.